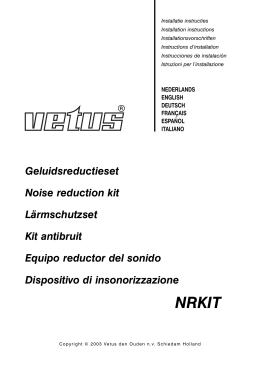
030610.02 r01 11-05
21-11-2005
14:46
Differentiaal apparaat voor keerkoppeling
Pagina 1
NEDERLANDS
Dual station unit for gearbox
ENGLISH
Inleiding
Introduction
Met behulp van het Vetus differentiaal apparaat type DS kan met
twee afstandsbedieningen de keerkoppeling bediend worden.
With the help of the Vetus dual station unit model DS, the gearbox
can be controlled using two remote controls.
Het Vetus differentiaal apparaat type DS is geschikt voor zowel
‘duwend’ als ‘trekkend’ (vooruit) schakelen.
The Vetus dual station unit model DS is suitable for switching gears
by both ‘pushing’ and ‘pulling’ (forward).
Installatie
Installation
N.B. De nummers verwijzen naar de tekeningnummers.
N.B. The numbers refer to the drawings.
Installeer het differentiaal apparaat zo dicht mogelijk bij de keerkoppeling.
Install the dual station unit as close as possible to the gearbox.
1 Zorg voor voldoende vrije ruimte achter het differentiaal apparaat, zodat de hele slag gemaakt kan worden.
Dual station unit for gearbox
Installatieinstructies
Installation instructions
Installationsanleitung
Instructions d’installation
Instrucciones de instalación
Istruzioni per l’installazione
1
NEDERLANDS
ENGLISH
DEUTSCH
FRANÇAIS
ESPAÑOL
ITALIANO
2
Schaal 1:2
Scale 1:2
Maßstab 1:2
Echelle 1:2
Escala 1:2
Scala 1:2
Differentiaal apparaat
1 Make sure there is sufficient room behind the dual station unit
for the whole stroke.
Dual station unit
2 Monteer het differentiaal apparaat met vier zeskantbouten M6.
3 Met beide afstandsbedieningen in de neutraalstand moet de
markering op de schuif samenvallen met het einde van het profiel (zie pijlen).
4 Verbind de keerkoppelingskabels (A en B) van beide afstandsbedieningen met het differentiaal apparaat.
Draai de meegeleverde verbindingsstang (C) op de keerkoppelingkabel (A). Borg met borgmoer (D). Borg het vorkeind (E) met
een borgmiddel op de verbindingsstang (C).
5 Leg een voldoende grootte radius in de keerkoppelingkabels.
Monteer het vorkeind (E) aan de schakelarm van de keerkoppeling.
3 When both remote controls are in neutral, the markings on the
slide should line up with the end of the track (see arrows).
De twee afstandsbedieningen mogen nooit tegelijkertijd gebruikt
worden.
Zet altijd de eerste afstandsbediening terug in de neutraalstand
voordat de tweede afstandsbediening gebruikt wordt.
Onderhoud
für Wendegetriebe
Différentiel
pour l’inverseur
Diferencial
para el inversor
Differenziale
4 Connect the gearbox cables (A and B) from both remote controls to the dual station unit.
Tighten the connecting rod (C) onto the gearbox cable (A). Lock
with lock nut (D). Lock the fork (E) with a locking device onto
the connecting rod (C).
per invertitore
DS
3
C o p y r i g h t © 2 0 0 5 Ve t u s d e n O u d e n n . v. S c h i e d a m H o l l a n d
5 Establish a large enough radius in the gearbox cables.
Fasten the forked (E) to the gearbox switch arm.
Hoofdafmetingen
Operation
Principal dimensions
The two remote controls may never be used at the same time.
Bediening
for gearbox
Differentialschalter
2 Fasten the dual station unit using four M6 hexagonal bolts.
voor keerkoppeling
4
Always put the first remote control back into neutral before using
the second remote control.
Hauptabmessungen
A
Dimensions principales
Dimensiones principales
B
Maintenance
Dimensioni principali
Regularly treat the contact surfaces of the slide and track with silicon spray or WD40.
D
C
Vet de contactvlakken van de schuif en het profiel regelmatig in met
siliconen-spray of met WD40.
Technische gegevens
E
Technical specifications
Maximal stroke
: 76 mm (3”)
Weight
: 0.27 kg
Suitable for cable type : 33C
5
Maximale slag
: 76 mm (3”)
Gewicht
: 0,27 kg
Geschikt voor kabeltype : 33C
E
FOKKERSTRAAT 571 - 3125 BD SCHIEDAM - HOLLAND - TEL.: +31 10 4377700 - TELEX: 23470
TELEFAX: +31 10 4372673 - 4621286 - E-MAIL: [email protected] - INTERNET: http://www.vetus.com
030610.02
030610.02
030610.02
030610.02
11-05
Printed in the Netherlands
030610.02 r01 11-05
21-11-2005
14:46
Pagina 2
Differentialschalter für Wendegetriebe
DEUTSCH
Différentiel pour l’inverseur
FRANÇAIS
Diferencial para el inversor
ESPAÑOL
Differenziale per invertitore
ITALIANO
Einleitung
Introduction
Introducción
Introduzione
Mit Hilfe des Vetus Differentialschalters Typ DS kann ein
Wendegetriebe mit zwei Fernbedienungen bedient werden.
Le différentiel Vetus type DS permet de commander l’inverseur
avec deux télécommandes.
Por medio del diferencial Vetus tipo DS se puede operar el inversor
de marcha con dos mandos a distancia.
Con l’ausilio del differenziale Vetus tipo DS l’invertitore può essere
governato tramite due comandi a distanza.
Der Vetus Differentialschalter Typ DS eignet sich sowohl für
‘drückendes’ als auch für ‘ziehendes’ (nach vorne) Schalten.
Le différentiel Vetus type DS convient pour passer les vitesses (en
avant) tant ‘en poussant’ qu’ ‘en tirant’.
El diferencial Vetus tipo DS es adecuado para un cambio de marcha (hacia delante) tanto ‘empujando’ como ‘tirando’.
Il differenziale Vetus tipo DS è adatto sia per il cambio a ‘spinta’ sia
per quello a ‘trazione’ (avanti).
Einbau
Installation
Instalación
Installazione
Note: Die Nummern beziehen sich auf die Zeichnung.
N.B. Les numéros renvoient aux numéros de dessin.
Nota. Los números refieren a los números de croquis.
N.B. I numeri si riferiscono ai numeri riportati sul disegno.
Bauen Sie den Differentialschalter so nahe wie möglich am
Wendegetriebe ein.
Installer le différentiel le plus près possible de l’inverseur.
Instale el diferencial lo más cerca posible al inversor.
Installare il differenziale il più vicino possibile all’invertitore.
1 Veiller à maintenir un espace suffisant derrière le différentiel, de
sorte qu’il puisse effectuer toute la course.
1 Asegure que queda suficiente espacio libre detrás del diferencial, permitiendo que se realice toda la vuelta.
1 Assicurarsi che vi sia spazio sufficiente dietro al differenziale, in
modo che esso possa effettuare la corsa completa.
2 Monter le différentiel avec quatre boulons M6 hexagonaux.
2 Monte el diferencial con cuatro tornillos hexagonales.
2 Montare il differenziale mediante quattro bulloni a testa esagonale M6.
3 Avec les deux télécommandes au point mort, le marquage sur
la glissière doit coïncider avec la fin du profil (voir flèches).
3 Con ambos mandos a distancia en posición neutra la marca en
la parte deslizante ha de coincidir con el extremo del perfil
(véanse las flechas).
1 Achten Sie auf genügend Raum hinter dem Differentialschalter,
so dass die ganze Drehung ausgeführt werden kann.
2 Montieren Sie den
Sechskantschrauben.
Differentialschalter
mit
vier
M6-
3 Wenn beide Fernbedienungen im Neutralstand stehen, muss
die Markierung auf dem Schieber mit den Profilenden (siehe
Pfeile) zusammen fallen.
4 Verbinden Sie die Wendegetriebekabel (A und B) von beiden
Fernbedienungen mit dem Differentialschalter.
Drehen Sie die beigefügte Verbindungsstange (C) auf das
Wendegetriebekabel (A). Sicherung mit Sicherungsmutter (B).
Sichern Sie das Gabelende (E) mit einem Sicherungsmittel auf
der Verbindungsstange (C).
5 Legen Sie einen ausreichenden Radius in das
Wendegetriebekabel.
Montieren Sie das Gabelende (E) an den Schalterarm des
Wendegetriebes.
4 Relier les câbles d’inverseur (A et B) des deux télécommandes
au différentiel.
Serrer la barre de connexion fournie (C) sur le câble d’inverseur
(A). Verrouiller avec l’écrou de blocage (D). Verrouiller la chape
pour bielle (E) avec un agent de blocage sur la barre de
connexion (C).
5 Créer un rayon de grandeur suffisante dans les câbles de
connexion.
Monter la chape pour bielle (E) au bras de sélection de l’inverseur.
Commande
Les deux télécommandes ne doivent jamais être utilisées en même
temps.
Die zwei Fernbedienungen dürfen niemals gleichzeitig benutzt
werden.
Mettre toujours la première télécommande au point mort avant
d’utiliser la deuxième télécommande.
Setzen Sie zuerst die Fernbedienung zurück in den Neutralstand,
bevor die zweite Fernbedienung benutzt wird.
Entretien
Wartung
Graisser régulièrement les surfaces de contact de la glissière et le
profil avec un spray silicone ou avec WD40.
Fetten Sie die Kontaktflächen des Schiebers und das Profil
regelmäßig mit Siliconspray oder mit WD40 ein.
Fiche technique
Course maximale
Poids
Convient pour type de câble
Los dos mandos a distancia no se pueden utilizar jamás simultáneamente.
Siempre ha de devolver el primer mando a distancia a la posición
neutra antes de utilizar el segundo mando a distancia.
Engrase con regularidad las superficies de contacto de la parte
deslizante con un pulverizador de siliconas o con WD40.
Vuelta máxima
Peso
Apto para tipo de cable
030610.02
5 Assicurarsi che i cavi dell’invertitore abbiano un raggio sufficientemente grande.
Montare l’estremità della forcella (E) sulla leva del cambio dell’invertitore.
I due comandi a distanza non devono mai essere usati contemporaneamente.
Rimettere sempre il primo comando a distanza in posizione neutra
prima di mettere in uso il secondo comando a distanza.
Manutenzione
Lubrificare regolarmente le superfici di contatto della leva e del profilo con uno spray al silicone o con WD40.
Dati tecnici
Especificaciones técnicas
: 76 mm (3”)
: 0,27 kg
: 33C
4 Collegare i cavi dell’invertitore (A e B) di entrambi i comandi a
distanza al differenziale.
Avvitare l’asta di collegamento (C) in dotazione sul cavo dell’invertitore (A). Bloccare con il dado (D). Bloccare con un mastice
l’estremità della forcella (E) sull’asta di collegamento (C).
Uso
Mantenimiento
Maximale Drehung:
: 76 mm (3”)
Gewicht
: 0,27 kg
Geeignet für Kabeltyp : 33C
030610.02
5 Disponga los cables del inversor con un radio suficientemente
grande.
Monte el extremo bifurcado (E) en el brazo de cambio del inversor.
Operación
Bedienung
Technische Daten
4 Una los cables de inversor (A y B) de ambos mandos a distancia con el diferencial.
Enrosque la barra de unión suministrada (C) en el cable del
inversor (A). Fíjela con la tuerca de seguridad (D). Fije el extremo bifurcado (E) con un producto de bloqueo en la barra de
unión (C).
3 Con entrambi i comandi a distanza in posizione neutra, il segno
sulla leva deve coincidere con la fine del profilo (vedi frecce).
Corsa massima
Peso
Adatto per cavo tipo
: 76 mm (3”)
: 0,27 kg
: 33C
030610.02
: 76 mm (3”)
: 0,27 kg
: 33C
030610.02
Scaricare