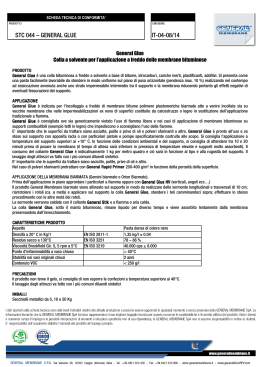
A nice Christmas tree for our front door
Un grazioso albero di Natale per la nostra porta di casa
What you need:
* 4 double pages of newspapers
and gold paper
* green crepe paper
* strong quick glue and stick
* white thin thread and needle
* water colours
Che cosa ti serve:
* giornali a della carta dorata
da pacco
* carta crespa verde sottobosco
* colla adesiva rapida e stick
* filo bianco da cucire fine
* ago normale
* acquarelli
How to make the paper sticks:
1.
From a double page of a big news
paper make a big square.
Come creare dei bastoncini:
You can wind the paper also
without skewer, folding up the
corner as shows the photo.
Puoi avvolgere la carta anche
senza spiedino ripiegando l’angolo
come mostra la foto.
3.
Then, go on in winding the small
tube until you arrive at the end
of the opposite diagonal side.
3.
Poi prosegui ad avvolgere il
tubetto su se stesso sino alla
fine della diagonale.
Glue the end of the corner
newspaper with glue stick.
Blocca l’avvolgimento del giornale
con la colla stick.
1.
Da due grandi pagine attaccate
di un quotidiano crea un grande
quadrato.
2.
2.
Roll a newspaper corner up firmly Avvolgi un angolo del giornale in
and diagonally round the skewer
modo stretto e lungo la sua
until you can get it in your hands. diagonale sullo spiedino, sino a
che lo puoi gestire nelle tue mani.
1
4.
Cut the weak sides of the stick
as much as you need its length.
4.
Taglia entrambi le parti più
deboli del bastoncino tanto
quanto desideri sia la sua
lunghezza.
5,
Trunk:
in the middle of the stick take 7
cm and then fold both sides so
that you get a tall triangle (see
photo on the left),
then glue the two ends together
with a strong glue.
5.
I tronco:
Al centro del bastoncino calcola
7 cm. e quindi ripiega i due lati
laterali (vedi la foto alla tua
sinistra),
poi incolla le due estremità con
una buona colla.
6.
The three pieces of the pin
tree or branches:
The biggest triangle has a base
of 26 cm.
The middle triangle has a base of
17 cm.
The smallest or top has a base of
12 cm.
6.
7.
Covering of the pin tree:
you cut easily a ribbon of green
crepe paper high 3 cm. in the
way that the paper yields,
folding up all paper of the roll,
in 4 or 5 parts.
You make a fringe on one side of
the ribbon and then wind it
round the three branches
8.
First paint the trunk and then
glue on it the three branches.
8.
Per prima cosa dipingi il tronco e
poi incolla su di esso i tre rami.
I tre pezzi o rami del pino:
Il triangolo più grande ha una
base di 26 cm.
Il triangolo medio ha una base di
cm. 17.
Il triangolo più piccolo ha una
base di cm. 12.
7.
Copertura del pino:
puoi tagliare facilmente un nastro di
carta crespa verde alto 3 cm. nel
senso che la carta cede, ripiegando
tutta la carta del rotolo , in 4 o 5
parti.
Frangia uno dei lati del nastro di
carta e poi avvolgilo sui tre rami.
9.
Make the small balls of 2 cm.
diameter:
fold up a gold piece of paper or
other colours paper, in 4 part;
draw on it many small disks and
cut them out.
2
9.
Crea delle piccolo palle del
10.
Bend each set of disk in half
and sew two of them together
for each ball with a piece of dark
green thread .
diametro di cm. 2:
piega un pezzo di carta dorata o
di un altro colore, in 4 parti;
disegna su esso molti piccoli
dischi e ritagliali a gruppi.
In order to help yourself in
making hole for the sewing, do it
on a piece of felt: see photo.
10.
Piega ogni gruppo di dischi a
metà e cuci insieme due gruppi
per ogni pallina con del filo verde
sottobosco.
Per aiutarti a cucire la carta ,
buca la carta su un pezzo di
feltro.
11.
Make a slipknot on one side of
the two central sewing.
11.
The rest of this thread you’ll
make you able to hang the ball
up on the branches.
At this point bend the ball in
the opposite side and …
stick together the half ball
faces where there are the
sewing, so that, in front and
behind.
Then open each segment in order
to have got a nice ball.
The star is a gold paper square
of 6 cm, fold up its two diagonal
Il filo rimanente ti consentirà di
appendere la palla ai rami.
Crea un cappio su una delle due
parti della cucitura centrale.
A questo punto puoi piegare la
palla dalla parte opposta e…
incollare le due mezze facce
dove ci sono le cuciture, ossia,
davanti e dietro.
Poi apri ciascun spicchio in modo
da ottenere una bella palla.
La stella è un quadrato di carta
dorata di 6 cm di lato, ripiegato
sulle sue due diagonali.
English Club 2013 di Santina Donghi © Copyright 2013
Via Mereghetti, 22 1/A – 20019 Settimo Milanese. All rights reserved
3
Scaricare

![11th and 12th grade supplies also in Italian (2)[2]](http://s2.diazilla.com/store/data/000715911_1-5ae31f28f75b79223750f7e63f8a2d10-260x520.png)