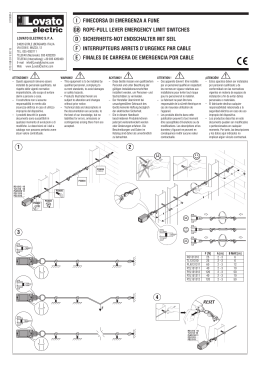
DUKE
Operatore
Operateur
Operator
Torantrieb
Operador
Alimentazione
Alimentation
Power Supply
Stromspannung
Alimentacion
Peso max cancello
Poids maxi portail
Max gate weight
Max Torgewicht
Peso máx verja
230V 50/60Hz
per anta 2 m / pour vantail 2 m / for 2
m leaf / für Flügel 2 m / para puerta 2 m
DUKE 110°
DUKE 180°
800 kg / 1760 lbs
Coppia max
Couple maxi
Max torque
Max. Drehmoment
Coppia max
Codice
Code
Code
Code
Codigo
AA10975
Nm 330
AA10985
ITALIANO pag. 05 / FRANÇAIS pag. 12 / ENGLISH page 19 / DEUTSCH pag. 26 / ESPAÑOL pag. 33
I
F
ISTRUZIONI DI SICUREZZA IMPORTANTI PER
L’INSTALLAZIONE
- ATTENZIONE PER LA SICUREZZA DELLE PERSONE É IMPORTANTE CHE VENGANO
SEGUITE TUTTE LE ISTRUZIONI
INSTRUCTIONS DE SECURITE IMPORTANTES POUR
L’INSTALLATION
- ATTENTION POUR LA SECURITE DES PERSONNES IL EST IMPORTANT QUE TOUTES
LES INSTRUCTIONS SOIENT SUIVIES
SUIVRE TOUTES LES INSTRUCTIONS D’INSTALLATION
SEGUIRE TUTTE LE ISTRUZIONI DI INSTALLAZIONE
1° - Questo libretto d’istruzioni è rivolto esclusivamente a del personale
specializzato che sia a conoscenza dei criteri costruttivi e dei dispositivi di
protezione contro gli infortuni per i cancelli, le porte e i portoni motorizzati
(attenersi alle norme e alle leggi vigenti).
2° - L’installatore dovrà rilasciare all’utente finale un libretto di istruzioni in accordo
alla EN 12635.
3° - L’installatore prima di procedere con l’installazione deve prevedere l’analisi
dei rischi della chiusura automatizzata finale e la messa in sicurezza dei punti
pericolosi identificati (seguendo le norme EN 12453/EN 12445).
4° - Il cablaggio dei vari componenti elettrici esterni all’operatore (ad esempio
fotocellule, lampeggianti, ecc.) deve essere effettuato secondo la EN 60204-1 e le
modifiche a questa apportate dal punto 5.2.2 della EN 12453.
5° - L’eventuale montaggio di una pulsantiera per il comando manuale del movimento
deve essere fatto posizionando la pulsantiera in modo che chi la aziona non si trovi
in posizione pericolosa; inoltre si dovrà fare in modo che sia ridotto il rischio di
azionamento accidentale dei pulsanti.
6° - Tenete i comandi dell’automatismo (pulsantiera, telecomando etc.) fuori dalla
portata dei bambini. I comandi devono essere posti ad un’altezza minima di 1,5mt
dal suolo e fuori dal raggio d’azione delle parti mobili.
7° - Prima di eseguire qualsiasi operazione di installazione, regolazione, manutenzione
dell’impianto, togliere la tensione agendo sull’apposito interruttore magnetotermico
collegato a monte dello stesso.
1° - Ce livret d’instructions est adressé exclusivement à un personnel
spécialisé qui connaît les critères de construction et les dispositifs de protection
contre les accidents concernant les portails, les portes et les grandes portes
motorisés (s’en tenir aux normes et aux lois en vigueur).
2° - L’installateur devra délivrer à l’utilisateur final un livret d’instruction en accord à
la EN 12635.
3° - L’installateur avant de procéder à l’installation, doit prévoir l’analyse des risques
de la fermeture automatisée finale et la mise en sécurité des points identifiés
dangereux (en suivant les normes EN 12453/EN 12445).
4° - Le câblage des divers composants électriques externes à l’opérateur (par exemple
photocellules, clignotants, etc) doit être effectué selon la EN 60204-1 et les
modifications apportées à celle-ci dans le point 5.2.2 de la EN 12453.
5° - Le montage éventuel d’un tableau pour la commande manuelle du mouvement doit
être fait en positionnant le tableau de façon à ce que la personne qui l’actionne ne
se trouve pas en position de danger; de plus, il faudra faire en sorte que le risque
d’actionnement accidentel des boutons soit réduit.
6° - Tenir les commandes de l’automatisme (tableau, télécommande, etc) hors de
portée des enfants. Les commandes doivent être placées à une hauteur minimum
de 1,5 m du sol et hors du rayon d’action des parties mobiles.
7° - Avant l’exécution de toute opération d’installation, de réglage, d’entretien de
l’installation, couper le courant en agissant sur l’interrupteur magnétothermique à
cet effet, branché en amont de l’installation.
LA DITTA RIB NON ACCETTA NESSUNA RESPONSABILITÀ per eventuali danni provocati
dalla mancata osservanza nell’installazione delle norme di sicurezza e delle leggi
attualmente in vigore.
LA SOCIETE RIB N’ACCEPTE AUCUNE RESPONSABILITE pour d’éventuels dommages
provoqués par la non-observation dans l’installation, des normes de sécurité et des lois
actuellement en vigueur.
CONSERVARE CON CURA QUESTE ISTRUZIONI
CONSERVER SOIGNEUSEMENT CES INSTRUCTIONS
1° - Se non é previsto nella centralina elettrica, installare a monte della medesima
un’interruttore di tipo magnetotermico (onnipolare con apertura minima dei contatti
pari a 3mm) che riporti un marchio di conformità alle normative internazionali.
Tale dispositivo deve essere protetto contro la richiusura accidentale (ad esempio
installandolo dentro quadro chiuso a chiave).
2° - Per la sezione ed il tipo dei cavi RIB consiglia di utilizzare un cavo di tipo H05RN-F
con sezione minima di 1,5mm2 e comunque di attenersi alla norma IEC 364 e alle
norme di installazione vigenti nel proprio Paese.
3° - Posizionamento di un’eventuale coppia di fotocellule: Il raggio delle fotocellule deve
essere ad un’altezza non superiore a 70 cm dal suolo e ad una distanza dal piano
di movimento dell’anta non superiore a 20 cm. Il loro corretto funzionamento deve
essere verificato a fine installazione in accordo al punto 7.2.1 della EN 12445.
4° - Per il soddisfacimento dei limiti imposti dalla EN 12453, se la forza di picco supera
il limite normativo di 400 N è necessario ricorrere alla rilevazione di presenza attiva
sull’intera altezza del cancello (fino a 2,5m max) - Le fotocellule in questo caso
sono da applicare all’esterno tra le colonne ed all’interno per tutta la corsa della
parte mobile ogni 60÷70cm per tutta l’altezza delle colonne del cancello fino ad
un massimo di 2,5m (EN 12445 punto 7.3.2.1) - es. colonne alte 2,2mt => 6
coppie di fotocellule - 3 interne e 3 esterne (meglio se dotate di sincronismo - 6
FIT SYNCRO con 2 TX SYNCRO).
1° - Si la centrale électrique ne dispose d’aucun interrupteur, il faut en installer un de
type magnétothermique en amont de cette dernière (omnipolaire avec ouverture
minimale des contacts correspondant à 3mm); la marque de cet interrupteur
devra être en conformité avec les normes internationales. Ce dispositif doit être
protégé contre toute remise en fonction accidentelle (ex. en l’installant dans un
coffre fermant à clé).
2° - En ce qui concerne la section et le type des câbles, le conseil de RIB est celui
d’utiliser un câble de type H05RN-F présentant une section minimale de 1,5mm2
et, quoi qu’il en soit, de se conformer à la norme IEC 364, ainsi qu’aux normes
d’installation en vigueur dans le pays de destination.
3° - Positionnement d’un éventuel jeu de photocellules : le faisceau des photocellules
ne doit pas être à une hauteur supérieure à 70 cm du sol et 20 cm du bord
du vantail. Leur correct effectivité fonctionnement doit être vérifié terminant
l’installation, selon le point de la 7.2.1 de la EN 12445.
4° - Afin de satisfaire aux limites imposées par la norme EN 12453, si la force
d’impact dépasse la limite de 400N, il sera nécessaire de détecter une présence
sur la hauteur totale du portail (jusqu’à un maximum de 2,5m) - Les cellules
photo-électriques dans ce cas-ci doivent être s’appliquent extérieurement entre
les colums et intérieurement pour toute la course de la pièce de mobil chaque
60÷70cm pour toute la taille de la colonne de la porte jusqu’à un maximum de
2,5m (EN 12445 point 7.3.2.1) - exemple: taille 2,2m de colonne = > 6 copies
des cellules photo-électriques - 3 internes et 3 externes (meilleur si complet du
dispositif de syncronism - FIT SYNCRO avec TX SYNCRO).
N.B.: È obbligatoria la messa a terra dell’impianto
I dati descritti nel presente manuale sono puramente indicativi.
RIB si riserva di modificarli in qualsiasi momento.
Realizzare l’impianto in ottemperanza alle norme ed alle leggi vigenti.
N.B.: La mise à terre de l’installation est obligatoire.
Les données figurant dans le présent manuel sont fournies à titre purement indicatif.
RIB se réserve le droit de les modifier à tout moment, sans aucun préavis. Effectuer
l’installation en conformité avec les normes et les lois en vigueur.
2
G
B
D
IMPORTANT SAFETY INSTRUCTIONS FOR THE
INSTALLATION
- ATTENTION FOR THE SAFETY OF THE PEOPLE IT IS IMPORTANT TO FOLLOW ALL THE
INSTRUCTIONS.
WICHTIGE SICHERHEITS ANLEITUNGEN FÜR DIE
INSTALLATIONEN
- ACHTUNG FÜR DIE SICHERHEIT DER PERSONEN IST ES WICHTIG, DASS ALLE
ANWEISUNGEN GENAU AUSGEFÜHRT WERDEN
ALLE INSTALLATIONSANLEITUNGEN BEFOLGEN
FOLLOW ALL INSTALLATION INSTRUCTIONS
1° - Diese Betriebsanleitung dient ausschließlich dem Fachpersonal, welche
die Konstruktionskriterien und die Sicherheits-Vorschriften gegen Unfälle für Tore,
Türen und automatische Tore kennt (geltende Normen und Gesetze beachten und
befolgen).
2° - Der Monteur muss dem Endkunde eine Betriebsanleitung in Übereinkunft der
EN12635 überreichen.
3° - Vor der Installierung muss für die automatische Schließung und zur
Sicherheitsgewährung der identifizierten kritischen Punkte, eine Risiko Analyse
vorgenommen werden mit der entsprechenden Behebung der identifizierten,
gefährlichen Punkte. (die Normen EN 12453/EN 12445 befolgend).
4° - Die Verkabelung der verschiedenen externen elektrischen Komponenten zum
Operator (z.B. Fotozellen, Blinker etc.) muss nach EN 60204-1 ausgeführt werden,
Änderungen davon nach Punkt 5.2.2 der EN 12453.
5° - Die eventuelle Montage einer Schalttafel für den manuellen Bewegungsbefehl
muss so angebracht werden, dass der Benutzer sich nicht in einer Gefahrenzone
befindet, und dass, das Risiko einer zufälligen nicht gewollten Aktivierung von
Schaltern gering ist.
6° - Alle Steuerungselemente (Schalttafel, Fernbedienung etc.) gehören nicht in
Reichweite von Kindern. Die Kommandos müssen min. 1,5 m ab Boden und
außerhalb des Aktionsbereiches der mobilen Teile angebracht werden.
7° - Vor jeglichem Eingriff, sei es Installation, Regulation oder Wartung der Anlage,
muss vorher die Stromzufuhr unterbrochen werden, den dafür bestimmten
Magnetthermo-Schalter drücken, der am Eingang der Anlage installiert ist.
1° - This handbook is exclusively addressed to the specialized personnel who
knows the constructive criteria and the protection devices against the accidents
for motorized gates, doors and main doors (follow the standards and the laws in
force).
2° - The installer will have to issue to the final user a handbook in accordance with
the EN 12635.
3° - Before proceeding with the installation, the installer must forecast the risks analysis
of the final automatized closing and the safety of the identified dangerous points
(following the standards EN 12453/EN 12445).
4° - The wiring harness of the different electric components external to the operator (for
example photoelectric cells, flashlights etc.) must be carried out according to the
EN 60204-1 and the modifications to it done in the point 5.2.2 of the EN 12453.
5° - The possible assembly of a keyboard for the manual control of the movement must
be done by positioning the keyboard so that the person operating it does not find
himself in a dangerous position; moreover, the risk of accidental activation of the
buttons must be reduced.
6° - Keep the automatism controls (push-button panel, remote control etc.) out of the
children way. The controls must be placed at a minimum height of 1,5mt from the
ground and outside the range of the mobile parts.
7° - Before carrying out any installation, regulation or maintenance operation of the
system, take off the voltage by operating on the special magnetothermic switch
connected upstream it.
THE RIB COMPANY DOES NOT ACCEPT ANY RESPONSIBILITY for possible damages
caused by the non observance during the installation of the safety standards and of the
laws in force at present.
DIE FIRMA RIB ÜBERNIMMT KEINE VERANTWORTUNG für eventuelle Schäden,
die entstehen können, wenn die Installierungsvorschriften die den gültigen
Sicherheitsnormen entsprechen, nicht eingehalten werden.
KEEP THESE INSTRUCTIONS WITH CARE
INSTALLATIONSVORSCHRIFTEN BEACHTET WERDEN
1° - Install a thermal magnetic switch (omnipolar, with a minimum contact opening of
3 mm) before the control board, in case this is not provided with it. The switch
shall be guaranteed by a mark of compliance with international standards. Such
a device must be protected against accidental closing (e.g. Installing it inside the
control panel key locked container).
2° - As far as the cable section and the cable kind are concerned, RIB suggests to
use an H05RN-F cable, with a minimum section of 1,5mm2, and to follow, In any
case, the IEC 364 standard and Installation regulations In force In your Country.
3° - Positioning of an eventual pair of photocells: The beam of the photocells must be
at an height not above the 70 cm from the ground, and, should not be more than
20 cm away from the axis of operation of the gate (Sliding track for sliding gate
or door, and the hinges for the swing gate). In accordance with the point 7.2.1 of
EN 12445 their correct functioning must be checked once the whole installation
has been completed.
4° - In order to comply with the limits defined by the EN 12453 norm, if the peak force
is higher than the limit of 400N set by the norm, it is necessary to use an active
obstacle detection system on the whole height of the gate (up to a maximum of
2,5m) - The photocells in this case must be apply externally between the colums
and internally for all the race of the mobil part every 60÷70cm for all the height
of the column of the gate up to a maximum of 2,5m (EN 12445 point 7.3.2.1).
example: column height 2,2m => 6 copies of photocells - 3 internal and 3 external
(better if complete of syncronism feature - FIT SYNCRO with TX SYNCRO).
1° - Wenn nicht bereits an der elektrischen Schaltzentrale vorgesehen, muss vor der
Schaltzentrale ein thermomagnetischer Schalter installiert werden (omnipolar,
mit einer minimalen Kontaktöffnung von 3 mm), der ein von den internationalen
Normen anerkanntes Konformitätszeichen besitzt. Solch ein Geraet muss vor
Vandalismus geschuetzt werden(z.B.mit einen Schluesselkatsten in einem
Panzergehaeuse)
2° - RIB empfiehlt den Kabeltyp H05RN-F mit einem minimalen Querschnitt von
1,5mm2 generell sollten die Normative IEC 364 und alle anderen geltenden
Montagenormen des Bestimmungslandes eingehalten werden.
3°- Position des ersten paar Fotozellen: Der sollten nicht hoeher als 70cm vom Boden
sein, und sollte nicht mehr als 20 cm entfernt von der Achse des Tores sitzen (das
gilt fuer Schiebe und Drehtore). In Übereinstimmung mit dem Punkt 7.2.1 der EN
12445 Norm, ihr korrektes Funktionieren muß einmal überprüft werden.
4°- In Einklang mit der Norm EN12453, ist es bei Toren notwendig eine komplette
Sicherheitslieiste zu installieren, bei denen mehr als 400N Kraft aufgewand werden
muessen, um das Tor zum anhalten zu bringen (Maximum von 2,5m anwenden) Die Fotozellen müssen in diesem Fall sein beantragen außen zwischen den colums
und innerlich das ganzes Rennen des mobil Teils jede 60÷70cm für die ganze
Höhe der Spalte des Gatters bis zu einem Maximum von 2,5m - EN 12445 Punkt
7.3.2.1). Beispiel: Spalte Höhe 2,2m => 6 Kopien von Fotozellen - 3 intern und
3 extern (besser, wenn komplett von der syncronism Eigenschaft - FIT SYNCRO
mit TX SYNCRO).
N.B.: The system must be grounded
Data described by this manual are only Indicative and RIB reserves to modify them at
any time. Install the system complying with current standards and regulations.
ANMERKUNG: Die Erdung der Anlage ist obligatorisch
Die in diesem Handbuch aufgeführten Daten sind ausschließlich empfohlene Werte. RIB
behält sich das Recht vor, das Produkt zu jedem Zeitpunkt zu modifizieren. Die Anlage
muss in Übereinstimmung mit den gültigen Normen und Gesetzen montiert werden.
3
E
S
IMPORTANTES INSTRUCCIONES DE SEGURIDAD PARA
LA INSTALACIÓN
- CUIDADO UNA INCORRECTA INSTALACIÓN PUEDE CAUSAR GRAVES DAÑOS
SEGUIR TODAS LAS INSTRUCCIONES DE INSTALACIÓN
1° - Este manual de instrucciones está exclusivamente dirigido a personal
especializado que conozca los criterios de construcción y de los dispositivos
de protección contra accidentes con cancelas, puertas y portales motorizados
(atenerse a las normas y a las leyes vigentes).
2° - El instalador tendrá que dar al utilizador final un manual de instrucciones de
acuerdo con la EN 12635.
3° - El instalador antes de proceder con la instalación tiene que hacer una analisis de
los riesgos del cierre automatizado final y la puesta en seguridad de los puntos
identificados como peligrosos (siguiendo las normas EN 12453 / EN 12445).
4° - El cablaje de los varios componentes eléctricos externos al operador (por ejemplo
fotocélulas, los intermitentes, etc) tiene que ser efectuado según la EN 60204-1 y
a las modificas sucesivas aportadas por el punto 5.2.2 della EN 12453.
5° - El eventual montaje de un panel de mandos para la gestión del movimiento manual
tiene que ser efectuado posicionando el panel en modo que quién lo accione no se
encuentre en una posición peligrosa; además se tiene que hacer en modo que el
riesgo de accionamiento accidental de los pulsadores sea mínimo.
6° - Tener los mandos del automatismo (panel de mandos, mando a distancia, etc.)
lejos del alcance de los niños. Los mandos tienen que ser puestoa una altura
mínima de 1,5mt del suelo y fuera del radio de acción de las partes móviles.
7° - Antes de ejecutar cualquier operación de instalación, ajuste o mantenimiento del
sistema, quitar la corriente accionando el respectivo interruptor magnetotérmico
conectado antes del mismo.
LA EMPRESA RIB NO ES RESPONSABLE por eventuales daños provocados por la
falta de respeto de las normas de seguridad, durante la instalación y de las leyes
actualmente vigentes.
CONSERVAR CUIDADOSAMENTE ESTAS INSTRUCCIONES
1° - En el caso de que no sea previsto en la central eléctrica, instalar antes de la
misma, un interruptor de tipo magnetotérmico (omnipolar con una abertura
mínima de los contactos de 3mm) que dé un sello de conformidad con las
normas internacionales. Este dispositivo tiene que estar protegido contra cierres
accidentales (por ejemplo instalándolo dentro de un panel cerrado a llave).
2° - Para la sección y el tipo de los cables, RIB aconseja utilizar cables de tipo H05RN-F
con sección mínima de 1,5mm2 e igualmente atenerse a la norma IEC 364 y a las
normas de instalación del propio País.
3° - Posicionamiento eventual de un par de fotocélulas. El rayo de las fotocélulas
no debe estar a más de 70 cm de altura desde el suelo y a una distancia de
la superficie de movimiento de la puerta, no superior a 20 cm. El correcto
funcionamiento tiene que ser controlado al final de la instalación de acuerdo con
el punto 7.2.1 de la EN 12445.
4° - Para satisfascer los límites impuestos por la EN 12453, si la fuerza de punta
supera el límite normativo de 400 N, es necesario recurrir al control de presencia
activa en toda la altura de la puerta (hasta a 2,5m max). Las fotocélulas en este
caso se tienen que colocar en el exterior entre las columnas y en el interior
por todo el recorrido de la parte móvil cada 60÷70cm en toda la altura de las
columnas de la cancela hasta un máximo de 2,5m (EN 12445 punto 7.3.2.1) - es.
columnas altas de 2,2mt => 6 par de fotocélulas - 3 internas y 3 externas (mejor
si están provistas de sincronismo - 6 FIT SYNCRO con 2 TX SYNCRO).
PS.: Es obligatorio la puesta a tierra del sistema.
Los datos descritos en el presente manual son sólamente indicativos.
RIB se reserva de modificarlos en cualquier momento.
Realizar el sistema respetando las normas y las leyes vigentes.
4
I
LAYOUT IMPIANTO
CARATTERISTICHE TECNICHE
❷
DUKE è un operatore irreversibile con finecorsa meccanici e coperchio
carrabile.
DUKE 110° è dotato di variazione di velocità dell’anta sia in apertura che in
chiusura (apertura iniziale lenta, poi veloce e chiusura inizialmente veloce, poi
lenta all’arrivo in battuta).
DUKE è portante dell’anta del cancello e in caso di manutenzione il motore può
essere rimosso senza togliere l’anta.
DUKE può azionare agevolmente cancelli e portoni pesanti fino a 800 kg con
ante lunghe fino a 2 m.
❸
❻
❺
❺
CARATTERISTICHE TECNICHE
m
3,5*
Peso max cancello
kg
❻
Coppia max
❹
❹
s
800 (2 m) - kg 400 (3,5 m)
20
30
Nm
330
230V~ 50Hz
Alimentazione e frequenza
❶
DUKE 180°
Lunghezza max. anta
Tempo medio di apertura
❶
❶
DUKE 110°
Potenza motore
W
302
Assorbimento
A
1,5
Condensatore
µF
Cicli normativi
n°
Cicli consigliati al giorno
n°
10
8 - 20s/2s
6 - 30s/2s
100
Servizio
Cicli consecutivi garantiti
❺
❺
50%
n°
22/20s
13/30s
Lubrificazione
❶ Operatore DUKE
❷ Antenna radio
❸ Lampeggiatore
❹ Fotocellula esterna
❺ Fotocellule interna
❻ Selettore a chiave
a grasso
Peso operatore + cassa
kg
8
Rumorosità
db
<70
Temperatura di lavoro
°C
-10 ÷ +55
Grado di protezione
IP
67
* E’ consigliabile prevedere una serratura elettrica per ante superiori a 2 m.
1
62
66
163
5
Ø3
240
27
95
27
67
163
5
67
Ø3
80
114
Ø 80
Ø 80
327
114
385
Misure in mm
5
2
INSTALLAZIONE DUKE
CONTROLLO PRE-INSTALLAZIONE
INSTALLAZIONE DUKE 110°
-
Ingrassare accuratamente il perno della cassa di fondazione. Appoggiare la sfera
(CVA1479) ed inserire la leva di traino CME5224 dopo aver fissato lo sblocco scelto (Fig.
7).
-Inserire il piatto dell’attacco cancello CME6987 tramite il suo perno nella leva di traino
(Fig. 8).
-Posizionare l’anta del cancello tra il cardine superiore e il piatto dell’attacco cancello (il
cardine e il perno del piatto dell’attacco cancello dovranno essere perfettamente
in asse tra loro).
- Saldare accuratamente il piatto dell’attacco cancello all’anta.
-Inserire la vite di regolazione apertura A (Fig. 11) M10X30 e il suo dado.
-Fissare il motoriduttore all’interno del cassonetto (Fig. 4).
-Avvitare sulla leva di traino la vite di regolazione M10x60 (C) ed il suo relativo dado (Fig.
11).
-Inserire la leva di collegamento CCA1360 (Fig. 4).
-ATTENZIONE: la leva di collegamento CCA1360 deve essere applicata come da Fig. 4.
Nel caso fosse impossibile collegarla, azionare elettricamente il riduttore.
Le ante devono essere solidamente fissate ai cardini delle colonne, non devono flettere
durante il movimento e devono muoversi senza attriti.
Prima d’installare DUKE è meglio verificare tutti gli ingombri necessari per poterlo installare.
Se il cancello si presenta come da Fig. 1 non occorrono modifiche.
È obbligatorio uniformare le caratteristiche del cancello alle norme e leggi vigenti.
Il cancello può essere automatizzato solo se in buono stato e se rispondente alla norma
EN 12604.
L’anta non deve presentare porte pedonali. In caso contrario occorrerà prendere
-
opportune precauzioni in accordo al punto 5.4.1 della EN12453 (ad esempio impedire
il movimento del motore quando il portoncino è aperto, grazie ad un microinterruttore
opportunamente collegato al quadro elettronico).
- Non bisogna generare punti di intrappolamento (ad esempio tra anta aperta del cancello
e cancellata).
- Non devono essere presenti fermi meccanici al di sopra del cancello perché non sono
sufficientemente sicuri.
Componenti da installare secondo la norma EN12453
USO DELLA CHIUSURA
TIPO DI COMANDO
Persone esperte
(fuori da area
pubblica*)
Persone esperte
(area pubblica)
Uso illimitato
a uomo presente
A
B
non possibile
a impulsi in vista
(es. sensore)
CoE
CoE
C e D, o E
a impulsi non in vista
(es. telecomando)
CoE
C e D, o E
C e D, o E
C e D, o E
C e D, o E
C e D, o E
automatico
250
I
460
* esempio tipico sono le chiusure che non accedono a pubblica via
A: Pulsante di comando a uomo presente (cioè ad azione mantenuta), come cod.
ACG2013
B: Selettore a chiave a uomo presente, come cod. ACG1010
C: Regolazione della forza del motore
D: Coste e/o altri dispositivi di limitazione delle forze entro i limiti della norma EN12453
- Appendice A.
E: Fotocellule, es. cod. ACG8026 (da applicare ogni 60÷70 cm per tutta l’altezza della
colonna del cancello fino ad un massimo di 2,5 m - EN 12445 punto 7.3.2.1)
0
38
3
CCA1360
PREPARAZIONE CEMENTAZIONE CASSA
- Eseguire una buca nel terreno vicino al pilastro (Fig. 3).
- Predisporre sul fondo del cassonetto un tubo Ø 50 mm in PVC per lo scarico dell’acqua e
su un lato un tubo Ø 32 mm di tipo isolante flessibile pesante per l’uscita dei cavi elettrici
(utilizzare i fori del lato interno dell’apertura cancello).
LA GIUNZIONE DEI CAVI DEVE AVVENIRE all’interno di una scatola di derivazione stagna
posta ALL’ESTERNO DELLA CASSA DI FONDAZIONE, murata o fissata ad un’altezza
minima di sicurezza e dovrà garantire il rispetto delle norme.
- Con una livella posizionate la cassa di fondazione in modo che il filo superiore del
coperchio corrisponda al piano finito del pavimento.
- L’asse del perno della cassa deve corrispondere perfettamente all’asse del cardine.
- Per DUKE 110°: Cementate la cassa di fondazione verificando che i suoi lati più
corti siano perfettamente paralleli al cancello quando è CHIUSO.
- Per DUKE 180°: Cementate la cassa di fondazione verificando che i suoi lati più
corti siano perfettamente perpendicolari al cancello quando è CHIUSO.
- Inserire i dadi a gabbietta per il fissaggio del coperchio nelle apposite sedi ricavate nella
cassa di fondazione.
CCA1360
SX
DX
4
6
I
5
6
CME6987
ACG2120
ACG2125
ACG2130
CME5224 (DUKE 110°)
CME5230 (DUKE 180°)
7
8
DUKE 180°
DUKE 110°
Tubo per cavi elettrici
62 mm
Tubo per scarico acqua
Tubo per scarico acqua
Tubo per cavi elettrici
9
10
7
I
INSTALLAZIONE DEL DUKE 180°
DX
- Ingrassare accuratamente il perno della cassa di fondazione. Appoggiare la sfera
(CVA1479) ed inserire la leva di traino CME5230 dopo aver fissato lo sblocco scelto
(Fig. 7).
- Inserire il piatto dell’attacco cancello CME6987 tramite il suo perno nella leva di traino
(Fig. 8).
- Posizionare l’anta del cancello tra il cardine superiore e il piatto dell’attacco cancello
(il cardine e il perno del piatto dell’attacco cancello dovranno essere perfettamente in
asse tra loro).
- Saldare accuratamente il piatto dell’attacco cancello all’anta.
- Fissare il motoriduttore all’interno del cassonetto (Fig. 12) utilizzando sul lato della
colonna i relativi dadi M12 e le rondelle in dotazione, mentre sul lato opposto della
colonna avvitare le prolunghe CME5228 e le relative rondelle DRL12X24 (vedi esploso
in ultima pagina). ATTENZIONE: sia nel caso di cancello posizionato a destra che a
sinistra il riduttore è sempre da inserire come da Fig. 12 (motore a destra).
- Fissare la piastra con l’ingranaggio utilizzando i relativi dadi e rondelle M10.
- Inserire la vite e il dado di registro (A) (Fig. 12).
- Inserire l’ingranaggio di traino CME5226 sull’albero di traino scanalato dopo aver
fissato la vite di registro B come da Fig. 12. ATTENZIONE: la regolazione della corsa
di apertura avviene tramite la vite di regolazione B, ma l’ampiezza di tale corsa è
determinata dalla posizione di inserimento dell’ingranaggio di traino. Più apertura si
vuole fare, più è da inserire l’ingranaggio di traino verso il fermo 1 per montaggio a
sinistra o il fermo 2 per il montaggio a destra.
C
SX
REGOLAZIONE FINECORSA MECCANICI DUKE 110°
CANCELLO CHIUSO
A
2
Usando il DUKE non è necessario fissare fermi a terra o altro perché è dotato all’interno
di viti di fermo registrabili per delimitare la corsa dell’anta.
Per accedere alle viti è necessario togliere il coperchio del DUKE.
- Per ottenere l’apertura desiderata del cancello è sufficiente avvitare o svitare l’apposita
vite (A) di fermo e di seguito bloccare il controdado per impedire che possa modificare
la sua posizione nel tempo (Fig. 11).
La stessa regolazione va eseguita anche sulla vite (C) per la chiusura facendo in modo di
permettere nell’operazione di sblocco il riaggancio del meccanismo.
11
CCA1360
ATTENZIONE: in chiusura impedite che le ante sbattano sul fermo
a terra. L’anta deve fermarsi per l’intervento del
finecorsa meccanico interno. In caso contrario
risulta impossibile lo sbloccaggio.
REGOLAZIONE FINECORSA MECCANICI DUKE 180°
Per fermare il movimento del cancello nelle posizioni desiderate è sufficiente agire sulle
apposite viti dei fermi A e B, bloccandole successivamente coi controdadi per impedire
che possano modificare la loro posizione nel tempo (Fig. 12).
Per delimitare la corsa dell’anta del cancello é necessario spostare la posizione del fermo
a secondo dell’angolo d’apertura massima richiesto:
A = FERMO CHIUSURA
Regolarlo facendo in modo di permettere nell’operazione di sblocco il riaggancio del
meccanismo.
B = FERMO APERTURA
ATTENZIONE: oltre a regolare la vite per delimitare la corsa di apertura, è necessario
inserire l’ingranaggio di traino più o meno verso il fermo su cui andrà a fermarsi la vite di
regolazione (2 per sinistra e 1 per destra).
B
1
DX
CANCELLO CHIUSO
2
A
ATTENZIONE: in chiusura impedite che le ante sbattano sul fermo
a terra. L’anta deve fermarsi per l’intervento del
finecorsa meccanico interno. In caso contrario
risulta impossibile lo sbloccaggio.
B
8
1
12
I
SBLOCCO DI EMERGENZA
SICUREZZE ELETTRICHE
Da effettuare dopo aver tolto l’alimentazione elettrica al motore.
Per poter eseguire in modo sicuro la movimentazione manuale dell’anta occorre verificare
che:
- sull’anta siano presenti maniglie idonee;
- tali maniglie siano posizionate in modo da non creare punti di pericolo durante il loro
utilizzo;
- lo sforzo manuale per muovere l’anta non superi i 225N per i cancelli posti su siti privati
ed i 390N per i cancelli posti su siti commerciali ed industriali (valori indicati nel punto
5.3.5 della norma EN 12453).
In caso di mancanza di energia elettrica, per poter aprire manualmente il cancello è
sufficente agire sullo sblocco posto sulla leva di traino (Fig. 8).
Realizzare l’impianto in ottemperanza alle norme ed alle leggi vigenti.
Si consiglia l’utilizzo del quadro elettronico di comando T2 (per 1 o 2 motori monofasi).
Per i collegamenti ed i dati tecnici degli accessori attenersi ai relativi libretti.
MANUTENZIONE
Da effettuare da parte di personale specializzato dopo aver tolto l’alimentazione
elettrica al motore.
Ogni anno ingrassare le parti in movimento all’interno del cassonetto e controllare la forza
di spinta esercitata dall’operatore sul cancello. In caso di manutenzione dell’operatore è
possibile rimuoverlo dal cassonetto senza togliere l’anta.
- Dopo aver rimosso il coperchio del cassonetto e aver scollegato il cavo di alimentazione
del motore, estraete manualmente la leva curva di movimento così da poter aprire
l’anta.
- Di seguito svitate i quattro dadi che fissano il riduttore.
ATTENZIONE: in chiusura impedite che le ante sbattano sul fermo
a terra. L’anta deve fermarsi per l’intervento del
finecorsa meccanico interno. In caso contrario
risulta impossibile lo sbloccaggio.
REGOLAZIONE FRIZIONE
Nel DUKE il limitatore di coppia meccanico non è presente.
É quindi necessario comandare questo operatore con un quadro elettronico dotato di
regolatore di forza elettronico.
Si consiglia l’utilizzo del quadro elettronico di comando T2 (per 1 o 2 motori monofasi).
OPTIONAL - Per i collegamenti ed i dati tecnici degli accessori attenersi ai relativi libretti di istruzione.
T2
cod. ABT2000 => CRX 230/50-60HZ
cod. ABT2001 => 230/50-60HZ
cod. ABT2002 => CRX 120/60HZ
cod. ABT2003 => 120/60HZ
T2 Wi-Fi
Con scheda MASTER Wi-Fi.
cod. ABT2001W
Autoapprendimento corsa e tempi
Apertura pedonale
Chiusura automatica totale e pedonale
Prelampeggio
Rallentamento regolabile in accostamento
Regolazione della forza
Comando radio automatico o passo passo apertura totale
Comando radio automatico o passo passo apertura pedonale
Comando singolo automatico o passo passo
Colpo d’ariete serratura elettrica
Radio ricevitore incorporato
Gestione fotocellule
Gestione chiusura immediata dopo il transito da fotocellule
Gestione lampeggiatore
Gestione coste
Autotest coste di sicurezza come richiesto da norma EN12453
Selettore a chiave
Buzzer
Serratura elettrica
9
I
TELECOMANDO SUN
CASSA DI FONDAZIONE PER DUKE 110°
SUN 2CH
SUN CLONE 2CH
cod. ACG8435
CASSA DI FONDAZIONE PER DUKE 180°
cod. ACG6052
cod. ACG6056
SUN 4CH
SUN CLONE 4CH
cod. ACG6054
cod. ACG6058
FIT SLIM
cod. ACG8436
FOTOCELLULE DA PARETE
cod. ACG8032
COPPIA DI COLONNINE PER FIT SLIM
cod. ACG8065
Le fotocellule FIT SLIM hanno la funzione di sincronismo in corrente alternata e portata
di 20 m.
Sono applicabili più coppie di fotocellule ravvicinate grazie al circuito sincronizzatore.
Aggiungere il TRASMETTITORE TX SLIM SYNCRO cod. ACG8029 per sincronizzare fino
a 4 coppie di fotocellule.
SBLOCCO CON CILINDRO DIN
SPARK
cod. ACG2120
SBLOCCO A CHIAVE TRILOBATA
cod. ACG2125
Per ottenere le migliori prestazioni degli apparati sopracitati, bisogna installare
un’antenna accordata sulla frequenza del radio ricevitore installato .
N.B. Fare molta attenzione che il filo centrale del cavo non vada a contatto con la
calza in rame esterna, ciò renderebbe nullo il funzionamento dell’antenna.
L’antenna va installata perpendicolarmente e deve essere in vista del telecomando.
LAMPEGGIATORE SPARK con scheda intermittente incorporata
cod. ACG7059
SUPPORTO LATERALE
cod. ACG7042
ANTENNA SPARK 91
cod. ACG5454
ANTENNA SPARK 433
cod. ACG5452
SBLOCCO CON CHIAVE A LEVA
cod. ACG2130
10
I
DISPOSITIVI Wi-Fi
MASTER Wi-Fi
SCHEDA DI GESTIONE SISTEMA SENZA FILI
con innesto - 12÷30V ac/dc
con morsettiera - 12÷30V ac/dc
NOVA Wi-Fi
FOTOCELLULE SENZA FILI
COPPIA COLONNINE NOVA
cod. ACG6094
cod. ACG6099
TOUCH Wi-Fi
VERTIGO Wi-Fi
COSTA SENZA FILI
FOTOCELLULE SENZA FILI SOSTITUTIVE DELLA COSTA
VERTIGO Wi-Fi 8 cod. ACG8042 - VERTIGO Wi-Fi 10 cod. ACG8043
cod. ACG3016
SPARK Wi-Fi
BLOCK Wi-Fi
LAMPEGGIATORE SENZA FILI
SUPPORTO LATERALE
SELETTORE A CHIAVE SENZA FILI
cod. ACG6098
T2 Wi-Fi
Quadro con regolatore di forza e scheda MASTER Wi-Fi.
Con contenitore.
cod. ACG8037
cod. ACG8039
cod. ABT2001W
11
cod. ACG7064
cod. ACG7042
F
SCHÉMA DÉTAILLÉ DE L’INSTALLATION
C
❷
ARACTERISTIQUES TECHNIQUES
DUKE est un opérateur irréversible équipé d’un fin de course mécanique et d’un
couvercle de passage.
DUKE 110° est équipé d’un variateur de vitesse du vantail, tant en ouverture
qu’en fermeture (ouverture lente au début puis rapide, fermeture rapide au
début puis lente à l’arrivé en butée).
DUKE porte le vantail du portail et il est possible d’enlever le moteur sans avoir
à ôter le vantail.
DUKE peut actionner aisément des grilles et des portails pesant jusqu’à 800 kg
avec des vantaux d’une longueur allant jusqu’à 2 m.
❸
❻
❺
❺
CARACTERISTIQUES
TECHNIQUES
❶
❶
❹
❹
m
3,5*
Poids maxi du portail
kg
Temps moyen d’ouverture
s
800 (2 m) - kg 400 (3,5 m)
20
❶
30
Nm
330
230V~ 50Hz
Alimentation et frequence
Puissance moteur
❶
W
302
Absorption
A
1,5
Condensateur
µF
10
Cycles normatifs
n°
Cycles conseillés par jour
n°
8 - 20s/2s
Cycles consécutifs garantis
❺
50%
n°
22/20s
Lubrification
Peso operatore + cassa
❶ Operateur DUKE
❷ Antenne radio
❸ Signal electrique
❹ Photocellules p/protection externe
❺ Photocellules p/protection interne
❻ Selecteur
6 - 30s/2s
100
Service
❺
DUKE 180°
Longueur maxi du battant
Couple maxi
❻
DUKE 110°
13/30s
à graisse
kg
8
Bruit
db
<70
Temperature de travail
°C
-10 ÷ +55
Indìce de protection
IP
67
On conseille à prévoir une serrure électrique pour portes supérieures à 2 m.
1
62
66
163
5
Ø3
240
27
95
27
67
163
5
67
Ø3
80
114
327
Ø 80
Ø 80
114
385
Mesures en mm
12
2
F
INSTALLATION DUKE
CONTROLE PRE-INSTALLATION
INSTALLATION DE DUKE 110°
Le portail à battant doit être solidement fixé aux cardans des colonnes, ne doit pas flechir
pendant le mouvement et doit pouvoir manoeuvrer sans effort.
Avant d’installer DUKE, il convient de verifier tous les encombrements necessaires pour
proceder à l’installation.
Si le portail se presente comme indiqué Fig. 1, aucune modification n’est necessaire.
Il est impératif d’uniformiser les caractéristiques du portail avec les normes et les
lois en vigueur. Le portail peut être automatisé seulement si il est en bon état et qu’il
est conforme à la norme EN 12604.
- Le vantail ne doit pas comporter de portillon intégré. Dans le cas contraire, il sera
opportun de prendre les précautions décrites au point 5.4.1 de la EN 12453 (interdire,
par le biais d’un contact raccordé aux bornes adaptées de la platine électronique, la
mise en marche de l’automatisme si le portillon est ouvert).
- Ne pas générer de zone d’écrasement (par exemple entre le vantail ouvert et la cloture).
- Il ne devra y avoir aucun arrêt mécanique au-dessus du portail, étant donné que les
arrêts mécaniques ne sont pas suffisamment sûrs.
- Graisser soigneusement le pivot de la caisse de fondation.
Mettre la sphère (CVA1479) et insérer le levier de remorquage CME5224 après avoir
fixé le déblocage choisi (Fig. 7).
- Insérer le plateau de la fixation grille CME6987 par son pivot dans le levier de
remorquage (Fig. 8).
-Mettre en position le volet de la grille entre le fond supérieur et le plateau de la fixation
grille (le fond et le pivot du plateau de la fixation grille devront être perfaitement
en axe d’entre eux).
- Souder soigneusement le plateau de la fixation grille à la porte.
- Insérer la vis de réglage ouverture A (Fig. 11) M10X30 et son écrou.
- Fixer le motoréducteur à l’intérieur du caisson (Fig. 4).
-Visser sur le levier de traînage la vis de réglage M10x60 (C) et son relatif écrou (Fig.
11).
- Insérer le levier de enclenchement CCA1360 (Fig. 4).
-ATTENTION: Le levier de enclenchement CCA1360 doit être appliqué comme de
Fig. 4. Dans le cas où il ne serait pas possible le enclencher, actionner le réducteur
électriquement.
Parties à installer conformément à la norme EN12453
TYPE DE COMMANDE
Personne expertes
(zone publique)
Usage illimité
homme presente
A
B
non possible
impulsion en vue
(es. capteur)
C ou E
C ou E
C et D, ou E
C ou E
C et D, ou E
C et D, ou E
C et D, ou E
C et D, ou E
C et D, ou E
impulsion hors de vue
(es. boîtier de commande)
automatique
250
USAGE DE LA FERMETURE
Personne expertes
(au dehors d’une zone
publique*)
* example typique: fermetures qui n’ont pas d’accès à un chemin public
A: Touche de commande à homme present (à action maintenue), code ACG2013.
B: Sélecteur à clef à homme mort, code ACG1010.
C: Réglage de la puissance du moteur.
D: Barre palpeuse et/ou autres dispositifs de limitation des forces dans les limites de
la norme EN12453- appendice A.
E: Cellules photo-électriques, code ACG8026 (Appliquer chaque 60÷70 cm pour toute
la taille de la colonne de la porte jusqu’à un maximum de 2,5 m - EN 12445 point
7.3.2.1).
460
0
38
3
PREPARER LA SCELLEMENT DU CAISSON
CCA1360
-Exécuter une fosse dans le sol, au ras du pilier (Fig. 3).
- Préparer sur le fond du caisson un tuyau diam. 50 mm en PVC pour le déchargement
de l’eau et sur un côté un tuyau diam. 32 mm de genre isolant, flexible, lourd pour
la sortie des câbles électriques (Utiliser les trous du côté interne de l’ouverture de la
grille).
LA JONCTION DES CABLES DOIT ARRIVER à l’intérieur d’une boîte de dérivation
étanche, placée A L’EXTERIEUR DE LA CAISSE DE FONDATION, murée ou fixée à une
hauteur minimum de sécurité et doit assurer le respect des règles.
-A l’aide d’un niveau, positionner le caisson de façon à ce que le fil supérieur du
couvercle corresponde au plan fini du sol.
-
L’axe des gonds doit correspondre parfaitement à l’axe de l’arbre porte-levier
d’entraînement.
- DUKE 110°: Cimenter en veillant à ce que le mortier n’entre pas à l’intérieur
du caisson et en s’assurant que les cÙtés les plus courts du caisson sont
parfaitement parallèles à la barrière lorsqu’elle est sur “FERME”.
- DUKE 180°: Cimenter en veillant à ce que le mortier n’entre pas à l’intérieur
du caisson et en s’assurant que les cÙtés les plus courts sont parfaitement
perpendiculaires à la barrière lorsqu’elle est sur “FERME”.
-Insérer les boulons pour fixer le couvercle dans des endroits coupés dans la caisse de
fondation.
CCA1360
SX
DX
4
13
F
5
6
CME6987
ACG2120
ACG2125
ACG2130
CME5224 (DUKE 110°)
CME5230 (DUKE 180°)
7
8
DUKE 180°
DUKE 110°
Tube pour câbles électriques
62 mm
Tube pour ecoulement de l’eau
Tube pour ecoulement de l’eau
Tube pour câbles électriques
9
10
14
F
INSTALLATION DE DUKE 180°
DX
- Graisser soigneusement le pivot de la caisse de fondation. Mettre la sphère (CVA1479)
et insérer le levier de remorquage CME5230 après avoir fixé le déblocage choisi (Fig.
7).
- Insérer le plateau de la fixation grille CME6987 par son pivot dans le levier de
remorquage (Fig. 8).
- Mettre en position le volet de la grille entre le fond supérieur et le plateau de la fixation
grille (le fond et le pivot du plateau de la fixation grille devront être perfaitement en axe
d’entre eux).
- Souder soigneusement le plateau de la fixation grille à la porte.
- Fixer le motoréducteur à l’intérieur du caisson (Fig. 12) et utiliser les relatifs écrous
M12 et les rondelles en dotation, sur le côté de la colonne.Ou contraire, visser les
rallonges CME 5228 et les relatives rondelles DRL12X24 sur le coté opposé de la
colonne (voir le tableau «explosion» à la dernière page). ATTENTION: soit la grille en
position à droite, soit elle en position à gouche, le réducteur doit être inséré toujours
conformément à Fig. 12 (moteur à droite).
- Fixer la plaque avec l’engrenage en utilisant les relatifs écrous et rondelles M10.
- Insérer la vis et l’ecrou de règlage (A) (Fig. 12).
- Insérer l’engrenage de traînage CME5226 sur l’arbre de traînage rainé après avoir fixé
la vis de réglage B, conformément à Fig. 12.
ATTENTION: le réglage de la course de ouverture arrive par la vis de réglage B, mais
l’étendue de cette course est provoquée de la position de l’insertion de l’engrenage de
traînage. Plus on veut ouverture, plus on doit insérer l’engrenage de traînage vers l’arrêt
1 pour le montage à gauche ou l’arrêt 2 pour le montage à droite.
C
11
CCA1360
SX
REGLAGE DES FINS DE COURSE MECANIQUES DUKE 110°
A
PORTAIL FERME
A
2
Lorsqu’on utilise le DUKE il n’est pas nécessaire de fixer des arrêts au sol ou ailleurs,
car il est équipé à l’intérieur de vis d’arrêt réglables pour stopper la course du vantail.
Pour accéder à ces vis, ôter le couvercle du DUKE.
- Pour obtenir l’ouverture du portail désirée, il suffit de visser ou de dévisser la vis d’arrêt
(A) et de bloquer ensuite le contre-écrou pour empêcher qu’elle change de position par
la suite (Fig. 11).
On doit faire la même régulation sur la vis (C) pour la fermeture et on doit faire en sorte
que le raccrochage du mécanisme soit possible dans l’operation de déblocage.
ATTENTION: Pour ne pas rendre trop difficile le débrayage manuel, veiller à ce que
les vantaux ne viennent pas buter sur le sabot au sol. Dans le cas
contraire, le déblocage résulte impossible.
REGLAGE DES FINS DE COURSE MECANIQUES DUKE 180°
Pour arrêter le mouvement du portail dans les positions désirées, il suffit d’agir sur les
vis des arrêts A et B en les bloquant ensuite avec leurs contre-écrous pour empêcher
qu’elles changent de position par la suite (Fig. 12).
Pour délimiter la course du vantail déplacer la position de l’arrêt selon l’angle d’ouverture
maximum requis:
A = ARRET FERMETURE
A le régler, pour permettre le raccrochage du mécanisme, dans l>opération de
déblocage.
B = ARRET OUVERTURE
ATTENTION: Non seulement on doit régler la vis pour délimiter la course d’ouverture,
mais il faut insérer l’engrenage de traînage plus ou moins vers l’arrêt où la vis de réglage
se blouquera (2 pour gouche et 1 pour droite).
ATTENTION: Pour ne pas rendre trop difficile le débrayage manuel, veiller à ce que
les vantaux ne viennent pas buter sur le sabot au sol. Dans le cas
contraire, le déblocage résulte impossible.
B
1
DX
PORTAIL FERME
2
B
15
A
1
12
F
SBLOCCO DI EMERGENZA
à leur manuel.
A n’effectuer qu’après avoir mis le moteur hors tension.
Afin de pouvoir manœuvre manuellement le vantail, il est important de vérifier que:
- Il soit fourni des poignées adaptées sur le vantail;
- Ces poignées doivent être positionnées de sorte à ne pas créer un danger durant leur
utilisation;
- L’effort manuel pour mettre en mouvement le vantail ne doit pas excéder 225N pour les
portes et portails en usage privé, et 390N pour les portes et portails à usage industriel et
commercial (valeurs indiquées au paragraphe 5.3.5 de la norme EN 12453).
En cas de panne d’électricité, pour ouvrir manuellement, il suffit d’agir sur la dispositif de
deblocage qui se trouve sur le levier d’entraînement (Fig. 8).
ENTRETIEN
Effectuer seulement par personnel specialisé apres avoir coupé l’alimentation.
Graisser tous les ans les parties mobiles à l’intérieur du caisson et contrôler la force de
poussée exercée par l’operateur sur le portail. En cas d’entretien de l’operateur, il est
possible de le sortir du caisson sans enlever le vantail.
-Après avoir ôté le couvercle du caisson et débranché le câble d’alimentation du moteur,
extraire à la main le levier courbe de déplacement, de façon à pouvoir ouvrir le vantail.
- De suite, on doit dévisser le 4 écrous qui fixent le réducteur.
ATTENTION:Pour ne pas rendre trop difficile le débrayage
manuel, veiller à ce que les vantaux ne viennent
pas buter sur le sabot au sol. Dans le cas
contraire, le déblocage résulte impossible.
REGLAGE DE L’EMBRAYAGE DE SECURITE
Le DUKE n’est pas pourvu de limitateur de couple mécanique.
Il est donc necessarie de commander ce operateur au moyen d’un coffret électronique
doté de limitateur de force électronique.
Nous vous conseillons d’utiliser des coffret électronique T2 (pour 1 ou 2 moteurs
monophasés).
SECURITES ELECTRIQUES
A dapter les installation du parties electriques aux normes et lois en vigueur. Nous vous
conseillons d’utiliser un coffret électronique T2 (pour 1 ou 2 moteurs monophasés).
Pour ce qui est des raccordements et des données techniques des accessoires, se référer
OPTIONS T2
Pour les branchements et les données techniques des accessoires, se conformer aux livrets d’instruction correspondants.
code ABT2000 => CRX 230/50-60HZ
code ABT2001 => 230/50-60HZ
code ABT2002 => CRX 120/60HZ
code ABT2003 => 120/60HZ
T2 Wi-Fi
Avec carte MASTER Wi-Fi
code ABT2001W
Auto-apprentissage course et temps
Ouverture piétonne
Fermeture automatique totale et piétonne
Pré-clignotement
Ralentissement réglable en approche
Réglage de la force
Commande radio automatique ou pas à pas ouverture totale
Commande radio automatique ou pas à pas ouverture piétonne
Commande simple automatique ou pas à pas
Coup de bélier serrure électrique
Récepteur radio incorporé
Gestion photocellules
Gestion de la fermeture immédiate par les photocellules après le passage
Gestion clignotant
Gestion cordon de securité
Autotest cordons de sécurité comme requis par la norme EN12453
Sélecteur à clef
Buzzer
Serrure électrique
16
F
EMETTEUR RADIO SUN
CAISSE DE FONDATION POUR DUKE 110°
SUN 2CH
SUN CLONE 2CH
code ACG8435
CAISSE DE FONDATION POUR DUKE 180°
code ACG6052
code ACG6056
SUN 4CH
SUN CLONE 4CH
code ACG6054
code ACG6058
FIT SLIM
code ACG8436
PHOTOCELLULES MURALES
code ACG8032
PAIRE DE POTEAUX POUR PHOTOCELLULES FIT SLIM
code ACG8065
Les photocellules FIT SLIM ont la fonction de synchronisme dans le
courant à C.A. et les gammes de 20 m.
Plusieurs paires sont appliqués, rapprochés les uns des autres grâce
au circuit synchronisé.
Ajouter le TRANSMETTEUR TX SLIM SYNCRO
code ACG8029
s’il existe plus de deux paires de photocellules (jusqu’à 4).
code ACG2120
SPARK
DÉBRAYAGE AVEC CYLINDRE DIN
DÉBRAYAGE À CLÉ TRIANGLE
code ACG2125
Afin d’optimaliser les performances des appareils suscités, il est indispensable d’installer
une antenne accordée sur la fréquence du radiorécepteur installé.
N.B. Veiller à ce que le fil central du câble n’entre pas en contact avec l’enveloppe
extérieure en cuivre; dans le cas contraire, le fonctionnement de l’antenne
serait nul.
L’antenne doit être installée de façon perpendiculaire et être en vue de la télécommande.
FEU CLIGNOTANT SPARK avec carte intermittente incorporée
c o d e
ACG7059
SUPPORT LATERAL
code ACG7042
ANTENNE SPARK 91 code ACG5454
ANTENNE SPARK 433
code ACG5452
DÉBRAYAGE À CLÉ À LEVIER
code ACG2130
17
F
DISPOSITIFS Wi-Fi
MASTER Wi-Fi
FICHE DE GESTION SYSTÈME SANS FILS
embrochable - 12÷30V ac/dc
avec bornes à visser - 12÷30V ac/dc
NOVA Wi-Fi
PHOTOCELLULES SANS FILS
PAIRE DE POTEAUX NOVA
code ACG6094
code ACG6099
TOUCH Wi-Fi
VERTIGO Wi-Fi
BARRE PALPEUSE SANS FILS
PHOTOCELLULES SANS FIL POUR REMPLACER LA BARRE PALPEUSE
VERTIGO Wi-Fi 8 code ACG8042
VERTIGO Wi-Fi 10 code ACG8043
code ACG3016
SPARK Wi-Fi
BLOCK Wi-Fi
FEU CLIGNOTANT SANS FILS
SUPPORT LATERAL
SÉLECTEUR À CLÉ SANS FILS
code ACG6098
T2 Wi-Fi
Tableau avec reglage de la force et carte MASTER Wi-Fi.
Avec boîtier.
code ACG8037
code ACG8039
code ABT2001W
18
code ACG7064
code ACG7042
G
B
SYSTEM LAY-OUT
TECHNICAL FEATURES
❷
The DUKE is an irreversible operator complete with mechanical limit switches
and a trafficable cover.
DUKE 110° varying the speed of the opening and closing movements (opening
movement initially slow, then fast; closing movement initially fast, then slow
immediately before shutting).
The DUKE functions as a load-bearing centre hinge, designed in such a way
that the motor can be removed for servicing purposes without taking down
the gate.
The DUKE will comfortably operate gates and doors up to 800 kg in weight and
2 metres in length.
❸
❻
❺
❺
❶
❶
❻
❶
DUKE 110°
❶
Max. leaf weight
kg
3,5*
kg
800 (2 m) - 400 (3,5 m)
Average opening time
s.
Max torque
Nm
20
30
330
230V~ 50/60Hz
Motor capacity
W
302
Power absorbed
A
1,5
Capacitor
µF
10
Power supply 120V
Thrust force with constant turns
❺
❺
DUKE 180°
Max. leaf weight
EEC Power supply
❹
❹
TECHNICAL DATA
120V~ 60Hz
N
352
Power absorbed
A
3,7
Capacitor
µF
35
Normative cycles 230V/50-60Hz
n°
8 - 20s/2s
6 - 30s/2s
Normative cycles 120V/60Hz
n°
14 - 20s/2s
9 - 30s/2s
Daily operations suggested
n°
100
Service
❶ DUKE operator
❷ Radio antenna
❸ Blinker
❹ Photoelectric cells (external)
❺ Photoelectric cells (internal)
❻ Key selector
Guaranteed consecutive cycles
50%
n°
22 - 20s/2s
Weight of operator + its box
kg
21
Noise
db
<70
Working temperature
°C
-10 ÷ +55
Protection
IP
67
Lubrification
1
13 - 30s/2s
with grease
35
* For leaves longer than 2 m it is suggested fitting an electro-lock
4
5/1,
Ø3
240/9,4
67/2,6
27/1
95/3,7
,4
27/1
5/1
163/6,4
Ø3
67/2,6
163/6,4
62/2,4
66/2,6
80/3,1
114/4,5
327/2,9
Ø 80/3,1
Ø 80/3,1
114/4,5
385/15,1
Measurements in mm/inch
19
2
INSTALLATION DUKE
INSTALLING THE DUKE 110°
PRE-INSTALLATION CHECKS
- Make sure that the pivot of foundation box is well greased. Lay down the ball
(CVA1479) end insert drive rod CME5224 after fitting release system (picture 7).
- Fit gate bracket plate CME6987 through its pivot in the drive rod (picture 8).
- Place gate leaf between upper hinge and plate of gate bracket (hinge and pivot of
gate bracket plate should be perfectly aligned).
- Weld carefully bracket plate on the leaf.
- Fit adjusting open position bolt A (picture 11) M10X30 and relevant nut.
- Fit Duke operator inside the foundation box (picture 4).
- Screw on pulling lever adjusting bolt M10x60 and relevant nut (picture 11).
- Fit joint lever CCA1360 (picture 4).
-ATTENTION: joint lever CCA1360 must be fitted as shown in picture 4. Should it be
difficoult to fit, operate electrically the reducer.
The leaf must be fixed firmily on the hinges to the pillars, must not be flexible during the
movement and must move without frictions.
Before the installation of DUKE, verify all dimensions etc.
There’s no need for any modification, if the gate is like that shown in Fig. 1.
Gate features must be uniformed with the standards and laws in force. The gate
can be automated only if it is in a good condition and its conditions comply with the EN
12604 norm.
- The gate leaf does not have to have a pedestrian opening. In the opposite case it
is necessary to take the appropriate steps, in accordance with EN 12453 norm (for
instance; by preventing the operation of the motor when the pedestrian opening is
opened, by installing a safety microswitch connected with the control panel).
- No mechanical stop shall be on top of the gate, since mechanical stops are not safe
enough.
Parts to install meeting the EN 12453 standard
USE OF THE SHUTTER
Skilled persons
(out of public
area*)
Skilled persons
(public area)
Unrestricted use
A
B
non possibile
with visible impulses
(e.g. sensor)
C or E
C or E
C and D, or E
with not visible
impulses
(e.g. remote control
device)
C or E
C and D, or E
C and D, or E
C and D, or E
C and D, or E
C and D, or E
COMMAND TYPE
with manned
operation
automatic
250
G
B
460
0
38
3
* a typical example are those shutters which do not have access to any public way
A: Command button with manned operation (that is, operating as long as activated),
like code ACG2013
B: Key selector with manned operation, like code ACG1010
C: Adjustable power of the motor
D: Safety strips and/or other safety devices to keep thrust force within the limits of
EN12453 regulation - Appendix A.
E: Photocells, like code ACG8026 (To apply every 60÷70cm for all the height of the
column of the gate up to a maximum of 2,5m - EN 12445 point 7.3.2.1)
CCA1360
PREPARE THE CEMENTATION OF THE BOX
- Excavate a trench next to the pillar (Fig. 3).
-On the bottom of foundation box a 50 mm Ø pipe should be fitted to drain water. On
one side of the box another pipe 32 mm Ø should be fitted. Pipe should be flexible,
sturdy and insulated type, to let out electrical wiring (use holes on internal side of gate
opening).
ENSURE THAT THE CABLE JOINTS ARE MADE inside a sealed junction box OUTSIDE
THE DUKE BOX (The junction box can be built-in to the wall or surface mounted,
positioned at a safe height and must comply with the relevant standards).
- Use a level to position the box so that the upper edge of the cover corresponds with
the finished floor level.
- The centreline of the pintles must be perfectly in line with the centreline of the operating
arm mounting shaft.
- DUKE 110°: Cement in, taking care to ensure that cement does not fall into the
box and checking that the short sides of the box are perfectly parallel to the gate
when in the “CLOSED” position.
- DUKE 180°: Cement in, taking care to ensure that cement does not fall into the
box and checking that the short sides of the box are perfectly perpendicular to
the gate when in the “CLOSED” position.
- Insert the bolts for cover fixing in places cut into the foundation box.
CCA1360
SX
DX
4
20
G
B
5
6
CME6987
ACG2120
ACG2125
ACG2130
CME5224 (DUKE 110°)
CME5230 (DUKE 180°)
7
8
DUKE 180°
DUKE 110°
Tube for electric cables
62 mm
62 mm
Tube for water drain
Tube for water drain
Tube for electric cables
9
10
21
G
B
INSTALLING THE DUKE 180°
DX
- Make sure that the pivot of foundation box is well greased. Lay down the ball (CVA1479) end
insert drive rod CME5230 after fitting release system (picture 7).
- Fit gate bracket plate CME6987 through its pivot in the drive rod (picture 8).
- Place gate leaf between upper hinge and plate of gate bracket (hinge and pivot of gate
bracket plate should be perfectly aligned).
- Weld carefully bracket plate on the leaf.
- Fit Duke operator inside foundation box (picture 12) by means of enclosed nuts M12 and
washers on column side, while on opposite column side screw in “prolunghe” CME5228 and
relevant washers DRL12X24 (refer to exploded view at last page). ATTENTION: Duke motor
must be always placed as in picture 12 (motor on right side), no matter right or left side.
- Fit gearing plate by means of relevant nuts and washers M10.
- Insert bolt and nut for adjusting (A) (Picture 12).
- Insert gear train CME5226 into splined drive shaft, after fitting adjusting bolt B as in picture
12.
ATTENTION: adjusting of opening travel must be done by adjusting bolt B, but amplitude is
regulated by position of insertion of drive shaft. The wider the opening is needed the closer to
stop 1 it must be inserted (for left side fitting), or stop 2 (for right side fitting).
C
A
11
CCA1360
ADJUSTMENT OF DUKE 110° MECHANICAL STOPPER
The DUKE system requires no floor stops or other accessories as the gate travel limit is
determined by means of set screws located internally of the box.
Access to the screws is gained by lifting the cover.
- To adjust the travel limit for the opening movement of the gate, simply turn the screw (A)
left or right as appropriate, then secure the lock nut to prevent the screw from slipping
out of position subsequently (Fig. 11).
Same adjusting must be done also on bolt (C) for closing, in order to let the mechanism block
again when unblocked.
SX
GATE SHUT
A
2
IMPORTANT: Please make sure that the leaves stop against the
mechanical stoppers inside the operator before
they reached the ground mechanical stopper. In not
adjusted, unblocking will be impossible.
ADJUSTMENT OF DUKE 180° MECHANICAL STOPPER
To adjust the travel limits to the required positions, simply turn the relative screws A and B
left or right as appropriate, then secure the locks nuts to prevent the screws from slipping
out of position subsequently (Fig. 12).
Before this adjustment is made, the angular position of the stop must be selected
according to the maximum opening arc required:
A = CLOSING STOP
Adjusting must be done in order to let the mechanism block again when unblocked.
B = OPENING STOP
ATTENTION: further to adjusting opening bolt, it is necessary to insert drive shaft approximately
towards the stop where adjusting bolt will end (2 for left side and 1 for right side).
B
1
DX
GATE SHUT
2
A
IMPORTANT: Please make sure that the leaves stop against the
mechanical stoppers inside the operator before
they reached the ground mechanical stopper. In not
adjusted, unblocking will be impossible.
B
22
1
12
G
B
EMERGENCY RELEASE
ELECTRICAL SAFETY DEVICES
To be carried out after having disconnected the power supply to the motor.
In order to carry out the manual operation of the gate leaf the followings must be checked:
- That the gate is endowed with appropriate handles;
- That these appropriate handles are placed so to avoid safety risks for the operator;
- That the physical effort necessary to move the gate leaf should not be higher than 225
N, for doors/gates for private dwellings, and, 390N for doors/gates for commercial and
industrial sites ( values indicated in 5.3.5 of the EN 12453 norm) .
In the case of a power cut, the gate can be opened manually by releasing the lock on the
operating lever to allow the gate to move freely (Fig. 8).
T he installation must be installed according to the current regulations and laws. Use
the T2 (for one or two single-phase motors) electronic control unit. For connections and
technical data of accessories refer to the appropriate booklets.
MAINTENANCE
To be undertaken by specialized staff after disconnecting power supply.
Make certain that moving parts located inside the box are greased once a year, and check
the force transmitted through the drive to the gate.
In the event that the need for servicing or repairs should arise, the speed reducer can be
removed from the box without taking down the gate.
- Lift the cover from the box, isolate the motor from the power supply by disconnecting
the cable, then remove the curved lever: the gate can now swing freely.
- Then unscrew the for nuts that fix the motor.
IMPORTANT: Please make sure that the leaves stop against the
mechanical stoppers inside the operator before
they reached the ground mechanical stopper. In not
adjusted, unblocking will be impossible.
SAFETY CLUTCH ADJUSTMENT
There is no mechanical safety clutch with the DUKE.
Therefore it is necessary to operate this operator with an electronic control panel fitted
with an electronic force regulator.
Use the T2 (for one or two single-phase motors) electronic control unit.
ACCESSORIES T2
code ABT2000 => CRX 230/50-60HZ
code ABT2001 => 230/50-60HZ
code ABT2002 => CRX 120/60HZ
code ABT2003 => 120/60HZ
For the connections and the technical data of the optional equipments follow the relevant handbooks.
T2 Wi-Fi
With MASTER Wi-Fi card.
code ABT2001W
Automatic travel and timing code learning system
Pedestrian opening command
Pedestrian and total automatic closure
Pre-blinking
Adjustable slow speed in approaching
Electronic adjustment of the force
Radio command - step by step or automatic total opening
Radio command - step by step or automatic pedestrian opening
Single command - step by step or automatic
Electric lock release operation
Built-in radio receiver 433MHz
Management of the photocells
Automatic closing after the transit through the photocell
Management of the blinker
Management of the strips
Safety strip autotest as required by EN12453
Key selector
Buzzer
Electric lock
23
G
B
RADIO TRANSMITTER SUN
FOUNDATION BOX FOR DUKE 110°
SUN 2CH
SUN CLONE 2CH
cod. ACG8435
FOUNDATION BOX FOR DUKE 180°
code ACG6052
code ACG6056
SUN 4CH
SUN CLONE 4CH
code ACG6054
code ACG6058
FIT SLIM
cod. ACG8436
PHOTOCELLS FOR THE WALL-INSTALLATION
codeACG8032
PAIR OF COLUMNS FOR FIT SLIM
code ACG8065
FIT SLIM photocells have synchronism function in AC current and ranges of 20 m. You
can fit many couples close together thanks to the synchronising circuit.
Add the SYNCRO TRANSMITTER TX SLIM SYNCRO code ACG8029 for more than 2
photocells couples (up to 4).
RELEASE WITH DIN CYLINDER
code ACG2120
SPARK
RELEASE WITH TRIANGLE KEY
code ACG2125
In order to make the systems mentioned above give the best performances, you need to
install an antenna tuned on the frequency of the radio receiver installed.
N.B. Pay attention to not let the central wire of the cable to came Into contact with
the external copper sheath, since this would prevent the antenna from working.
Install the antenna vertically and in such a way the remote control can reach it.
SPARK BLINKER WITH IN-BUILT INTERMITTENT CARD code ACG7059
LATERAL SUPPORT
code ACG7042
SPARK ANTENNA 91
code ACG5454
SPARK ANTENNA 433
code ACG5452
RELEASE WITH HANDLE
code ACG2130
24
G
B
Wi-Fi DEVICES
MASTER Wi-Fi
RECEIVER CARD TO MANAGE WIRELESS SYSTEM
with connector - 12÷30V ac/dc
with terminal block - 12÷30V ac/dc
NOVA Wi-Fi
PHOTOCELLS WITHOUT WIRES
PAIR OF COLUMS NOVA
code ACG6094
code ACG6099
code ACG8037
code ACG8039
VERTIGO Wi-Fi
TOUCH Wi-Fi
SAFETY STRIP WITHOUT WIRES
WIRELESS PHOTOCELLS SUBSTITUTING THE SAFETY STRIP
VERTIGO Wi-Fi 8 code ACG8042 - VERTIGO Wi-Fi 10 code ACG8043
code ACG3016
SPARK Wi-Fi
BLOCK Wi-Fi
BLINKER WITHOUT WIRES
LATERAL SUPPORT
KEY SELECTOR WITHOUT WIRES
code ACG6098
T2 Wi-Fi
Control panel with electronic adjustment of the force and MASTER Wi-Fi card. With
container.
code ABT2001W
25
code ACG7064
code ACG7042
D
ANLAGEN LAY-OUT
TECHNISCHE EIGENSCHAFTEN
❷
DUKE ist ein Selbsthemmender Antrieb mit einen mechanischen Endanschlag
und eine befahrbare Abdeckung.
DUKE 110° ein Flügel-Verzögerungssystem sowohl bei der Öffnungs- als
auch bei der Schließbewegung (Beschleunigung der anfänglich langsamen
Öffnungsbewegung und Verzögerung der Schließbewegung am Anschlag) auf.
DUKE trägt das Flügelgewicht und der Motor kann für Wartungsarbeiten
entfernt werden, ohne den Flügel zu demontieren.
Mit DUKE können Türen und Tore bis zu 800 kg mit einer max. Flügellänge von
2m betätigt werden.
❸
❻
❺
❺
TECHNISCHE EIGENSCHAFTEN
❶
❶
3,5*
Max. Torgewicht
kg
800 (2 m) - kg 400 (3,5 m)
Öffnungszeit ca.
s
❶
30
Nm
330
230V~ 50Hz
Motorleistung
❶
20
Stromspannung und Frequenz
❹
W
302
Stromaufnahme
A
1,5
Kondensator
µF
10
Normative Zyklen
n°
Max. tägliche Zyklen
n°
8 - 20s/2s
50%
Garantierte kontinuierliche Zyklen
❺
n°
22 - 20s/2s
Schmierung
13 - 30s/2s
mit Schmiere
Motorgewicht + Gehäuse
❶ E-Torantrieb DUKE
❷ Antenne
❸ Blinkleuchte
❹ Photozelle Toraussenseitig
❺ Photozellen Torinnenseitig
❻ Schlusselschalter
6 - 30s/2s
100
Service
❺
DUKE 180°
m
Maximale Drehmoment
❻
❹
DUKE 110°
Max. Torflügelweite
kg
21
35
Geräusch
db
<70
Betriebstemperatur
°C
-10 ÷ +55
Schutzartklasse
IP
67
* Man empfiehlt einen elektrischen Schloss für Flügel länger als 2 Meter.
1
62
66
163
5
Ø3
240
27
95
27
67
163
5
67
Ø3
80
114
327
Ø 80
Ø 80
114
385
Abmessungen in mm
2
26
D
INSTALLATION DUKE
PRÜFUNG VON DER MONTAGE
INSTALLATION VON DUKE 110°
Das Flugeltor muß fest an der Angelpunkten der Träger fixiert sein, darf sich während der
Bewegung nicht biegen und ohne Reibung bewegen.
Bevor DUKE montiert wird ist es besser alle Hindernisse, die bei der Montage auftreten
können festzustellen.
Bei einem Tor wie in Abbildung 1 müssen keine Veränderungen vorgenommen werden.
Es ist erforderlich, die Charakteristiken des Tors an die geltenden Normen und
Gesetze anzupassen. Das Tor kann nur automatisch Angeschlossen werden, wenn es
in einem einwandfreien Zustand ist und der EN12604 entspricht.
- Das Tor welches keine Gehfluegelfunktion hat,in diesem Fall ist es erforderlich das Tor
mit der norm EN12453 in Einklang zu bringen(z.B. das in Bewegung setzen des Motors
per Handsender, wenn der Gehfluegel geoeffnet ist. Das zu vehindern koennen sie
einen Endschalter anschliessen der beim oeffnen des Gehfluegel andere automatischen
funktionen ausser Kraft setzt).
- Es dürfen keine mechanischen Anschläge über dem Tor vorhanden sein, da diese nicht
ausreichend sicher sind.
- Den Bolzen von Fundamentgehäuse sorgfältig schmieren. Die Kugel (CVA1479) legen,
und den Zughebel CME5224 einsetzen, nachdem man die gewählte Lösung fixiert hat
(Abb. 7).
-
Den Flachstahl von Torkupplung CME6987 mit seinem Bolzen in den Zughebel
einsetzen (Abb. 8).
- Den Torflügel zwischen dem obenen Stützzapfen und dem Flachstahl von Torkupplung
aufstellen (der Stützzapfen und der Bolzen vom Torkupplungsflachstahl müssen
perfekt gegeneinander in Achse sein).
- Den Flachstahl von Torkupplung sorgfältig auf den Flügel löten.
- Die Öffnungseinstellschraube A (Abb. 11) M10X30 und ihre Mutter einsetzen.
- Den Motor ins Gehäuse fixieren (Abb. 4).
- Auf dem Zughebel die Einstellschraube M10x60 (C) und ihre Mutter einschrauben
(Abb. 11).
- Den Verbindungshebel CCA1360 einsetzen (Abb. 4).
- ACHTUNG: Der Verbindungshebel CCA1360 soll wie per Abb. 4 installiert werden.
Wenn unmöglich, den Antrieb elektrisch betätigen.
Komponenten zur Installation nach der Norm EN1253
STEUERUNGSSYSTEM
mit Totmannschaltung
(außer einem
öffentlichen
Platz*)
Fachpersonen
(öffentlicher
Platz)
Grenzlose
Anwendung
A
B
nicht möglich
mit sichtbaren
(z.B. Sensor)
C oder E
C oder E
C und D, oder E
mit nicht sichtbaren
Impulsen (Fernsender)
C oder E
C und D, oder E
C und D, oder E
automatisch
C und D,
oder E
C und D, oder E
C und D, oder E
250
ANWENDUNG DER SCHLIESSUNG
Fachpersonen
* e in Musterbeispiel dafür sind jene Türe, die keine Zufahrt zu einem öffentlichen
Weg haben
A: Betriebstaste mit Totmannschaltung (das heißt, aktivieren sie eine Funktion,
solange man sie gedrückt hält), wie Kode ACG2013
B: Schlüsselselektor mit Totmannschaltung, wie Kode ACG1010
C: Justierbare Kraft des Motors
D: Kontaktleiste und /oder andere Sicherheitseinrichtungen muessen mit den Norm
EN12453 uebereinstimmen (Anhang A).
E: Photozelle, wie Kode ACG8026 (Jede 60÷70 cm für die ganze Höhe der Spalte des
Gatters bis zu einem Maximum von 2,5 m anwenden - EN 12445 Punkt 7.3.2.1)
460
0
38
3
CCA1360
BEREITEN SIE DIE ZEMENTIERUNG DES GEHÄUSE VOR
- Die Grube im Boden an der Kante des Pfeilers (Abb. 3).
- Am Boden vom Kasten ein Rohr Ø 50 mm aus PVC für den Abfluss vorbereiten, und auf
einer Seite ein Nichtleiter-Rohr Ø 32 mm Typ “biegsam schwer” für Kabelabgang (bitte
die internen Löcher von Toröffnung benutzen).
Diese Abzweigdose, die den einschlägigen Vorschriften entsprechen muß, kann
entweder unter Putz angebracht oder außen befestigt werden; dabei muß eine MindestSicherheitshöhe eingehalten werden.
- Den Kasten mit Hilfe einer Wasserwaage so positionieren, daß die obere Kante des
Deckels mit der fertigen Bodenfläche zusammenfällt.
- Die Achse der Angelzapfen muß perfekt mit der Achse der Zughebelwelle übereinstimmen.
- DUKE 110°: Das ganze einzementieren. Dabei darauf achten, daß kein
Zementsand in den Kasten eindringt und sicherstellen, daß die kürzeren Seiten
des Kastens perfekt parallel zum Tor stehen, wenn dieses “GESCHLOSSEN” ist.
- DUKE 180°: Das ganze einzementieren. Dabei darauf achten, daß kein
Zementsand in den Kasten eindringt und sicherstellen, daß die kürzeren Seiten
des Kastens perfekt rechtwinklig zum Tor stehen, wenn dieses “GESCHLOSSEN”
ist.
- Setzen Sie die Schrauben zur Befestigung der Abdeckung an Orten, in das Fundament
Fall geschnitten.
CCA1360
SX
DX
4
27
D
5
6
CME6987
ACG2120
ACG2125
ACG2130
CME5224 (DUKE 110°)
CME5230 (DUKE 180°)
7
8
DUKE 180°
DUKE 110°
Röhre für elektrische Kabel
62 mm
62 mm
Röhre für Wasserabfluss
Röhre für Wasserabfluss
Röhre für elektrische Kabel
9
10
28
D
INSTALLATION VON DUKE 180°
DX
-D
en Bolzen von Fundamentgehäuse sorgfältig schmieren. Die Kugel (CVA1479) legen, und
den Zughebel CME5230 einsetzen, nachdem man die gewählte Lösung fixiert hat (Abb. 7).
-D
en Flachstahl von Torkupplung CME6987 mit seinem Bolzen in den Zughebel einsetzen
(Abb. 8).
-D
en Torflügel zwischen dem obenen Stützzapfen und dem Flachstahl von Torkupplung
aufstellen (der Stützzapfen und der Bolzen vom Torkupplungsflachstahl müssen perfekt
gegeneinander in Achse sein).
-D
en Flachstahl von Torkupplung sorgfältig auf den Flügel löten.
-D
en Motor ins Gehäuse fixieren (Abb. 12). Auf der Säulenseite die Mutter M12 und die
Scheiben benutzen, auf der anderen Seite die Verlängerungen CME5228 und die Scheiben
DRL12X24 einschrauben (auf der letzten Seite nachprüfen). ACHTUNG: für Tore auf beiden
Positionen gestellt (rechts oder links) muß man den Motor immer wie per Abb. 12 einsetzen
(Motor rechts).
-D
ie Platte mit dem Zahnrad dank der Mutter und der Scheiben M10 fixieren.
-D
ie Einstellschraube und -mutter (A) einsetzen (Abb. 12).
-D
en Zugzahnrad CME5226 auf die Keilwelle einsetzen, nach der Regulierung der
Einstellschraube B wie per Abb. 12.
ACHTUNG: die Einstellung von Öffnungszug erfolgt dank Einstellungsschraube B, die
Breite dieses Zug erfolgt dank der Einstellungsposition vom Zugzahnrad. Je breiter die
gewünschte Öffnung, je tiefer der Zugzahnrad in Richtung Sperrung 1 (Montage link), oder
in Richtung Sperrung 2 (Montage rechts).
C
Mit einem DUKE-Antrieb erübrigen sich Anschläge im Boden o.ä., da er über interne,
regulierbare Endlagenschrauben zur Begrenzung der Torbewegung verfügt.
Für den Zugang zu den Schrauben die Abdeckung abnehmen.
-D
ie gewünschte Toröffnung über Ein- bzw. Abdrehen der entsprechenden
Endlagenschraube (A) einstellen. Anschließend die Position durch Arretieren der
Gegenmutter fixieren (Abb. 11).
Die gleiche Einstellung bitte auch für die Schliessungsschraube (C) ausführen, indem man die
Zugzahnradkupplung bei der Entsicherung ermöglicht.
11
CCA1360
SX
EINSTELLUNG MECHANISCHE ENDANSCHLÄGE DUKE 110°
A
TOR GESCHLOSSEN
A
2
WICHTIG: Versichern sie sich das die mechanischen Stopper am
Antrieb richtig eingestellt sind und den Antrieb stoppen
bevor er die Anschläge am Boden berührt. Im anderen
Fall ist die Entsicherung unmöglich.
EINSTELLUNG MECHANISCHE ENDANSCHLÄGE DUKE 180°
Die Torbewegung wird über die betreffenden Endlagenschrauben A bzw. B und
anschließende Lageneinstellung durch Arretieren der Gegenmuttern begrenzt (Abb.12).
-D
ie Torbewegung je nach gewünschtem Öffnungswinkel durch Einstellen der
Anschlagposition begrenzen:
A = SCHLIESSPERRUNG
Bitte die Sperrung einstellen, indem man die Zugzahnradkupplung bei der Entsicherung
ermöglicht.
B = ÖFFNUNGSSPERRUNG
ACHTUNG: die Schraube für die Öffnung einstellen, dazu den Zugzahnrad in Richtung
Einstellschraubensperrung einsetzen (2 links, 1 rechts).
B
1
DX
TOR GESCHLOSSEN
2
A
WICHTIG: Versichern sie sich das die mechanischen Stopper am
Antrieb richtig eingestellt sind und den Antrieb stoppen
bevor er die Anschläge am Boden berührt. Im anderen
Fall ist die Entsicherung unmöglich.
B
29
1
12
D
NOTENTRIEGELUNG
ELEKTRISCHE SICHERHEITEN
Diese darf nur nach Unterbrechung der Stromzufuhr zum Motor durchgeführt
werden.
Um das Tor manuell richtig zu pruefen muessen folgende Punkte beachtet werden:
-D
as Tor muss einen geeigneten Griff haben.
-D
ieser Griff muss so angebracht sein das er kein Risiko ist beim Test.
-D
aß die physische notwendige Kraft um das Tor-Blatt zu bewegen nicht höher als
225N ist, für Tore bei privaten Wohnungen, und 390N für Tore für kommerzielle und
industrielle Situationen (Werte nach 5.3.5 vom EN 12453 Norm).
Um das Tor bei Stromausfall von Hand öffnen zu können, genügt es, das Schloß am
Zughebel zu öffnen, um die Flügelbewegung freizugeben (Abb. 8).
Die Installation muß nach die aktuellen Gesetznormen installiert werden.
Es wird die Verwendung der elektronischen Steuergeräte T2 (für 1 oder 2 einphasige
Motoren) empfohlen.
Für die Anschlüsse und technische Daten der Zubehörteilen verweisen wir auf die
entsprechenden Bedienungshandbücher.
WARTUNG
Die Wartungsarbeit nur durch spezialiesierten Fachleuten nach der Ausschliessung
der Spannung auszuführen.
Die Bewegungsteile im Getriebekasten jährlich schmieren und die Druckkraft des
Getriebes auf das Tor überprüfen. Das Getriebe kann für Wartungsarbeiten aus dem
Gehäuse entfernt werden, ohne den Torflügel zu demontieren.
- Die Gehäuseabdeckung abnehmen, die Stromzufuhr zum Motor unterbrechen, den
Bewegungshebel von Hand herausziehen und den Flügel öffnen.
- Die 4 Motormutter entschrauben.
WICHTIG: Versichern sie sich das die mechanischen Stopper am
Antrieb richtig eingestellt sind und den Antrieb stoppen
bevor er die Anschläge am Boden berührt. Im anderen
Fall ist die Entsicherung unmöglich.
EINSTELLUNG DER RUTSCHKUPPLUNG
Bei DUKE ist keine mechanische Rutschkupplung vorhanden.
Es ist daher notwendig, diesen Torantrieb mittels einer elektronischen Rutschkupplung
ausgerüstet ist.
Es wird die Verwendung der elektronischen Steuergeräte T2 (für 1 oder 2 einphasige
Motoren) empfohlen.
OPTIONEN T2
Für die Anschlüsse und die technischen Daten der Zubehöre verweisen wir auf die entsprechenden Betriebsanleitungen.
Kode ABT2000 => CRX 230/50-60HZ
Kode ABT2001 => 230/50-60HZ
Kode ABT2002 => CRX 120/60HZ
Kode ABT2003 => 120/60HZ
T2 Wi-Fi
Mit Steuereinheit MASTER Wi-Fi
Kode ABT2001W
Automatisches lernen des Weges-Hub und Zeiten
Fußgängeröffnung
Automatisches Fußgänger- und totalschliessen
Vorblinken
Sie können den Sanft-Stop beim schließen regeln
Elektronische Kupplung
Automatischer - oder Schrittfunkbefehl totalöffnung
Automatischer - oder Schrittfunkbefehl Fußgängeröffnung
Automatischer - oder “step by step” Einzelimpuls
Elektrischer Verriegelung Freigabebetrieb
Eingebautes Radiogerät 433MHz
Überwachung den Fotozellen
Sofortige Schließung nach Durchfahrt von Fotozellen
Überwachung der Blinklicht
Überwachung den Kontaktleiste
Selbstkontrolle der Sicherheitsrippen, gemäß Vorschrift der Norm EN12453
Schlüsselschalter
Buzzer
Elektrische Verriegelung
30
D
A - VERBINDUNGEN
FERNSENDER SUN
FUNDAMENTGEHÄUSE FÜR DUKE 110°
SUN 2CH
SUN CLONE 2CH
Kode ACG8435
FUNDAMENTGEHÄUSE FÜR DUKE 180°
Kode ACG6052
Kode ACG6056
SUN 4CH
SUN CLONE 4CH
Kode ACG6054
Kode ACG6058
FIT SLIM
Kode ACG8436
WANDFOTOZELLEN
Kode ACG8032
EIN PAAR FOTOZELLEN-STAENDER FÜR FIT SLIM Kode ACG8065
FIT SLIM Fotozellen haben Synchronismusfunktion im Wechselstrom Strom und Strecken
20 m.
Dank einer Synchronisiereinrichtung sind mehrere sich gegenseitig annähernde Paare
möglich.
Bei mehr als 2 Fotozellenpaare (bis 4), den SENDER SYNCRO TX SLIM SYNCRO
Kode ACG8029
Kode ACG2120
SPARK
ENTBLOCKUNG MIT ZYLINDER DIN
ENTBLOCKUNG MIT DREIPASSCHLÜSSEL
Kode ACG2125
Um die bestmöglichen Leistungen mit den o. g. Apparaten zu erhalten, muss eine auf die
Frequenz des Funkempfängers abgestimmte Antenne montiert werden.
Anmerkung: Besonders muss darauf geachtet werden, dass das Zentralkabel der
Leitung nicht mit der externen Kupferumwicklung in Kontakt kommt,
da dies die Funktion der Antenne außer Kraft setzt.
Die Antenne muss senkrecht, von dem Fernbetätigungsgerät aus sichtbar montiert
werden.
BLINKER SPARK mit eingebauter wechselsignalkarte
Kode ACG7059
SEITENLAGER
Kode ACG7042
ANTENNE SPARK 91 Kode ACG5454
ANTENNE SPARK 433
Kode ACG5452
ENTBLOCKUNG MIT HEBELSCHLÜSSEL
Kode ACG2130
31
D
Wi-Fi VORRICHTUNGEN
MASTER Wi-Fi
KARTE FÜR DEN BETRIEB DES SYSTEMS OHNE KABEL
mit Verbinder - 12÷30V ac/dc
mit Endblockierung - 12÷30V ac/dc
NOVA Wi-Fi
FOTOZELLEN OHNE KABEL
EIN PAAR FOTOZELLEN - STÄNDER NOVA
Kode ACG6094
Kode ACG6099
TOUCH Wi-Fi
Kode ACG8037
Kode ACG8039
VERTIGO Wi-Fi
KONTAKTLEISTE OHNE KABEL
KABELLOSE FOTOZELLE ERSETZT DIE SCHALTLEISTEN
VERTIGO Wi-Fi 8 Kode ACG8042 - VERTIGO Wi-Fi 10 Kode ACG8043
Kode ACG3016
SPARK Wi-Fi
BLOCK Wi-Fi
BLINKER OHNE KABEL
SEITENLAGER
SCHLÜSSELSCHALTER OHNE KABEL
Kode ACG6098
T2 Wi-Fi
Steuereinheit mit elektronische kupplung und Steckverbinder MASTER Wi-Fi. Mit
Gehäuse.
Kode ABT2001W
32
Kode ACG7064
Kode ACG7042
E
S
DISPOSICIÒN DE LA INSTALACIÒN
CARACTERÍSTICAS TÉCNICAS
❷
DUKE es un operador irreversible dotado de un sistema de fin de carrera
mecanico de tapa removible.
DUKE 110° está dotado de variacion de velocidad de la hoja ambos durante la
abertura y el cierre (comienzo de la abertura lento, después rápido y al fin cerra
lento cuando la hoja acerca el tope).
DUKE es portante de las hojas de la puerta y en caso que se necesita
manutencion se puede quitar el motor sin quitar la hoja.
DUKE accionarà facilmente puertas que pesan hasta 800 kg y tienen 2 metros
de largo.
❸
❺
❺
CARACTERÍSTICAS TÉCNICAS
❶
❶
Peso máx cancela
kg
Tiempo de abertura
s
Potencia motor
❶
800 (2 m) - 400 (3,5 m)
20
30
Nm
330
230V~ 50Hz
W
302
Absorcion
A
1,5
Condensador
µF
10
Ciclos normativos
n°
Ciclos diarios sugeridos
n°
8 - 20s/2s
Ciclos garantizados
❺
❶ Operador DUKE
❷ Antena de radio
❸ Intermitente
❹ Fotocélulas esternas
❺ Fotocélulas internas
❻ Interruptor de llave
50%
n°
22/20s
Lubricación
Peso operador + caja
6 - 30s/2s
100
Servicio
❺
DUKE 180°
3,5*
Alimentación y frecuencia
❹
❹
m
Coppia max
❻
DUKE 110°
Longitud máxima de la anta
13/30s
a grasa
kg
8
Nivel de ruido
db
<70
Temperatura de trabajo
°C
-10 ÷ +55
Nivel de protección
IP
67
* Se aconseja un cierre elèctrico para hojas de màs de 2 metros.
1
62
66
163
5
Ø3
240
27
95
27
67
163
5
67
Ø3
80
114
327
Ø 80
Ø 80
114
385
Mesures en mm
2
33
INSTALACIÓN DUKE
CONTROLES DE LA PRE-INSTALACIÓN
INSTALACIÓN DE DUKE 110°
La puerta de batiente debe fijarse sólidamente a las bisagras de las columnas y no debe
balancearse durante el movimiento.
Antes de proceder a la instalación de DUKE, es prudente verificar todos los espacios necesarios
para emplazarlo. Si la cancela se presenta como en la Fig. 1, no hace falta efectuar ninguna
modificación.
N.B. Es obligatorio adecuar las características de la cancela a las normas y leyes
vigentes.
La puerta puede ser automatizada sólo si se encuentra en buen estado y responde a la norma
EN 12604.
- La puerta no tiene que tener puertas peatonales. De lo contrario se tendrán que tomar las
oportunas precauciones de acuerdo con el punto 5.4.1 de la EN12453 (por ejemplo impedir
el movimiento del motor cuando la puertecilla está abierta, gracias a un microinterruptor
debidamente conectado a la central).
- No hay que generar puntos donde se pueda quedar atrapado (por ejemplo entre la puerta de
la cancela y la verja).
Las columnas de la verja tienen que llevar en su parte superior unas guías anti-descarrilamiento
para evitar desenganches involuntarios.
- No tiene que haber topes mecánicos por encima de la verja porque no son suficientemente
seguros.
-Engrasar con cuidado el pernio de contenedor de fundaciòn. Apoyar la bola (CVA1479) e
introducir la palanca de remolque CME5224 despuès de fijar el bloqueo eligido (Ilu. 7).
-Introducir el plato de la fijaciòn de hoja CME6987 a travès de su pernio en la palanca de
remolque (Ilu. 8).
-Posicionar la hoja de la puerta entre el fundamento superior y el plato de la fijaciòn de hoja
(fundamento y pernio de plato de fijaciòn de hoja tienen que estar perfectamente en
eje entre sì).
-Soldar con cuidado el plato de fijaciòn de hoja a la hoja.
-Introducir el tornillo de regulaciòn abertura A (Ilu. 11) M10X30 y su tuerca.
-Fijar el motor en el interior del contenedor (Ilu. 4).
-Atornillar en la palanca de remolque el tornillo M10x60 (C) y su tuerca (Ilu. 11).
-Introducir la palanca de conexion CCA1360 (Ilu. 4).
-ATENCION: La palanca de conexion CCA1360 tiene que ser aplicada como por ilu. 4. En caso
no sea posible instalarla asì, mover electricamente el motoreductor.
Componentes a instalar según la norma EN12453
250
E
S
USO DEL CIERRE
Personas expertas
(fuera de un área
pública*)
Personas
expertas
(área pública)
Uso ilimitado
A
B
non posivel
con impulsos a la vista
(ej. sensor)
CoE
CoE
C e D, o E
con impulso no a la
vista
(ej. telemando)
CoE
C e D, o E
C e D, o E
C e D, o E
C e D, o E
C e D, o E
TYPO DE MANDO
en presencia
alguien
automatico
de
460
0
38
3
*un ejemplo típico son los cierres que no dan a la calle.
A: Pulsador de mando en presencia de alguien, (es decir con acción mantenida), como
cód. ACG2013.
B: Interruptor de llave en presencia de alguien, como cód. ACG1010.
C: Regulacion de la fuerza del motor.
D: Nervaduras como cód. ACG3010 y / o otros dispositivos que limitan las fuerzas entre
limites de las normas EN 12453 - Appendix A.
E: Fotocélulas, como cód. ACG8026 (Da applicare cada 60÷70 cm por toda la altura de
la puerta hasta un máximo de 2,5 m (EN 12445 punto 7.3.2.1).
CCA1360
PREPARACIÓN DEL ENCEMENTADO DE LA CAJA
CCA1360
- Hacer una fosa en la tierra al lado de la columna (Fig. 3).
-Preparar en el fondo del contenedor un tubo Ø 50 mm en PVC de escape para agua y, en un
lado, un tubo Ø 32 mm aislante flexible pesado para la salida de los cables elèctricos (utilizar
los agujeros del lado interior de abertura hoja).
LAS UNIONES DE LOS CABLES TIENEN QUE HACERSE al interno de una caja de tipo
impermeable colocada AL EXTERIOR DE LA CAJA DE CEMENTACIÓN, encementada o fijada
a una altura mínima de seguridad y tendrá que garantizar el respeto de las normas.
-Con un nivel posicionar la caja de modo que el bordo superior de la tapa corresponde al plano
acabado del suelo.
-Los ejes del perno de la caja tienen que corresponder perfectamente con el eje del quicio.
- D
UKE 110°: Cementar prestando atención que el cemento no caiga dentro la caja
y controlar que las caras cortas de la caja estén perfectamente paralelas a la hoja
cuando en posición cerrado.
- D
UKE 180°: Cementar la caja y controlar que las caras cortas de la caja sean
perfectamente perpendicular a la hoja cuando en posición “CERRADO”.
-Insertar los tornillos para sujetar la tapa en lugares corte en la caja de cementación.
SX
DX
4
34
E
S
5
6
CME6987
ACG2120
ACG2125
ACG2130
CME5224 (DUKE 110°)
CME5230 (DUKE 180°)
7
8
DUKE 180°
DUKE 110°
Tubo para cables eléctricos
62 mm
62 mm
Tubo para descarga agua
Tubo para descarga agua
Tubo para cables eléctricos
9
10
35
E
S
INSTALACIÓN DE DUKE 180°
DX
- E ngrasar con cuidado el pernio de contenedor de fundaciòn. Apoyar la bola (CVA1479)
e introducir la palanca de remolque CME5230 despuès de fijar el bloqueo eligido (Ilu. 7).
- I ntroducir el plato de la fijaciòn de hoja CME6987 a travès de su pernio en la palanca de
remolque (Ilu. 8).
- P osicionar la hoja de la puerta entre el fundamento superior y el plato de la fijaciòn de hoja
(fundamento y pernio de plato de fijaciòn tienen que estar perfectamente en eje entre sì).
- S oldar con cuidado el plato de fijaciòn de hoja a la hoja.
- F ijar el motor en el interior del contenedor (Ilu. 12) utilizando en el lado de la columna las
tuercas M12 y las arandelas, mientras en el lado contrario de la columna atornillar las
alargaderas CME5228 y sus arandelas DRL12X24 (ver esquema al final). CUIDADO: tanto
en caso de hoja posicionada a la derecha, como a la izquierda, se tiene que introducir el
motor como por Ilu. 12 (motor a la derecha).
- F ijar la placa con el engranaje, utilizando sus tuercas y arandelas M10.
- I ntroducir el tornillo y la tuerca de registro (A) (Ilu. 12).
- I ntroducire el engranaje de remolque CME5226 en el àrbol de remolque con canaladura,
despuès fijar la tuerca de registro B como por Ilu. 12. CUIDADO: la regulaciòn de carrera de
abertura ocurre con tuerca de regulaciòn B, pero la extensiòn de carrera està determinada
por la posiciòn de inserciòn del engranaje de remolque. Si se quiere una abertura màs
ancha, se tiene que insertar màs el engranaje de remolque hacia el cierre 1 para montaje a
la izquierda o hacia el cierre 2 para montaje a la derecha.
C
REGOLAZIONE FINECORSA MECCANICI DUKE 110°
11
CCA1360
SX
Usando DUKE no es necesario fijar topes u otras cosas en la tierra porque està equipado
adentro de tornillos ajustables de parada para delimitar el recorrido de la hoja.
Para tener acceso a los tornillos es necesario quitar la tapa del DUKE.
- Para obtener la abertura deseada de la puerta es suficiente atornillar o desatornillar
el tornillo de bloqueo “A” y despues bloquear la tuerca de fijación para impedir que
modifique su posición en el futuro (Fig. 11).
Se tiene que realizar la misma regulaciòn tambièn en el tornillo (C) para el cierre, permitiendo
en el desbloqueo el reenganche de mecanismo.
A
PUERTA CERRADA
A
2
ATENCIÓN: en la operación de cierre, deben impedir que las hojas
de la cancela choquen con el paro a tierra. La hoja se
debe de parar por la intervención del fin de carrera
interno. En caso contrario es imposible el desbloqueo.
REGULACION TOPES MECANICOS DUKE 180°
Para parar el movimiento de la puerta en las posiciones deseadas es suficiente obrar
sobre los tornillos de parada A y B, bloqueando despues las tuercas de fijación para
impedir que modifique su posición en el futuro (Fig. 12).
Para delimitar el movimiento de la hoja es necesario mover la posición del tope según la
angulacion máxima de abertura requerida:
A = CIERRE DE CIERRE
Regular el cierre permitiendo en el desbloqueo el reenganche de mecanismo.
B = CIERRE DE ABERTURA
CUIDADO: ademàs que regular el tornillo para delimitar la carrera de abertura, se necesita
introducir el engranaje de remolque màs o menos hacia el cierre en que se pararà el tornillo
de regulaciòn (2 para izquierda y 1 para derecha).
B
1
DX
PUERTA CERRADA
ATENCIÓN: en la operación de cierre, deben impedir que las hojas
de la cancela choquen con el paro a tierra. La hoja se
debe de parar por la intervención del fin de carrera
interno. En caso contrario es imposible el desbloqueo.
2
B
36
A
1
12
E
S
DESBLOQUEO DE EMERGENCIA
SEGURIDAD ELÉCTRICA
Efectuar tras haber cortado la alimentaciòn al motor.
Para poder realizar en modo seguro el desplazamiento manual de la puerta hay que
controlar que:
- Las manillas de la puerta que se han proporcionado sean idóneas;
- Estas manillas no estén posicionadas en modo de crear puntos de peligro durante su
utilizo;
- El esfuerzo manual para mover la puerta no debe superar los 225N para las cancelas
colocadas en lugares privados y los 390N para las cancelas colocadas en sitios
comerciales e industriales (valores indiacados en el punto 5.3.5 de la norma EN 12453).
En caso de falta de energía, para poder abrir manualmente la puerta es suficiente
accionar la cerradura eléctrica, después empujar las dos hojas manualmente (Fig. 8).
Realizar la instalación conforme a las normas y leyes.
Se aconseja cuadro electrónico T2 (para 1 o 2 motores monofasis).
Para las conexiones y datos técnicos de los accesorios consulte el respectivo folleto.
MANTENIMIENTO
Estas operaciones deben ser efectuadas exclusivamente por personal
especializado y con el motor desconectado de la alimentación eléctrica.
-Cada año poner grasa sobre las piezas que se mueven dentro de la caja y controlar la
fuerza ejercitada por el motor sobre la puerta.
-Cada dos años es mejor una manutención al reductor substituyendo aceite. En caso
que se necesite hacer manutención al reductor es posible quitarlo de la caja sin
desmontar la hoja.
-Despues de haber quitado la tapa y haber desconectado el cable que da alimentaciòn
al motor, extraer manualmente la palanca así que es posible abrir la hoja.
-A seguir, destornillar las cuatro tuercas que fijan el motor.
ATENCIÓN: en la operación de cierre, deben impedir que las hojas
de la cancela choquen con el paro a tierra. La hoja se
debe de parar por la intervención del fin de carrera
interno. En caso contrario es imposible el desbloqueo.
REGULACION DEL EMBRAGUE
Con el DUKE el embrague mecánico no está presente.
Por lo tanto es necesario ordenar este motor usando un cuadro elétrico con ajuste
electrónico del embrague incorporado.
Se aconseja cuadro electrónico T2 (para 1 o 2 motores monofasis).
OPCIONALES T2
cód. ABT2000 => CRX 230/50-60HZ
cód. ABT2001 => 230/50-60HZ
cód. ABT2002 => CRX 120/60HZ
cód. ABT2003 => 120/60HZ
Para las conexiones y datos técnicos de los accesorios, consultar los manuales respectivos.
T2 Wi-Fi
Con tarjeta MASTER Wi-Fi
cód. ABT2001W
Autoaprendizaje carrera y tiempos
Abertura peatonal
Encierro automático peatonal y total
Pre-intermitencia
Moderación de velocidad en acercamiento regulable
Regulación de la fuerza
Gestión telemando - paso a paso o automática abertura total
Gestión telemando - paso a paso o automática abertura peatonal
Gestión Botón único - paso a paso o automática
Golpe de desenganche de la cerradura eléctrica
Radio receptor 433MHz incorporado
Administracion fotocélulas
Gestión de cierre inmediato después del tránsito por las fotocélulas
Administracion intermitencia
Administracion costas
Autotest costas de seguridad como requerido por la norma EN12453
Selector de llave
Buzzer
Cerradura eléctrica
37
E
S
CONTENEDOR DE FUNDACION PARA DUKE 110°
TELEMANDO SUN
SUN 2CH
SUN CLONE 2CH
cód. ACG8435
CONTENEDOR DE FUNDACION PARA DUKE 180°
cód. ACG6052
cód. ACG6056
SUN 4CH
SUN CLONE 4CH
cód. ACG6054
cód. ACG6058
FIT SLIM
cód. ACG8436
FOTOCÉLULAS PARA PARED
cód. ACG8032
PAR DE COLUMNAS PARA FIT SLIM
cód. ACG8065
Las fotocélulas FIT SLIM tienen una funciòn de sincronizaciòn en
corriente alterna y portada de 20 metros.
Pueden ser aplicadas màs parejas de fotocélulas cercanas gracias al
circùito de sincronizaciòn.
Añadir el TRANSMISOR TX SLIM SYNCRO
cód. ACG8029
para sincronizar hasta 4 parejas de fotocélulas.
DESBLOQUEO CON CILINDRO
SPARK
cód. ACG2120
DESBLOQUEO CON LLAVE A 3 ANGÚLOS
cód. ACG2125
Para obtener las mejores prestaciones de los citados aparatos, es necesario instalar una
antena sintonizada con la frecuencia del radioreceptor.
Importante:Controlar con atención que el hilo central del cable no
esté en contacto con la protección de cobre externa. Esto impediría el
funcionamiento de la antena.
Instale la antena verticalmente y de tal manera el mando a distancia puede alcanzarla.
INTERMITENTE SPARK con tarjeta intermitente incorporada
cód. ACG7059
SOPORTE LATERAL
cód. ACG7042
ANTENA SPARK 91 cód. ACG5454
ANTENA SPARK 433 cód. ACG5452
DESBLOQUEO CON LLAVE A PALANCA
cód. ACG2130
38
E
S
DISPOSITIVOS Wi-Fi
MASTER Wi-Fi
FICHA DE GESTIÓN SISTEMA SIN CABLES
con enchufe - 12÷30V ac/dc
con regleta - 12÷30V ac/dc
NOVA Wi-Fi
FOTOCÉLULAS SIN CABLES
PAR DE COLUMNAS NOVA
cód. ACG6094
cód. ACG6099
TOUCH Wi-Fi
VERTIGO Wi-Fi
COSTA SIN CABLES
FOTOCÉLULAS SIN CABLES PARA REEMPLAZAR A LA COSTA
VERTIGO Wi-Fi 8 cód. ACG8042 - VERTIGO Wi-Fi 10 cód. ACG8043
cód. ACG3016
SPARK Wi-Fi
BLOCK Wi-Fi
INTERMITENTE SIN CABLES
SOPORTE LATERAL
SELECTOR DE LLAVE SIN CABLES
cód. ACG6098
T2 Wi-Fi
Cuadro con regulación de la fuerza y tarjeta MASTER Wi-Fi.
Con contenedor.
cód. ACG8037
cód. ACG8039
cód. ABT2001W
39
cód. ACG7064
cód. ACG7042
NOTES
40
®
automatismi per cancelli
automatic entry systems
R.I.B. S.r.l.
25014 Castenedolo - Brescia - Italy
Via Matteotti, 162
Tel. ++39.030.2135811
Fax ++39.030.21358279 - 21358278
www.ribind.it - [email protected]
AZIENDA CON SISTEMA
DI QUALITÀ CERTIFICATO
DA DNV
COMPANY WITH QUALITY
SYSTEM CERTIFIED
BY DNV
DICHIARAZIONE DI CONFORMITÁ - DECLARATION OF COMPLIANCE
DÉCLARATION DE CONFORMITÉ - ÜBEREINSTIMMNUGSERKLÄRUNG
DECLARACIÓN DE CONFORMIDAD
Dichiariamo sotto la nostra responsabilità che l’operatore DUKE è conforme alle seguenti norme e Direttive:
L’opérateur DUKE se conforme aux normes suivantes:
We declare under our responsibility that DUKE operator is conform to the following standards:
Wir erklaeren das der DUKE den folgenden EN-Normen entspricht:
Declaramos bajo nuestra responsabilidad que los operators DUKE es conforme a la siguientes normas y disposiciones:
EN 301 489-1
2011
EN 55014-2
2009
EN 61000-6-1
2007
EN 301 489-3
2013
EN 60335-1
2014
EN 61000-6-2
2006
EN 300 220-1
2012
EN 60335-2-103 2010
EN 61000-6-3
2013
EN 300 220-3
2010
EN 61000-3-2
2011
EN 61000-6-4
2013
EN 55014-1
2012
EN 61000-3-3
2014
Inoltre permette un’installazione a Norme - Permit, en plus, une installation selon les normes suivants
You can also install according to the following rules - Desweiteren genehmigt es eine Installation der folgenden Normen:
Además permite una instalación según las Normas:
EN 12453
2002
EN 12445
2002
EN 13241-1
2011
Come richiesto dalle seguenti Direttive - Conformément aux Directives
As is provided by the following Directives - Wie es die folgenden Richtlinien verfügen
Tal y como requerido por las siguientes Disposiciones:
2006/95/CE
2004/108/CE
Il presente prodotto non può funzionare in modo indipendente ed è destinato ad essere incorporato in un impianto costituito da ulteriori elementi. Rientra perciò nell’Art. 6 paragrafo 2 della
Direttiva 2006/42/CE (Macchine) e successive modifiche, per cui segnaliamo il divieto di messa in servizio prima che l’impianto sia stato dichiarato conforme alle disposizioni della Direttiva.
Le présent dispositif ne peut fonctionner de manière indépendante, étant prévu pour être intégré à une installation constituée d’autres éléments. Aussi rentre-t-il dans le champ d’application
de l’art. 6, paragraphe 2 de la Directive machines 2006/42/CEE et de ses modifications successives. Sa mise en service est interdite avant que l’installation ait été déclarée conforme
aux dispositions prévues par la Directive.
This product can not work alone and was designed to be fitted into a system made up of various other elements. Hence, it falls within Article 6, Paragraph 2 of the EC-Directive 2006/42
(Machines) and following modifications, to which respect we point out the ban on its putting into service before being found compliant with what is provided by the Directive.
Dieses Produkt kann nicht allein funktionieren und wurde konstruiert, um in einen von anderen Bestandteilen zusammengesetzten System eingebaut zu werden. Das Produkt fällt deswegen
unter Artikel 6, Paragraph 2 der EWG-Richtlinie 2006/42 (Maschinen) und folgenden.
Este producto no puede funcionar de manera independiente y se tiene que incorporar en una instalación compuesta por otros elementos. Está incluido por lo tanto en el Art. 6 párrafo 2
de la Disposición 2006/42/CEE (Maquinaria) y sus siguientes modificaciones, por lo cual destacamos que está prohibido poner la instalación en marcha antes de que esté declarada
conforme a la citada Disposición.
Legal Representative
(Rasconi Antonio)
41
DUKE 110°
CTC1410
CAL1230
CTC1090 DUK6004ZZ
CMO1319
DUK6202ZZ
CTC1375
BA01097
CEL1810
DDMM12I
CME5221
CTC1013
DAC4X10
DRD4
CME5223
CEL1428
CRS62042R
DRL12X24I
CME6987
CAL1232
DSC6X20I
CME5222
CTC1372
CCA1393
CTC1371
CCA1360
CME5224
CCA1361
CVA1479
CZM6008
CTC1374
CAL1231
CVA1910
DDMM10I
CCA1362
DTE10X60I
CCA1392
DTM12X80I
DTE10X30I
DAE55X16
Codice
Denominazione Particolare
DDD12MAI
CME5223
Vite s/fine
DAC4X10
Vite trilob. TC CR 4X10 UNI8112
BA01097
Campana + Statore + Cavo
CME5224
Leva traino cassa DUKE 110°
DAE55X16
Vite aut. te. 5.5X16 p. tronca Z
CAL1230
Carter
CME6987
Piatto cancello cassa DUKE
DDD12MAI
Dado autobloccante M12 inox
CAL1231
Sotto carter
CMO1319
DDMM10I
Dado 10MA medio inox UNI5588
CAL1232
Ingranaggio albero traino
CRS62042R
Cusc. 6204/2RS
DDMM12I
Dado 12MA medio UNI5588 inox
CCA1360
Leva collegamento curva DUKE 110°
CTC1013
Chiavetta 8 7 25
DRD4
Rond. dentellata D=4 piana DIN6798
CCA1361
Leva traino corta DUKE 110°
CTC1090
Paraolio 20x30x5 Rolf
DRL12X24I
Rond. piana 12X24 inox
CCA1362
Lamierino di protezione
CTC1371
Spina cil. 12x70 non temp.
DTE10X30I
Vite TE 10X30 inox UNI5739
CCA1392
Cassa fondazione con sfera
CTC1372
Spina elastica 12X60 UNI6873
DTE10X60I
Vite TE 10X60 inox UNI5739
CCA1393
Coperchio cassa fondazione
CTC1374
Anello di tenuta OR 4725
DTM12X80I
Vite TE M12x80 inox
CEL1425
Cond. 10µF 450V c/cav. (L=35 cm)
CTC1375
Anello di tenuta OR 3450
DSC6X20I
Vite TSP.CR. 6X20 inox
CEL1428
Cap. occh. 5055 tot. stag. crimp
CTC1410
Paraolio 40x52x7 AS
DUK6004ZZ
Cusc. mot. 6004 ZZ JBL-ME-86
CEL1810
Pressacavo PRA 14/9 G1/4 IP67
CVA1479
Sfera D=20
DUK6202ZZ
Cusc. mot. 6202 ZZ JBL-ME-86
CME5221
Ingranaggio elic. Z24
CVA1910
Tappo D6-TPP-Neutro
CME5222
Albero traino
CZM6008
Cusc. mot. 6008ZZ 40x68x15
Rotore con albero
42
DUKE 180°
CTC1375
CAL1230
CTC1410
CTC1090
DUK6202ZZ
DUK6004ZZ
CME5228
DDMM12I
BA01097
CMO1319
CEL1810
DRL12X24I
CCA1362
CVA1910
CRS62042R
CME5221
CTC1013
CME5223
DRL12X24I
DAC4X10 DRD4
CME5230
CME6987
DSC6X20I
CEL1428
CAL1232
CCA1393
CME5226
DDD10MAI
CME5225
CTC1133
DDMM10
DRL10x20I
CME5227
CCA1392
DDMM10I
CME5229
DTE10X40I
CTC1372
CVA1479
CTC1371
DTE10X30I
CZM6008
CTC1374
CAL1231
DAE55X16
Codice
Denominazione Particolare
CME5229
Albero di traino DUKE 180°
DAC4X10
Vite autom. TC CR 4X10 TRIL. UNI8112
BA01097
Campana + Statore + Cavo
CME5230
Gruppo palmola c/ingr. DUKE 180°
DAE55X16
Vite aut. TE. 5.5X16 p. tronca Z
CAL1230
Carter
CME6987
Piatto cancello cassa DUKE
DDD10MAI
Dado autob. 10MA inox alto
CAL1231
Sotto carter
CMO1319
Rotore con albero
DDMM10
Dado 10MA medio UNI5588
CAL1232
Ingranaggio albero traino
CRS62042R
Cusc. 6204/2RS
DDMM10I
Dado 10MA medio UNI5588 inox
CCA1362
Lamierino di protezione
CTC1013
Chiavetta 8 7 25
DDMM12I
Dado 12MA medio UNI5588 inox
CCA1392
Cassa di fondazione con sfera
CTC1090
Paraolio 20x30x5
DRD4
Rond. dentellata D=4 piana DIN6798
CCA1393
Coperchio cassa di fondazione
CTC1133
Seeger I47
DRL10X20I
Rond. piana 10X20 inox
CEL1425
Cond. 10µF 450V c/cav. (L=35 cm)
CTC1120
Seeger E20
DRL12X24I
Rond. piana 12X24 inox
CEL1428
Cap. occh. 5055 tot. stag. crimp.
CTC1371
Spina cil. 12x70 non temp.
DTE10X25Z
Vite TE 10X25 UNI5739
CEL1810
Pressacavo PRA 14/9 G1/4 IP67
CTC1372
Spina elastica 12X60 UNI6873
DTE10X30I
Vite TE 10X30 UNI5739 inox
CME5221
Ingranaggio prima riduzione
CTC1374
Anello di tenuta OR 4725
DTE10X40I
Vite TE 10X40 UNI5739 inox
CME5223
Vite s/fine seconda rid.
CTC1375
Anello di tenuta OR 3450
DSC6X20I
Vite TSP.CR. 6X20 inox
CME5225
Ingranaggio ballerino
CTC1410
Paraolio AS 40x52x7 AS
DUK6004ZZ
Cusc. mot. 6004 ZZ JBL-ME-86
CME5226
Ingran. traino c/fermo DUKE 180°
CVA1479
Sfera D=20
DUK6202ZZ
Cusc. mot. 6202 ZZ JBL-ME-86
CME5227
Piastra fissaggio completa DUKE 180°
CVA1910
Tappo D6-TPP6-NEUTRO
CME5228
Distanziale piastra ingr. DUKE 180°
CZM6008
Cusc. mot. 6008ZZ 40X68X15
43
Questo prodotto è stato completamente progettato e costruito in Italia · Ce produit a été complètement développé et fabriqué en Italie · This product has been completely
developed and built in Italy · Dieses Produkt wurde komplett in Italien entwickelt und hergestellt · Artìculo totalmente proyectado y producido en Italia
®
automatismi per cancelli
automatic entry systems
25014 CASTENEDOLO (BS) - ITALY
Via Matteotti, 162
Tel. +39.030.2135811
Fax +39.030.21358279
www.ribind.it - [email protected]
Cod. CVA1759 - 26032015 - Rev. 14
DUKE
Scaricare