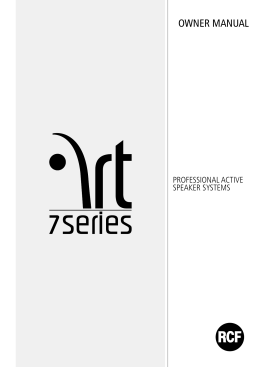
OWNER MANUAL
MANUALE D’USO
HDL20-A
HDL10-A
ACTIVE LINE
ARRAY MODULES
ENGLISH
LANGUAGE
ENGLISH
3
ITALIANO
23
ENGLISH
SAFETY
PRECAUTIONS
1. All the precautions, in particular the safety ones, must be read with special attention, as
they provide important information.
WARNING: to prevent the risk of fire or electric shock, never expose this product to rain
or humidity.
WARNING
2. POWER SUPPLY FROM MAINS
a. The mains voltage is sufficiently high to involve a risk of electrocution; install and
connect this product before plugging it in.
b. Before powering up, make sure that all the connections have been made correctly and
the voltage of your mains corresponds to the voltage shown on the rating plate on the
unit, if not, please contact your RCF dealer.
c. This unit is CLASS I construction, so it must be connected to a MAIN socket outlet with
a protective earthing connection.
d. Appliance coupler or PowerCon Connector® is used to disconnect device from MAIN
power. This device shall remain readily accessible after the installation
e. Protect the power cable from damage; make sure it is positioned in a way that it
cannot be stepped on or crushed by objects.
f. To prevent the risk of electric shock, never open this product: there are no parts inside
that the user needs to access.
3. Make sure that no objects or liquids can get into this product, as this may cause a short
circuit.
This apparatus shall not be exposed to dripping or splashing. No objects filled with liquid,
such as vases, shall be placed on this apparatus. No naked sources (such as lighted candles)
should be placed on this apparatus.
4. Never attempt to carry out any operations, modifications or repairs that are not expressly
described in this manual.
Contact your authorized service centre or qualified personnel should any of the following
occur:
-- The product does not function (or functions in an anomalous way).
-- The power cable has been damaged.
-- Objects or liquids have got in the unit.
-- The product has been subject to a heavy impact.
5. If this product is not used for a long period, disconnect the power cable.
6. If this product begins emitting any strange odours or smoke, switch it off immediately
and disconnect the power cable.
7. Do not connect this product to any equipment or accessories not foreseen.
For suspended installation, only use the dedicated anchoring points and do not try to hang
this product by using elements that are unsuitable or not specific for this purpose. Also
check the suitability of the support surface to which the product is anchored (wall, ceiling,
structure, etc.), and the components used for attachment (screw anchors, screws, brackets
not supplied by RCF etc.), which must guarantee the security of the system / installation
over time, also considering, for example, the mechanical vibrations normally generated by
transducers.
To prevent the risk of falling equipment, do not stack multiple units of this product unless
this possibility is specified in the user manual.
IMPORTANT
8. RCF S.p.A. strongly recommends this product is only installed by professional
qualified installers (or specialised firms) who can ensure correct installation
and certify it according to the regulations in force.
The entire audio system must comply with the current standards and regulations
regarding electrical systems.
3
ENGLISH
9. Supports and trolleys
The equipment should be only used on trolleys or supports, where necessary, that are
recommended by the manufacturer. The equipment / support / trolley assembly must be
moved with extreme caution. Sudden stops, excessive pushing force and uneven floors may
cause the assembly to overturn.
10. There are numerous mechanical and electrical factors to be considered when installing
a professional audio system (in addition to those which are strictly acoustic, such as sound
pressure, angles of coverage, frequency response, etc.).
11. Hearing loss
Exposure to high sound levels can cause permanent hearing loss. The acoustic pressure level
that leads to hearing loss is different from person to person and depends on the duration
of exposure. To prevent potentially dangerous exposure to high levels of acoustic pressure,
anyone who is exposed to these levels should use adequate protection devices. When a
transducer capable of producing high sound levels is being used, it is therefore necessary
to wear ear plugs or protective earphones. See the manual technical specifications to know
the maximum sound pressure level.
IMPORTANT NOTES
IMPORTANT NOTES
To prevent the occurrence of noise on line signal cables, use screened cables only and avoid
putting them close to:
-- Equipment that produces high-intensity electromagnetic fields.
-- Power cables.
-- Loudspeaker lines.
OPERATING
PRECAUTIONS
-- Place this product far from any heat sources and always ensure an adequate air
circulation around it.
-- Do not overload this product for a long time.
-- Never force the control elements (keys, knobs, etc.).
-- Do not use solvents, alcohol, benzene or other volatile substances for cleaning the
external parts of this product.
IMPORTANT NOTES
IMPORTANT NOTES
Before connecting and using this product, please read this instruction manual carefully and
keep it on hand for future reference. The manual is to be considered an integral part of
this product and must accompany it when it changes ownership as a reference for correct
installation and use as well as for the safety precautions. RCF S.p.A. will not assume any
responsibility for the incorrect installation and / or use of this product.
4
ENGLISH
PRODUCT
INFORMATIONS
The concept of this unique speaker derives from the touring industry, bringing in a compact
cabinet all the experience of RCF professional sound.
The vocals are natural, the sound is clear at longer distances, the spl power is stable at very
high levels.
The RCF Precision transducers equipping D LINE have been representing for decades the
ultimate performance, the highest power handling and the mos advanced technology in the
professional and touring industry.
The high power woofer delivers extremely accurate punchy bass, the custom made
compression driver offers a transparent midrange and extreme fidelity.
RCF Class-D power amplifiers technology packs huge performance operating with high
efficiency into a lightweight solution. D LINE amplifiers deliver ultra fast attack, realistic
transient response and impressive audio performance.
The integrated DSP manages crossover, equalisation, soft limiter, compressor and dynamic
bass boost.
D LINE cabinets are moulded on a special polypropylene composite material designed to
dampen down vibrations even at maximum volume settings.
From moulding to the final texture, D LINE offers the maximum reliability and strength for
the intensive use on the road.
D LINE TOURING AUDIO SOLUTIONS
The HDL20-A and HDL10-A are very compact, self-powered, 2-way line array loudspeaker
modules. The 700-watt Class-D amp modules accurately match the high quality digital
signal input boards with precise, complex filter responses that result in the natural,
detailed reproduction of the best direct radiating designs. They are the ideal choice when
line-array performance is needed but the venue size doesn’t call for the very long-throw
characteristics of larger line-arrays and a fast and easy setup is a must. The speakers deliver
extraordinary power handling, clarity, flexibility and great sound in a compact, easy to
handle and affordable package.
HDL20-A, HDL10-A
ACTIVE LINE ARRAY MODULES
THE INPUT SECTION PROVIDES:
- Out XLR connectors;
- IN XLR Jack combo
- system volume control;
- 5 configuration switch;
- 4 status LEDs.
HDL20-A IS A 2-WAY ACTIVE SYSTEM FEATURING:
- 10” neo woofer, 2,5” voice coil in horn loaded configuration;
- 2” exit, 3” voice coil neo compression driver;
- 100° x 15°, constant directivity coverage angle.
HDL10-A IS A 2-WAY ACTIVE SYSTEM FEATURING:
- 8” neo woofer, 2,0” voice coil in horn loaded configuration;
- 2” exit, 2,5” voice coil neo compression driver;
- 100° x 15°, constant directivity coverage angle.
THE AMPLIFIER SECTION FEATURES:
- 700 Watt switching power supply module;
- 500 Watt low frequency digital amplifier module;
- 200 Watt high frequency digital amplifier module;
- extra capacitor bus able to sustain the voltage for 100 ms burst signals.
The total available power supply power is 700 Watt and can be distributed to the 2 final
amplifier sections. Each amplifier section has a very high maximum output power capability
in order to provide, when necessary, maximum output bursts in a specific frequency range.
5
ENGLISH
POWER
REQUIREMENTS
AND SET-UP
The HDL line arrays Systems are designed to operate in hostile and demanding situations.
Nevertheless it is important to take extremely care of the AC power supply and set up a
proper power distribution.
The HDL line arrays Systems are designed to be GROUNDED. Always use a grounded
connection.
WARNING
The HDL amplifiers are designed to work within the following AC Voltage limits:
230 V NOMINAL VOLTAGE: minimum voltage 185 V, maximum voltage 260 V
115 V NOMINAL VOLTAGE: minimum voltage 95 V, maximum voltage 132 V.
If the voltage goes below the minimum admitted voltage the system stops working If
the voltage goes higher than the maximum admitted voltage the system can be seriously
damaged. To obtain the best performances from the system it is very important that the
voltage drop it is as low as possible.
VOLTAGE
Make sure that all the system is properly grounded. All the grounding points shall be
connected to the same ground node. This will improve reducing hums in the audio system.
GROUNDING
The module is provided with a Powercon outlet to daisy chain other modules. The maximum
number of modules that is possible to daisy chain is:
16 (SIXTEEN) OR 4 HDL 18-AS + 8 HDL 20-A MAXIMUM OR 8
HDL18-A.
AC CABLES DAISY CHAINS
230 Volt NOMINAL VOLTAGE: minimum voltage 185 Volt, maximum voltage 264
Volt (for UK 240V+10%)
115 Volt NOMINAL VOLTAGE: minimum voltage 95 Volt, maximum voltage 132
Volt.
6
A superior number of modules in daisy chain will exceed the Powercon connector maximum
ratings and create a potentially dangerous situation.
WARNING
When the HDL line arrays systems are powered from a three phase power distribution it
is very important to keep a good balance in the load of each phase of the AC power. It is
very important to include subwoofers and satellites in power distribution calculation: both
subwoofers and satellites shall be distributed between the three phases.
POWERING FROM
THREE PHASE
ENGLISH
REAR
PANEL
6
1
12
7
5
8
4
9
2
3
10
14
13
11
1 MAIN XLR INPUT (BAL/UNBAL). The system accept male XLR/Jack input connectors
with line level signals from a mixing console or other signal source.
2 LINK XLR OUTPUT. The output XLR male connector provides a loop trough for
speakers daisy chaining.
3 VOLUME. Controls the volume of the power amplifier. The control ranges from (maximum attenuation) to the MAX level ∞ (maximum output).
4 POWER INDICATOR. Power on indicator. When the power cord is connected and
the power switch is turned on this indicator lights green.
5 SIGNAL INDICATOR. The signal indicator lights green if there is signal present on
the main XLR input.
6 LIMITER INDICATOR. The amplifier has a built in limiter circuit to prevent clipping
of the amplifiers or overdriving the transducers. When the peak clipping circuit is active
the LED blinks orange. It is okay if the limit LED blinks occasionally. If the LED blinks
frequently or lights continuously, turn down the signal level. The amplifier has a built
in RMS limiter. If the RMS limiter is active the LED lights red. The RMS limiter has the
purpose to prevent damages the transducers. The speaker shall never be used with
the limit indicator red, continuous operation with the RMS protection active can cause
damages to the speaker.
7 HF. The switch gives the possibility to set high frequencies correction depending on
target distance (air absorption correction):
- NEAR (used for pole mount applications or near field)
- FAR (for farthest field).
8 CLUSTER. The combination of the 2 switches gives 4 possibilities of mid low
frequencies correction depending on cluster size.
- 2-3 modules (used for pole mount applications ground stacking)
- 4-6 modules (small flown systems)
- 7-9 modules (medium flown systems)
- 10-16 modules (maximum flown configuration).
9 HIGH CURVING. The switch gives the extra possibility to boost mid frequencies
depending on a high curving cluster configuration of few pieces.
- OFF (not active correction)
- ON (for high curving arrays of few pieces HDL20-A or HDL10-A).
10 INDOOR. The switch gives the extra possibility to set low frequencies correction
depending on a indoor/outdoor use, in order to compensate room reverberation on
lows.
- OFF (not active correction)
- ON (correction for reverberant indoor rooms).
7
ENGLISH
11 AC POWERCON RECEPTACLE. RCF D LINE uses a POWERCON locking 3-pole AC
mains. Always use the specific power cord provided in the package.
12 AC POWERCON LINK RECEPTACLE. Use this receptacle to link one or more units.
Always make sure that the maximum current requirement does not
exceed the maximum admitted POWERCON current. In case of doubt call the closest RCF
SERVICE CENTRE.
13 POWER MAIN SWITCH. The power switch turns the AC power ON and OFF. Make sure
that the VOLUME is set to - when you turn on the speaker.
14
FUSE.
CONNECTIONS
The XLR connectors use the following AES standard:
PIN 1 = GROUND (SHIELD)
HOT
GND
PIN 2 = HOT (+)
PIN 3 = COLD (-)
COLD
BAL. XLR
At this point you can connect the power supply cable and the signal cable, but before
turning on the speaker make sure that the volume control is at the minimum level (even
on the mixer output). It is important that the mixer is already ON before turning on the
speaker. This will avoid damage to the speakers and noisy “bumps” due to turning on parts
on the audio chain. It is a good practice to always turn on speakers at last and turn them
off immediately after the show.
Now you can turn ON the speaker and adjust the volume control to a proper level.
BEFORE TURNING ON
THE SPEAKER
WARNING: Always make sure that the maximum current requirement does not exceed
the maximum admitted POWERCON current. In case of doubt call the closest RCF SERVICE
CENTRE.
WARNING
230 Volt, 50 Hz SETUP: FUSE VALUE T3,15A - 250V
VOLTAGE SETUP
115 Volt, 60 Hz SETUP: FUSE VALUE T6, 30A - 250V
(RESERVED TO THE RCF SERVICE CENTRE)
Audio signal can be daisy-chained using the male XLR loop through connectors. A single
audio source can drive multiple speakers modules (like a full left or right channel made of
8-16 speaker modules); make sure that the source device is able to drive the impedance
load made of the modules input circuits in parallel. The HDL line arrays input circuit presents
a 100 KOhm input impedance. The total input impedance seen as a load from the audio
source (ex. audio mixer) will be:
- system input impedance = 100 KOhm / number of input circuits in parallel.
SIGNAL CABLES DAISY CHAINS
The required output impedance of the audio source (ex. audio mixer) will be:
- source output impedance > 10 * system input impedance;
- always make sure that XLR cables used to feed audio signal to the system are:
- balanced audio cables;
- wired in phase.
A single defective cable can affect the performance of the overall system!
8
ENGLISH
SINGLE HDL20-A, HDL10-A
The HDL is a flexible system that can be used in ground-supported or suspended applications.
The following information will help you set up your HDL system safely and effectively.
When using stands or poles, be sure to observe the following precautions:
- Check the stand or pole specification to be certain the device is designed to support the
weight of the speaker. Observe all safety precautions specified by the manufacturer.
- Be certain that the surface on which the system is to be stacked is flat, stable and solid.
- Inspect the stand (or pole and associated hardware) before each use and do not use
equipment with worn, damaged, or missing parts.
- Do not attempt to place more than two HDL loudspeakers on a stand or pole.
- When mounting two HDL speakers on a pole or tripod, integral rigging hardware must be
used to secure the speakers to each other.
- Always be cautious when deploying the system outdoors. Unexpected winds may topple
a system. Avoid attaching banners or similar items to any part of a speaker system. Such
attachments could act as a sail and topple the system.
POLE AND TRIPOD SAFETY
WARNINGS
A single HDL may be used on a tripod stand (AC S260) or on a pole (AC PMA) over its D
LINE Series subwoofers. The use of a subwoofer is recommended for applications requiring
more low-frequency power and extension and needs a pole (P.N. 13360110).
Usually, the cluster switch on the input panel should be set to the 2-3 position and the
HF on NEAR when a single speaker is used. Indoor switch use depends on the speaker
placement. Place the speaker on the pole or on a tripod using its own hardware LIGHT
BAR HDL20-A (P.N. 13360229) or LIGHT BAR HDL10-A (P.N. 13360276) as shown in the
following picture.
9
ENGLISH
HDL20-A, HDL10-A SUSPENDED
- Suspending loads should be done with extreme caution.
- When deploying a system always wear protective helmets and footwear.
- Never allow people to pass under the system during the installation process.
- Never leave the system unattended during the installation process.
- Never install the system over areas of public access.
- Never attach other loads to the array system.
- Never climb the system during or after the installation.
- Never expose the system to extra loads created from the wind or snow.
WARNING: The system must be rigged in accordance with the laws and regulations of the
Country where the system is used. It is responsibility of the owner or rigger to make sure that
the system is properly rigged in accordance with Country and local laws and regulations.
WARNING
WARNING: Always check that all the parts of the rigging system that are not provided
from RCF are:
- appropriate for the application;
- approved, certified and marked;
- properly rated;
- in perfect condition.
WARNING
WARNING: Each cabinet support the full load of the part of the system below. It is very
important that each single cabinet of the system is properly checked.
WARNING
The suspension system is designed to have a proper Safety Factors (configuration
dependent). Using the “RCF Shape Designer” software it is very easy to understand safety
factors and limits for each specific configuration. To better comprehend in which safety
range the mechanics are working a simple introduction is needed: HDL mechanics are built
with certified UNI EN 10025-95 S 235 JR and S 355 JR Steel.
“RCF SHAPE DESIGNER”
SOFTWARE AND SAFETY
FACTOR
S 235 JR is a structural steel and has a stress-strain (or equivalent Force-Deformation) curve
like the following.
The curve is characterized by two critical points: the Break Point and the Yield Point. The
tensile ultimate stress is simply the maximum stress attained. Ultimate tensile stress is
commonly used as a criterion of the strength of the material for structural design, but it
should be recognized that other strength properties may often be more important. One
of these is for sure the Yield Strength. Stress-strain diagram of S 235 JR exhibit a sharp
break at a stress below the ultimate strength. At this critical stress, the material elongates
considerably with no apparent change in stress. The stress at which this occurs is referred
to as the yield point.
Permanent deformation may be detrimental, and the industry adopted 0.2% plastic strain
as an arbitrary limit that is considered acceptable by all regulatory agencies. For tension
and compression, the corresponding stress at this offset strain is defined as the yield.
N/mm
2
Ultimate
Strength
Yield
Strength
SF = 4
Working
Conditions
%
S 355 J and S 235 JR characteristic values are R=360 [N/mm2] and R=510 [N/mm2] for
Ultimate Strength and Rp0.2=235 [N/mm2] and Rp0.2=355 [N/mm2] for Yield Strength. In
our prediction software the Safety Factors are calculated considering the Maximum Stress
Limit equal to the Yield Strength, according with many international standards and rules.
The resulting Safety Factor is the minimum of all the calculated safety factors, for each link
or pin.
This is where you are working with a SF=4:
Depending on local safety regulation and on situation the required safety factor can vary.
It is responsibility of the owner or rigger to make sure that the system is properly rigged
in accordance with Country and local laws and regulations. The “RCF Shape Designer”
software gives detailed information of the safety factor for each specific configuration.
The safety factor is the result of the forces acting on fly bar’s and system’s front and rear
links and pins and depends on many variables:
10
N/mm
2
Ultimate
Strength
Yield
Strength
SF = 4
Working
Conditions
%
ENGLISH
- number of cabinets;
- fly bar angles;
- angles from cabinets to cabinets. If one of the cited variables change the safety factor
MUST BE recalculated using the software before rigging the system.
In case the fly bar is picked up from 2 motors make sure that the fly bar angle is correct. An
angle different from the angle used in the prediction software can be potentially dangerous.
Never allow persons to stay or pass under the system during the installation process.
When the fly bar is particularly tilted or the array is very curved the centre of gravity can
move out from the rear links. In this case the front links are in compression and the rear
links are supporting the total weight of the system plus the front compression. Always
check very carefully with the “RCF Shape Designer” software all this kind of situations
(even with a small number of cabinets).
THE MAXIMUM NUMBER OF SPEAKERS THAT MAY BE SUSPENDED USING
THE HDL20-A FRAME IS:
n° 16 HDL20-A;
n° 8 HDL18-AS;
n° 4 HDL 18-AS + 8 (EIGHT) HDL 20-A USING ACCESSORY LINK BAR HDL20-HDL18-AS
MAXIMUM ARRAY SIZE
THE MAXIMUM NUMBER OF SPEAKERS THAT MAY BE SUSPENDED USING
THE HDL10-A FRAME IS:
n° 16 HDL10-A;
n° 8 HDL15-AS;
n° 4 HDL 15-AS + 8 (EIGHT) HDL 10-A USING ACCESSORY LINK BAR HDL10-HDL15-AS
THE HDL FLY BAR
1 FRONT FLYING BRACKET. Front mounting.
THE HDL FLY BAR FEATURES:
4
2 QUICK LOCK PIN HOLE. Front mounting (to be used to lock the front bracket before
installation).
3 FRONT BRACKET - TRANSPORT HOLES.
4 CENTRAL PICK UP POINTS.
3
2
1
5 The pickup point is asymmetric and can be fit in two positions (A and B).
A position brings the shackle towards the front.
B position allows an intermediate step using the same fixing holes.
A
B
6 Move the pickup bracket in the position suggested by RCF Shape Designer.
7 Fix the pickup bracket with the two pins on the bracket’s lanyard to lock the pickup.
11
ENGLISH
8 Check that all the pins are secured and locked.
Rigging the system follow the procedure:
RIGGING PROCEDURE
H RIGGING CHAIN HOIST.
S CERTIFIED SHACKLE.
F FLY BAR.
H
S
F
1) Connect the fly-bar F to the chain hoist H (o motors) using the certified shackle.
Secure the shackle.
2) Connect the second pin on the front bracket to make sure that the connecting bracket
is vertical.
3) Connect the front bracket to the first HD cabinet using 2 quick lock pins.
USING THE FLY BAR HDL 20 LIGHT (P.N. 13360229) IT IS ALLOWED TO CONNECT A
MAXIMUM OF 4 HDL 20-A MODULES.
USING THE FLY BAR HDL 10 LIGHT (P.N. 13360276) IT IS ALLOWED TO CONNECT A
MAXIMUM OF 6 HDL 10-A MODULES.
12
ENGLISH
4) Reverse and connect the 1 rear bracket to the fly-bar using 2 quick lock pins.
The first HDL has to be fixed always starting at 0° with respect of the frame. No other
angles are allowded.
5) Connect the second cabinet to the first always starting from the 2 front brackets.
6) Reverse and connect the rear bracket of the second cabinet using the hole for the proper
angle.
7) Connect all the other cabinets following the same procedure and connecting a single
cabinet each time.
13
ENGLISH
ARRAY SYSTEMS
DESIGN
HDL allow users to choose from different face-to-face angle adjustments to create arrays
with varying curvature. Thus, designers can create arrays custom-tailored to each venue’s
profile.
The basic approach to array design dependent on three factors:
- Number of Array Elements;
- Vertical Splay Angles;
- Horizontal Coverage.
Determining the number of elements to use is critical: the number of elements greatly
affects the SPL available from the system as well as the uniformity of coverage in both SPL
and frequency response. The number of elements profoundly effects the directivity at lower
frequencies.
The next easy equation, works as an approximation for flat listening planes.
Coverage (x) ≈ 8n (m) Coverage distance required = x (metres).
Changing the splay angles between cabinets has a significant impact on vertical coverage
for the high frequencies, with the result that narrower vertical splay angles produce a
higher Q vertical beamwidth, while wider splay lowers the Q at high frequencies. In general,
the splay angles do not affect the vertical coverage at lower frequencies.
The curved array system design can be summarized as:
- flat-front HDL for long throw sections;
- increase curvature as distance decreases;
- add more enclosures for more output.
This approach focuses more transducers mounted on long-throw horns at the farthest seat,
gradually focusing fewer transducers as distance decreases. As long as the no gap rule is
maintained, arrays constructed according to these principles will provide even SPL and a
consistent sonic character throughout the venue without requiring complex processing.
This approach, where the same amount of acoustic energy is spread over a larger or smaller
vertical angle depending on required throw, typically have the following objectives:
- even horizontal and vertical coverage;
- uniform SPL;
- uniform frequency response;
- sufficient SPL for the application.
This discussion represents, of course, just a basic approach. Given the infinite variety of
venues and performers, users will find themselves needing to solve specific problems in
specific situations. RCF Shape Designer software designed to help calculate optimum splay
angles, aiming angles, and fly-bar pick points (crucial in aiming the array) for a given venue,
will be explained later in this Guide.
SOFTWARE SHAPE
DESIGNER
RCF Shape Designer is supplied in a zip folder which contains a setup executable file:
Double-click on this and follow the on-screen prompts.
14
INSTALLING RCF SHAPE
DESIGNER
COMPUTER REQUIREMENTS
Use the RCF Shape Designer for designing HDL arrays. The RCF Shape Designer’s primary
function is to determine the configuration that will provide the best vertical performance
for a given application. Various venue dimensions are entered that allow the RCF Shape
Designer to calculate the resultant array performance.
INTRODUCTION
Once you have installed RCF Shape Designer, it will be visible as a shortcut in All Programs
via your Windows Start button.
USING RCF SHAPE DESIGNER
SOFTWARE
ENGLISH
The RCF Shape Designer requires a compatible PC with the Windows® 98, Windows®
98SE, Windows® 2000, Windows® ME, Windows® XP, or Windows NT® operating
systems. It is not designed to work with Windows® 3.x, Windows® 95, or Macintosh®
operating systems.
A single click on the RCF Shape Designer tab will open the following page:
A single click on the window will open the following page:
Filling the blank tabs it’s possible to start the program.
15
ENGLISH
ENTERING VENUE DATA
For best results, planes should be used as follows:
FLOOR is used to simulate the main floor area from the stage to a rear bleacher or
boundary.
PLANE 1 is used to simulate any audience continuation behind FLOOR (e.g. a rear bleacher)
from the end of the main floor to furthest and highest seat below PLANE 2.
PLANE 2 is used to simulate the furthest/highest audience area.
Enter the height, length and elevation of up to three planes.
For all planes Length refers to the horizontal length of that plane.
For all planes Height refers to the height of the rear of the plane.
For PLANES 1 and 2 Elevation refers to the elevation (height) of the front of the plane.
For PLANE 1 and 2 Distance relates to the actual distance from the front of the array to the
start of the plane.
For all planes selecting Seated or Standing places ear level at 1.3 or 1.7 m above the
respective plane.
Specify the horizontal coverage distances from the front of the array.
COVERAGE
Select either Suspended or Stack in the Array installation section to determines how the
array is supported.
ARRAY INSTALLATION
In Suspended mode the grid is suspended and cabinets are attached beneath.
In Stack mode the grid forms a base and cabinets are placed on top.
16
SUSPENDED MODE
ENGLISH
AUTO H SETTING - MIN TRIM HEIGHT
This is the low limit for the array and is defined as the smallest allowable distance from the
lowest point of the array to the ground below
AUTO H SETTING - MAX SUSPENSION POINT
Set this to the maximum array height allowable (usually the highest part of the flying frame).
The maximum pick height is usually chosen to allow for the maximum flying point height
minus a sensible allowance for any shackles, stingers, bridles or flying hooks. 1m should be
allowed for a stinger between each grid flying lug and the relevant motor hook to ensure that
motor chain bags do not rest on the grid or top cabinet and upset its tilt angle.
MANUAL H SETTING
In manual installation mode it is possible to enter the height required for flying the system.
Number of cabinets can be set depending also on cabs availability.
NUMBER OF CABINETS AND
SUBWOOFERS
HDL20-A
VENUE PAGE
- Graphical representations of the array and the venue
- Aiming splay angle between each pair of enclosures
RCF SHAPE DESIGNER RESULTS
- Height of the array and trim height to the bottom of the array from the floor
- Pick Point on the Fly-Bar to achieve the calculated array angle when suspended
- Weight of the array
- Mechanical check result
ARRAY PAGE
17
ENGLISH
18
- Cluster Mechanical specifications
- Mechanical safety factors
MECHANICS PAGE
- DSP preset configuration
PROCESSOR PAGE
- On-axis aiming angle for each enclosure as a difference from 0° horizontal
- Various angles and throw distances calculated from the venue’s dimensions
- DSP preset configuration
- SPL representation on the audience area
SPL & REPORT PAGE
WARNING: It is possible to display different pages only IN SEQUENCE (venue > array >
mechanics > processor > spl & report, and back), in order to be sure that all pages will be
shown to the user, including the one regarding mechanics.
WARNING
MANUAL MODE
ENGLISH
RCF Shape Designer works in either of two basic ways:
- AUTOMATIC MODE (default setting): The RCF Shape Designer will select the optimum
enclosure splays, array aiming angle, fly-bar pick point and DSP preset configurations.
- MANUAL MODE: This provides a partial control over the array’s configuration. The enclosure
splays can be increased with a progression of 2° steps for each adjacent speaker, in order to
maintain a spiral array configuration. Then array aiming angle, and fly-bar pick point can be
entered manually by switching on Box1 + grid changeable and MANUAL H flags.
Array window: Manual splays setting
Angles manual changing
OPTIMIZING
THE ARRAY
Once the design (number of elements and vertical splay angles) has been designed using
Shape Designer software, you can effectively optimise the array depending on the environment
and the application by driving it using different DSP presets stored onboard. Typically arrays
are divided in two or three zones depending the design and size of the array.
To optimise and EQ the array, different strategies are used for high frequencies (long throws
and short throws) and low frequencies.
The longer the distance, the greater the attenuation at high frequencies. Generally, high
frequencies need a correction to compensate for energy lost over distance; the correction
needed is usually proportional to the distance and high-frequency air absorption. In the
near- to mid-field, the air absorption is not nearly as critical; in this zone, high frequencies
need little additional correction.
HIGH-FREQUENCY
EQUALIZATION STRATEGIES
In the next figure is shown the equalization that corresponds to HF settings for NEAR and
FAR:
19
ENGLISH
While wave-guides provide isolated control over various mid- to high-frequency coverage areas,
the low-frequency section of a HDL array still requires mutual coupling - with equal amplitude
and phase - to achieve better directionality. Low-frequency directionality is less dependent on the
array’s relative splay angles and more dependent on the number of elements of the array.
LOW-FREQUENCY COUPLING
EFFECTS
At low frequencies, the more elements in the array (the longer the array), the more directional the
array becomes, providing more SPL in this range. The directional control of the array is achieved
when the length of the array is similar or larger than the wavelength of the frequencies being
reproduced by the array.
Although the array can (and usually should) be zoned for implementing different
equalization curves for high frequencies, identical equalization should be maintained in all
the low-frequency filters.
Different low-frequency equalization settings in the same array will degrade the desired
coupling effect. For the same reason, gain differences are not recommended for line arrays,
since adjusting various zones with an overall amplitude control for each results in decrease
of Low-frequency headroom and directionality.
In any case, line arrays generally need a correction to compensate for energy sum on lows.
LOW-FREQUENCY STRATEGIES
In the next figure is shown the equalization that corresponds to CLUSTER settings, referring
to different number of speakers from 2-3 up to 10-16. Increasing the number of cabinets,
response curves are decreased in order to compensate the low-frequency section mutual
coupling.
HDL20-A GROUND
STACKED
HDL loudspeakers can be stacked on top of RCF subwoofers with the dedicated accessories.
HDL 20-A compatible Subwoofers:
- SUB 8004-AS
- SUB 8006-AS
- HDL 18-AS
HDL 10-A compatible Subwoofers:
- SUB 8004-AS
- SUB 8006-AS
- HDL 15-AS
20
ENGLISH
1) Fix the HDL fly bar on subs as shown in the picture.
2) The stacking bar adds a fixed amount of up or downtilt to ground-stacked HDL
loudspeakers, with additional 15 degrees of adjustment possible (from +7,5° to -7,5°).
3) Connect front bracket of the first HDL cabinet using 2 quick lock pins.
21
ENGLISH
4) The baffle of the bottom box in a stacked array does not necessarily have to be parallel
to the stage or the array frame. It can be tilted up or downward if desired. In this way arced
arrays can be readily created from a ground stack position.
5) The bottom box in a stacked array can be tilted to obtain proper coverage patterns (from
+7,5° to -7,5°). Reverse and connect the 1 rear stacking bar bracket to the first enclosure
using the hole for the proper angle and quick lock pins.
Add HDL cabinets one by one as indicated for flown configurations. Up to four HDL
enclosures can be stacked and interlinked using the standard D LINE rigging components
and the D LINE subs as ground support.
6) It is possible to stack HDL speakers on the ground using its own fly bar as shown in the
pictures.
22
ITALIANO
SAFETY
PRECAUTIONS
1. Si prega di leggere tutte le avvertenze con molta attenzione, in particolare quelle di
sicurezza, poiché forniscono informazioni importanti.
AVVERTENZA: al fine di evitare il rischio di incendio o di scossa elettrica, non esporre mai
il prodotto alla pioggia o all’umidità.
AVVERTENZA
2. ALIMENTAZIONE TRAMITE RETE ELETTRICA
a. La tensione della rete elettrica è sufficientemente elevata da provocare folgorazione;
installare e collegare il prodotto prima di connettersi alla rete di alimentazione.
b. Prima di accendere il dispositivo verificare che tutti i collegamenti siano stati effettuati
in maniera corretta e che la tensione della rete di alimentazione corrisponda al
valore indicato nella targhetta dati dell’unità; se così non fosse rivolgersi al proprio
rivenditore RCF.
c. Questo è un dispositivo di CLASSE I, pertanto deve essere collegato a una presa della
RETE di alimentazione con collegamento di protezione a terra.
d. Per scollegare il dispositivo dalla RETE di alimentazione si utilizza il relativo accoppiatore
o il dispositivo PowerCon Connector®. Questo dispositivo deve rimanere accessibile
in seguito all’installazione
e. Proteggere il cavo di alimentazione da possibili danneggiamenti; assicurarsi che sia
posizionato in modo da non essere calpestato o schiacciato da altri oggetti.
f. Onde evitare il rischio di scosse elettriche, non aprire mai il prodotto: esso non contiene
parti a cui l’utente possa avere necessità di accedere.
3. Evitare che corpi estranei o liquidi penetrino all’interno del prodotto poiché potrebbero
provocare un cortocircuito.
Evitare che l’apparecchiatura sia collocata in prossimità di gocciolamenti o spruzzi. Non
posizionare oggetti contenenti liquidi, come ad esempio dei vasi, sull’apparecchiatura. Non
posizionare fiamme libere (come candele accese) sull’apparecchiatura.
4. Non tentare mai di eseguire operazioni, modifiche o riparazioni che non siano
espressamente descritte in questo manuale. Rivolgersi a un centro di assistenza autorizzato
qualora dovesse verificarsi uno dei seguenti casi:
-- Il prodotto non funziona (o funziona in modo anomalo).
-- Il cavo di alimentazione è danneggiato.
-- Corpi estranei o liquidi sono penetrati nel dispositivo.
-- Il prodotto ha subito un impatto violento.
5. Se il prodotto non viene utilizzato per un periodo prolungato, scollegare il cavo di
alimentazione.
6. Se dal prodotto provengono fumo o strani odori, spegnerlo immediatamente e scollegare
il cavo di alimentazione.
7. Non collegare il prodotto ad apparecchiature o accessori non previsti per questo uso.
Per installazioni sospese, utilizzare esclusivamente i punti di ancoraggio previsti e non
cercare di fissare il prodotto utilizzando elementi non adatti o non specifici per questo uso.
Verificare inoltre l’idoneità della superficie di supporto a cui si intende ancorare il prodotto
(parete, soffitto, struttura, ecc.) e dei componenti utilizzati per il fissaggio (tasselli, viti, staffe
non fornite da RCF, ecc.), che devono garantire la sicurezza del sistema/installazione nel
tempo, considerando inoltre, ad esempio, le vibrazioni meccaniche normalmente prodotte
dai trasduttori.
Onde evitare il rischio di cadute, non sovrapporre più unità del prodotto, a meno che il
manuale specifichi tale possibilità.
8. RCF S.p.A. raccomanda vivamente di affidare l’installazione del prodotto
esclusivamente a installatori professionali qualificati (o a ditte specializzate)
in grado di garantire la corretta installazione e di certificarla in base alle
normative in vigore.
L’impianto audio deve essere complessivamente conforme agli standard e alle
normative vigenti in materia di impianti elettrici.
IMPORTANTE
23
ITALIANO
9. Supporti e carrelli
L’apparecchiatura, ove necessario, deve essere usata esclusivamente su carrelli o supporti
raccomandati dal produttore. L’apparecchiatura con il relativo supporto o carrello deve
essere spostata con estrema cautela. Arresti improvvisi, spinte eccessivamente forti e
pavimentazioni irregolari possono provocare il ribaltamento dell’apparecchiatura.
10. Ai fini dell’installazione di un impianto audio professionale è necessario considerare
numerosi fattori meccanici ed elettrici (oltre a quelli prettamente acustici come la pressione
acustica, gli angoli di copertura, la risposta in frequenza, ecc.).
11. Danneggiamento dell’udito
L’esposizione a livelli acustici elevati può provocare perdita dell’udito permanente. Il livello
di pressione acustica pericolosa per l’udito varia sensibilmente da persona a persona e
dipende dalla durata dell’esposizione. Per prevenire l’esposizione a livelli di pressione
acustica elevata potenzialmente pericolosi, chiunque sia esposto a tali emissioni deve
utilizzare dispositivi di protezione adeguati. Pertanto quando viene utilizzato un trasduttore
in grado di produrre livelli elevati di emissioni acustiche è necessario utilizzare tappi
auricolari o cuffie di protezione. Per conoscere il livello massimo di pressione acustica
consultare i dati tecnici contenuti nel manuale delle istruzioni.
NOTE IMPORTANTI
NOTE IMPORTANTI
Al fine di prevenire la produzione di rumore sui cavi del segnale di linea, utilizzare
esclusivamente cavi schermati ed evitare di collocarli nelle vicinanze di:
-- Apparecchiature che producono campi elettromagnetici ad alta intensità
-- Cavi di alimentazione.
-- Linee degli altoparlanti
PRECAUZIONI
DI UTILIZZO
-- Posizionare il prodotto lontano da fonti di calore e assicurare sempre un’adeguata
circolazione d’aria attorno ad esso.
-- Non sottoporre il prodotto a sovraccarichi prolungati.
-- Non forzare mai i comandi (pulsanti, manopole, ecc.).
-- Non utilizzare solventi, alcool, benzene o altre sostanze volatili per la pulizia delle parti
esterne del prodotto.
NOTE IMPORTANTI
Prima di collegare e utilizzare il prodotto, leggere attentamente il manuale d’istruzioni e
tenerlo a portata di mano per consultazioni future. Il manuale è da considerare come parte
integrante del prodotto e deve seguirlo anche nei passaggi di proprietà per permettere al
nuovo proprietario di conoscere le modalità di installazione e d’uso e le avvertenze per la
sicurezza. RCF S.p.A. declina ogni responsabilità per le conseguenze di un’installazione e/o
utilizzo errati del prodotto.
24
NOTE IMPORTANTI
ITALIANO
INFORMAZIONI
SUL PRODOTTO
Questo straordinario diffusore si basa su un concetto derivato dall’esperienza live, mettendo
tutta l’esperienza dell’acustica professionale RCF in un cabinet compatto.
Le voci sono naturali, il suono è chiaro anche a grandi distanze, la pressione acustica (SPL)
è stabile a livelli estremamente alti.
I trasduttori di precisione RCF della serie D-LINE sono da decenni quelli con le migliori
prestazioni, la gestione della potenza più elevata e la tecnologia più avanzata in campo
professionale e touring.
Il woofer a elevata potenza emette bassi estremamente accurati, il driver a compressione
personalizzato offre un midrange trasparente e grandissima fedeltà del suono.
La tecnologia degli amplificatori RCF in Classe D offre in un’unica soluzione e a peso
ridotto ottime prestazioni ed elevata efficienza. Gli amplificatori D-LINE offrono un attacco
rapidissimo, una risposta al transitorio realistica e prestazioni audio eccezionali.
Il DSP integrato controlla crossover, equalizzazione, soft limiter, compressore e aumento
dinamico dei bassi.
I cabinet della serie D-LINE sono realizzati con un materiale composito in polipropilene
speciale, progettato per attenuare le vibrazioni anche al massimo volume.
Dallo stampaggio alla finitura, la serie D-LINE offre il massimo livello di affidabilità e di
resistenza per l’uso intenso su strada.
I modelli HDL20-A e HDL10-A sono moduli di casse acustiche a 2 vie per sistemi ad array,
ultracompatti e autoalimentati. I moduli di amplificatori Classe D da 700 W si abbinano
perfettamente con le schede di ingresso del segnale digitale ad alta qualità, grazie a una
risposta dei filtri precisa e complessa che consente una riproduzione del suono naturale
e dettagliata, degna dei migliori sistemi a radiazione diretta. Sono la scelta migliore in
quei casi in cui occorrono le prestazioni di un line array ma le dimensioni dell’ambiente
non permettono l’utilizzo di line array più grandi, e in cui è fondamentale un’installazione
semplice e veloce. Gli altoparlanti offrono livelli straordinari di flessibilità, chiarezza
e gestione della potenza, oltre a un’ottima qualità del suono; il tutto in un pacchetto
compatto, facile da gestire ed economico.
D LINE TOURING AUDIO SOLUTIONS
HDL20-A, HDL10-A
MODULI LINE ARRAY ATTIVI
LA SEZIONE INGRESSI COMPRENDE:
- connettori XLR di uscita;
- connettore XLR/Jack di ingresso;
- controllo del volume;
- interruttore a 5 configurazioni;
- LED a 4 stati
HDL20-A È UN SISTEMA ATTIVO BIDIREZIONALE CON:
- woofer in neodimio da 10”, bobina da 2,5” con caricamento a tromba;
- uscita da 2”, compression driver in neodimio, bobina da 3”;
- angolo di copertura a direttività costante, 100° x 15°.
HDL10-A È UN SISTEMA ATTIVO BIDIREZIONALE CON:
- woofer in neodimio da 8”, bobina da 2,0” con caricamento a tromba;
- uscita da 2”, compression driver in neodimio, bobina da 2.5”;
- angolo di copertura a direttività costante, 100° x 15°.
LA SEZIONE AMPLIFICATORI COMPRENDE:
- modulo di alimentazione di commutazione da 700 W;
- modulo amplificatore digitale a bassa frequenza da 500 W;
- modulo amplificatore digitale ad alta frequenza da 200 W;
- bus condensatore aggiuntivo in grado di reggere la tensione per segnali da 100 ms.
La potenza di alimentazione complessiva disponibile è di 700 W e può essere distribuita
alle 2 sezioni finali dell’amplificatore. Ogni sezione dell’amplificatore ha una portata della
potenza di uscita massima molto elevata, allo scopo di fornire, ove necessario, la massima
quantità di treni di segnali di uscita su intervalli di frequenza specifici.
25
ITALIANO
REQUISITI DI ALIMENTAZIONE
E SETTAGGIO
I sistemi line array HDL sono progettati per poter funzionare anche in condizioni sfavorevoli
e gravose. È comunque importante prestare la massima attenzione all’alimentazione in CA
e a impostare un sistema di distribuzione adeguato.
I sistemi line array HDL sono progettati per essere COLLEGATI A TERRA. Utilizzare sempre
connessioni collegate a terra.
ATTENZIONE
Gli amplificatori HDL sono progettati per operare entro i seguenti limiti di tensione in CA:
TENSIONE NOMINALE 230 V: tensione minima 185 V, tensione massima 260 V
TENSIONE NOMINALE 115 V: tensione minima 95 V, tensione massima 132 V.
Se la tensione scende sotto il livello minimo ammesso il sistema smette di funzionare. Se
la tensione sale oltre il livello massimo ammesso, il sistema potrebbe risultarne seriamente
danneggiato. Per ottenere le migliori prestazioni dal sistema è estremamente importante
che la caduta di tensione sia la più bassa possibile.
VOLTAGGIO
Accertarsi che tutto il sistema sia adeguatamente collegato a terra. Tutti i punti di massa
devono essere collegati allo stesso nodo di massa. Ciò favorirà la riduzione del ronzio del
sistema audio.
COLLEGAMENTO A TERRA
Il modulo è dotato di un’uscita Powercon per collegare in serie altri moduli.
Il numero massimo di moduli che è possibile collegare in serie è:
COLLEGAMENTO IN SERIE
TENSIONE NOMINALE 230 V: tensione minima 185 V, tensione massima 264 V
(per Regno Unito 240 V+10%)
TENSIONE NOMINALE 115 V: tensione minima 95 V, tensione massima 132 V.
Un numero maggiore di moduli collegati in serie supererebbe la portata massima del
connettore Powercon, causando una situazione di possibile pericolo.
Quando i sistemi line array HDL ricevono un’alimentazione trifase è molto importante
mantenere un buon bilanciamento nel carico di ogni fase dell’alimentazione in CA. È poi
essenziale comprendere i subwoofer e i satelliti nel computo della distribuzione di potenza:
sia i subwoofer sia i satelliti devono essere distribuiti fra le tre fasi.
26
ATTENZIONE
ALIMENTAZIONE
TRIFASE
ITALIANO
PANNELLO
POSTERIORE
6
1
12
7
5
8
4
9
2
3
10
14
13
11
1 INGRESSO XLR PRINCIPALE (BAL/UNBAL). Utilizzare connettori di ingresso maschi
XLR/Jack con segnali di linea da mixer o da altra fonte di segnali.
2 LINK XLR OUTPUT. Il connettore XLR di uscita consente il collegamento in serie dei
diffusori.
3 VOLUME. Controlla il volume dell’amplificatore di potenza. L’intervallo varia da (attenuazione massima) al livello massimo ∞ (uscita massima).
4 INDICATORE DELL’ALIMENTAZIONE. Quando il cavo di alimentazione è collegato
e l’interruttore dell’alimentazione è attivo, questo indicatore è illuminato in verde.
5 INDICATORE DEL SEGNALE. L’indicatore del segnale si illumina in verde se è
presente un segnale nell’ingresso XLR principale.
6 INDICATORE DEL LIMITER. L’amplificatore ha un limiter integrato che impedisce il
clipping del segnale degli amplificatori o l’overdrive dei trasduttori. Quando il limiter è
attivo, il LED lampeggia in arancione. Se il LED del limiter lampeggia occasionalmente
è normale. Se il LED del limiter lampeggia frequentemente o resta acceso, abbassare
il livello del segnale. L’amplificatore ha un limiter RMS integrato. Se il limiter RMS
è attivo il LED è acceso in rosso. Il limiter RMS serve a impedire danneggiamenti ai
trasduttori. L’amplificatore non deve mai essere usato quando l’indicatore del limiter è
rosso, un funzionamento continuativo con la protezione RMS attiva può danneggiare
l’amplificatore.
7 ALTE FREQUENZE. L’interruttore consente di impostare la correzione delle alte
frequenze in base all’area da coprire (a causa dell’assorbimento d’aria):
- NEAR (usata per installazioni su pali o vicine)
- FAR (per installazioni più lontane).
8 CLUSTER. La combinazione di 2 interruttori offre 4 possibilità di correzione delle
frequenze medio-basse, in base alla dimensione del cluster.
- 2-3 moduli (utilizzato per installazioni su pali)
- 4-6 moduli (sistemi piccoli)
- 7-9 moduli (sistemi medi)
- 10-16 moduli (sistemi grandi).
9 ELEVATA CURVATURA. L’interruttore offre la possibilità di aumentare le frequenze
intermedie in base a una configurazione del cluster con pochi pezzi ed elevata curvatura.
- OFF (senza correzione attiva)
- ON (per gruppi a curvatura elevata di pochi elementi HDL20-A o HDL10-A).
10 INTERNI. L’interruttore offre l’ulteriore possibilità di impostare correzioni di
bassa frequenza in base all’uso interno/esterno, allo scopo di compensare il riverbero
nell’ambiente alle basse frequenze.
- OFF (senza correzione attiva)
- ON (correzione per ambienti interni con riverbero).
27
ITALIANO
11 PRESA POWERCON CA. La serie D-LINE RCF utilizza una rete di alimentazione in CA
con POWERCON a 3 poli.
Utilizzare sempre gli appositi connettori forniti nella confezione.
12 PRESA DI COLLEGAMENTO POWERCON CA. Utilizzare questa presa per collegare
uno o più elementi. Accertarsi sempre che i requisiti di corrente massimi non superino la
massima corrente ammessa della presa POWERCON. In caso di dubbi contattare il CENTRO
DI ASSISTENZA RCF più vicino.
13 INTERRUTTORE RETE DI ALIMENTAZIONE. L’interruttore dell’alimentazione serve ad
ACCENDERE e SPEGNERE l’alimentazione stessa. Accertarsi che il volume sia impostato
su - all’accensione del diffusore.
FUSIBILE.
14
I connettori XLR utilizzano lo standard AES seguente:
CONNETTORE 1 = MASSA (SCHERMATA)
HOT
CONNETTORE 2 = CALDO (+)
CONNETTORE 3 = FREDDO (-)
COLD
CONNESSIONI
GND
BAL. XLR
A questo punto è possibile collegare il cavo dell’alimentazione e il cavo del segnale; prima
di attivare il diffusore accertarsi che il volume sia regolato al minimo (anche sull’uscita
del mixer). È importante che il mixer sia già ACCESO prima di attivare il diffusore. Questo
servirà a prevenire danneggiamenti agli altoparlanti e i fastidiosi “salti” nel flusso audio
dovuti all’accensione. È buona norma accendere sempre i diffusori all’ultimo momento e
spegnerli subito dopo l’esibizione.
Ora è possibile ACCENDERE il diffusore e regolare il volume al livello richiesto.
ATTENZIONE: accertarsi sempre che i requisiti di corrente massimi non superino la
massima corrente ammessa della presa POWERCON. In caso di dubbi contattare il CENTRO
DI ASSISTENZA RCF più vicino.
IMPOSTAZIONI 230 V, 50 Hz: PORTATA FUSIBILE T3,15 A - 250 V
PRIMA DELL’ACCENSIONE
DEL DIFFUSORE
ATTENZIONE
IMPOSTAZIONI DI VOLTAGGIO
(RISERVATO AI CENTRI DI ASSISTENZA RCF)
IMPOSTAZIONI 115 V, 60 Hz: PORTATA FUSIBILE T6, 30 A - 250 V
Il segnale audio può essere collegato in serie utilizzando il circuito dei connettori maschi
XLR. Una singola fonte audio può comandare svariati moduli di diffusori (canale sinistro
o destro composto di 8-16 moduli di casse); accertarsi che il dispositivo in ingresso sia in
grado di comandare il carico di impedenza composto dai circuiti di ingresso dei moduli in
parallelo. Il circuito di ingresso line array HDL presenta un’impedenza di ingresso di 100
kΩ. L’impedenza di ingresso totale come carico dalla fonte audio (ad es. mixer audio) sarà:
- impedenza d’ingresso del sistema = 100 kΩ/numero di circuiti d’ingresso in parallelo.
L’impedenza d’uscita richiesta della fonte audio (ad es. mixer audio) sarà:
- impedenza d’uscita della fonte > 10 * impedenza d’ingresso del sistema;
- assicurarsi sempre che i cavi XLR utilizzati per inviare il segnale audio al sistema siano:
- cavi audio bilanciati;
- cablati in fase.
Un solo cavo difettoso può compromettere il funzionamento dell’intero sistema!
28
COLLEGAMENTO IN SERIE
DEL SEGNALE
ITALIANO
SINGOLI HDL20-A, HDL10-A
Il sistema HDL è flessibile e può essere utilizzato per applicazioni al suolo o sospese.
Seguono informazioni utili per impostare il sistema HDL in modo sicuro ed efficace.
Se si utilizzano piedistalli o aste, accertarsi di seguire le precauzioni seguenti:
- Controllare le specifiche del piedistallo o dell’asta per accertarsi che siano in grado di
sostenere il peso del diffusore. Rispettare tutte le precauzioni di sicurezza indicate dal
produttore.
- Accertarsi che la superficie sulla quale è posizionato il sistema sia piana, stabile e
resistente.
- Controllare il piedistallo (o asta con relativa attrezzatura) prima di ogni uso e non utilizzare
un’apparecchiatura con parti consumate, danneggiate o mancanti.
- Non cercare di posizionare più di due diffusori HDL su un piedistallo o su un’asta.
- Quando si montano due diffusori HDL su un’asta o su un cavalletto, è necessario utilizzare
tutta l’attrezzatura necessaria per fissare i diffusori uno all’altro.
- Agire sempre con cautela quando si installa il sistema all’esterno. Il vento potrebbe far
oscillare il sistema. Non applicare striscioni o simili su nessuna parte del diffusore. Tali
elementi potrebbero fungere da vela e far oscillare il sistema.
AVVERTENZE DI SICUREZZA PER
L’UTILIZZO DI POLE MOUNT E
TREPPIEDI
Un singolo diffusore HDL può essere impiegato su un cavalletto (AC S260) o su un’asta
(AC PMA) sui relativi subwoofer della serie D-LINE. Si raccomanda l’uso di un subwoofer
per applicazioni in cui è richiesta maggiore potenza in bassa frequenza ed estensione.
In quest’ultimo caso è necessario utilizzare il pole mount (P.N. 13360110).
Solitamente, l’interruttore del cluster sul pannello d’ingresso deve essere impostato sulle
posizioni 2-3 e l’HF su NEAR, quando si utilizza un solo diffusore. L’utilizzo di un interruttore
per interni dipende dalla posizione del diffusore. Ogni volta che si installa il diffusore su
un pole mount o su un treppiedi, è necessario utilizzare solo ed esclusivamente i suoi
accessori LIGHT BAR HDL20-A (P.N. 13360229) o LIGHT BAR HDL10-A (P.N. 13360276),
come illustrato nella figura seguente.
29
ITALIANO
HDL20-A, HDL10-A
IN SOSPENSIONE
I carichi sospesi devono essere installati con estrema cautela.
- Durante l’installazione di un sistema indossare sempre il caschetto protettivo e le scarpe
antinfortunistiche.
- Non consentire mai il passaggio di persone sotto il sistema durante il processo di
installazione.
- Non lasciare mai il sistema incustodito durante il processo di installazione.
- Non installare mai il sistema su aree di pubblico accesso.
- Non collegare mai altri carichi al sistema di diffusori.
- Non salire sul sistema durante e dopo l’installazione.
- Non esporre il sistema a carichi ulteriori dovuti al vento o alla neve.
ATTENZIONE: il sistema deve essere fissato nel rispetto delle leggi e dei regolamenti del
paese in cui sarà utilizzato. Il proprietario o installatore è responsabile di garantire che il
sistema sia fissato correttamente, in base alle leggi e ai regolamenti statali e locali.
ATTENZIONE: controllare sempre che tutti i componenti del sistema di installazione non
forniti da RFC siano:
- adatti all’uso;
- approvati, certificati e marchiati;
- adeguatamente dimensionati;
- in condizioni perfette.
ATTENZIONE: ogni diffusore è in grado di sostenere l’intero carico del componente
del sistema sottostante. È molto importante che ogni singolo diffusore del sistema sia
adeguatamente controllato.
Il sistema delle sospensioni è progettato con i fattori di sicurezza adeguati (in base alla
configurazione). Tramite il software “RCF Shape Designer” è molto semplice comprendere
i limiti e i fattori di sicurezza in ogni singola configurazione. Per comprendere meglio in
quale intervallo di sicurezza lavorano i meccanismi è necessaria una semplice introduzione:
i meccanismi HDL sono realizzati con acciaio certificato UNI EN 10025-95 S 235 JR e S
355 JR.
S 235 JR è un acciaio strutturale con la curva di trazione (o di deformazione equivalente)
illustrata a fianco.
La curva è caratterizzata da due punti critici: il punto di rottura e il punto di snervamento.
Il carico di rottura è semplicemente la sollecitazione massima raggiunta. Il carico di rottura
è normalmente utilizzato come indicatore della resistenza del materiale per progettazioni
strutturali, ma è utile notare che altre proprietà di resistenza sono spesso più importanti.
Una di queste è indubbiamente la resistenza allo snervamento. Il grafico della curva di
trazione di S 235 JR mostra una rottura netta a una sollecitazione inferiore al carico
di rottura. A questo livello critico, il materiale si allunga considerevolmente, senza una
variazione evidente della sollecitazione. La sollecitazione a cui questo avviene si definisce
punto di snervamento.
Una deformazione permanente può essere dannosa, nel settore è stato stabilito che lo 0,2%
di deformazione plastica è il limite arbitrario considerato accettabile da tutte le agenzie
di regolamentazione. Per quanto riguarda tensione e compressione, la sollecitazione
corrispondente a questa deformazione si definisce come snervamento.
30
I valori caratteristici di S 355 J e S 235 JR sono R=360 [N/mm2] e R=510 [N/mm2] per carico
di rottura e Rp0,2=235 [N/mm2] e Rp0,2=355 [N/mm2] per la resistenza allo snervamento.
Nel nostro software predittivo i fattori di sicurezza sono calcolati considerando il carico di
rottura equivalente alla resistenza allo snervamento, come indicato da svariate norme e
regole internazionali. Il fattore di sicurezza risultante è il valore minimo di tutti i fattori di
sicurezza calcolati, per ogni collegamento o connettore.
Questo è il punto di lavorazione con un FS=4:
Il fattore di sicurezza richiesto può variare in base alle norme di sicurezza locali o alla
situazione. Il proprietario o installatore è responsabile di garantire che il sistema sia fissato
regolarmente, in base alle leggi e ai regolamenti statali e locali. Il software “RCF Shape
Designer” fornisce informazioni dettagliate sul fattore di sicurezza per ogni configurazione
specifica.
ATTENZIONE
ATTENZIONE
ATTENZIONE
“RCF SHAPE DESIGNER”
SOFTWARE E FATTORI DI
SICUREZZA
N/mm
2
Ultimate
Strength
Yield
Strength
SF = 4
Working
Conditions
%
N/mm
2
Ultimate
Strength
Yield
Strength
SF = 4
Working
Conditions
%
ITALIANO
Il fattore di sicurezza è il risultato delle forze che agiscono sui collegamenti e sui connettori
anteriori e posteriori della barra di sospensione e del sistema, e dipende da alcune variabili:
- numero di diffusori;
- angolo formato dal primo cabinet e dalla barra di sospensione;
- angoli tra i diffusori. Se una delle variabili elencate cambia il fattore di sicurezza DEVE
ESSERE ricalcolato tramite il software prima di fissare il sistema.
Se la barra di sospensione proviene da 2 motori, accertarsi che la sua angolazione sia
corretta. Un’angolazione diversa da quella utilizzata nel software predittivo può essere
potenzialmente pericolosa. Non consentire mai la sosta o il passaggio sotto il sistema
durante il processo di installazione.
Quando la barra di sospensione è particolarmente inclinata o il gruppo è molto curvato, il
baricentro può uscire dai collegamenti posteriori. In questo caso i collegamenti anteriori
sono compressi e i collegamenti posteriori sostengono il peso complessivo del sistema oltre
alla compressione anteriore. Controllare sempre attentamente tutte queste condizioni con
il software “RCF Shape Designer” (anche con pochi cabinet).
IL NUMERO MASSIMO DI DIFFUSORI SOSPESI CHE PUÒ ESSERE INSTALLATO UTILIZZANDO
IL TELAIO HDL20-A È:
16 HDL20-A;
8 HDL18-AS;
4 HDL 18-AS + 8 (OTTO) HDL 20-A MEDIANTE L’ACCESSORIO LINK BAR HDL20-HDL18-AS
DIMENSIONI MASSIME
DELL’ARRAY
IL NUMERO MASSIMO DI DIFFUSORI SOSPESI CHE PUÒ ESSERE INSTALLATO UTILIZZANDO
IL TELAIO HDL10-A È:
16 HDL10-A;
8 HDL15-AS;
4 HDL 15-AS + 8 (OTTO) HDL 10-A MEDIANTE L’ACCESSORIO LINK BAR HDL10-HDL15-AS
IL FLY BAR HDL
1 STAFFA DI SOSPENSIONE ANTERIORE. Montaggio anteriore.
IL FLY BAR HDL PRESENTA:
4
2 FORO PER IL PERNO DI BLOCCAGGIO RAPIDO. Montaggio anteriore (da utilizzare per
bloccare la staffa anteriore prima del montaggio).
3 STAFFA ANTERIORE - FORI PER IL TRASPORTO
4 PUNTI DI SOLLEVAMENTO CENTRALI.
3
2
1
5 La staffa di sollevamento è asimmetrica ed è utilizzabile in due posizioni (A e B).
La posizione A porta il moschettone verso la parte anteriore.
La posizione B consente un passaggio intermedio utilizzando gli stessi fori di fissaggio.
A
B
6 Spostare la staffa di sollevamento nella posizione suggerita da RCF Shape Designer.
7 Fissare la staffa di sollevamento con i due perni sulla corda della staffa per bloccare il
sollevamento.
31
ITALIANO
8 Controllare che tutti i perni siano fissati e bloccati.
Seguire la procedura seguente per fissare il sistema:
PROCEDURA DI SOSPENSIONE
H PARANCO CON CATENA DI FISSAGGIO.
S MOSCHETTONE CERTIFICATO.
F BARRA DI SOSPENSIONE.
H
S
F
1) Collegare la barra di sospensione F al paranco con catena di fissaggio H (o ai motori)
utilizzando il moschettone certificato.
Fissare il moschettone.
2) Collegare il secondo perno sulla staffa anteriore per accertarsi che la staffa di
collegamento sia in posizione verticale.
3) Collegare la staffa anteriore al primo diffusore HDL utilizzando 2 perni a bloccaggio
rapido.
È POSSIBILE UTILIZZARE LA BARRA DI SOSPENSIONE HDL 20 LIGHT (P.N. 13360229) PER
COLLEGARE UN MASSIMO DI 4 MODULI HDL 20-A.
È POSSIBILE UTILIZZARE LA BARRA DI SOSPENSIONE HDL 10 LIGHT (P.N. 13360276) PER
COLLEGARE UN MASSIMO DI 6 MODULI HDL 10-A.
32
ITALIANO
4) Invertire e collegare la staffa posteriore 1 alla barra di sospensione utilizzando 2 perni
di bloccaggio rapido.
Il primo HDL deve essere fissato sempre partendo a 0° rispetto al telaio. Non sono permesse
altre angolazioni.
5) Collegare il secondo diffusore al primo sempre partendo dalle 2 staffe anteriori.
6) invertire e collegare la staffa posteriore del secondo diffusore utilizzando il foro per
l’angolazione corretta.
7) Collegare tutti gli altri diffusori seguendo la stessa procedura e operando su un diffusore
per volta.
33
ITALIANO
ARRAY SYSTEMS
DESIGN
La serie HDL consente agli utenti di scegliere tra svariate regolazioni angolari, per creare
gruppi di diffusori con curvatura variabile. Pertanto i progettisti possono creare gruppi su
misura, adatti alle caratteristiche di qualsiasi ambiente.
L’approccio base per la progettazione di gruppi dipende da tre fattori:
- Numero di elementi del gruppo;
- Angoli di copertura verticale;
- Copertura orizzontale.
Determinare il numero di elementi da utilizzare è un fattore cruciale: il numero di elementi
influenza notevolmente l’SPL ottenibile dal sistema, così come l’uniformità della copertura
in termini di risposta in frequenza e SPL. Il numero di elementi influisce fortemente sulla
direttività alle basse frequenze.
La semplice equazione che segue è un’approssimazione per le superfici di ascolto piane.
Copertura (x) ≈ 8n (m) Distanza di copertura richiesta = x (metri).
La modifica degli angoli di apertura tra i cabinet ha un impatto significativo sulla copertura
verticale per le alte frequenze, con il risultato che angoli di apertura verticale più stretti
causano un fascio verticale a Q maggiore, mentre un’apertura più ampia riduce il Q alle
alte frequenze. In generale gli angoli di apertura non influiscono sulla copertura verticale
alle basse frequenze.
La progettazione di sistemi di gruppi con curvatura si può riassumere come segue:
- HDL a fronte piano per sezioni a lunga distanza;
- aumento della curvatura al diminuire della distanza;
- aggiunta di ulteriori diffusori per un maggior livello sonoro.
Questo approccio concentra più trasduttori sulle lunghe distanze, nei punti più lontani,
riducendo gradualmente il numero di trasduttori al diminuire della distanza. Se viene
rispettata una progressione regolare di angoli, i gruppi realizzati secondo questi principi
forniranno un SPL uniforme e un carattere del suono coerente in tutto l’ambiente, senza la
necessità di elaborazioni complesse. Questo approccio, in cui la stessa quantità di energia
acustica viene distribuita su un angolo verticale più grande o più piccolo in base alla portata
richiesta, ha solitamente i seguenti scopi:
- coperture orizzontale e verticale uniformi;
- SPL uniforme;
- risposta in frequenza uniforme;
- SPL sufficiente per l’applicazione.
Naturalmente questa discussione è un approccio base. Data la quantità infinita di ambienti
e di utilizzatori, gli utenti dovranno risolvere problemi specifici in situazioni particolari. Il
software RCF Shape Designer programmato per il calcolo degli angoli di apertura ottimali,
degli angoli di puntamento e dei punti di appoggio sul graticcio della barra di sospensione
(fondamentali per il posizionamento del gruppo) per un dato ambiente, sarà illustrato in
seguito in questa guida.
SOFTWARE SHAPE
DESIGNER
RCF Shape Designer viene fornito in una cartella compressa in formato zip contenente un
file eseguibile di installazione:
Fare doppio clic sulla stessa e seguire le istruzioni a video.
34
INSTALLAZIONE DI RCF SHAPE
DESIGNER
REQUISITI DI SISTEMA
Utilizzare RCF Shape Designer per progettare gruppi HDL. La funzione principale di RCF
Shape Designer è quella di determinare la configurazione che fornisce le migliori prestazioni
in verticale per una data applicazione. Vengono inserite molteplici dimensioni di ambienti
che consentono a RCF Shape Designer di calcolare le relative prestazioni del gruppo di
diffusori.
Dopo l’installazione RCF Shape Designer sarà visibile come collegamento in Tutti i
programmi, tramite il pulsante di avvio di Windows.
INTRODUZIONE
ITALIANO
RCF Shape Designer necessita di un PC compatibile con i sistemi operativi Windows® 98,
Windows® 98SE, Windows® 2000, Windows® ME, Windows® XP, o Windows NT®.
Non è programmato per funzionare con i sistemi operativi Windows® 3.x, Windows® 95,
o Macintosh®.
UTILIZZO DEL SOFTWARE RCF
SHAPE DESIGNER
Facendo clic sulla scheda RCF Shape Designer si aprirà la pagina seguente:
Facendo clic sulla finestra si aprirà la pagina seguente:
È possibile avviare il programma compilando i campi vuoti.
35
ITALIANO
INSERIMENTO DEI DATI DELL’AMBIENTE
Per avere i risultati migliori i piani devono essere considerati come segue:
FLOOR: viene utilizzato per simulare la sezione di pavimento principale, dal palco alla
gradinata o alla recinzione. PLANE 1: viene utilizzato per simulare un proseguimento
del pubblico dietro al FLOOR (ad es. una gradinata posteriore) dalla fine del pavimento
principale al posto più lontano e più alto dietro al PLANE 2.
PLANE 2: viene utilizzato per simulare l’area di pubblico più lontana/in alto.
Inserire l’altezza, la lunghezza e l’elevazione fino a tre piani.
Per tutti i piani LENGTH si riferisce alla lunghezza orizzontale del piano stesso.
Per tutti i piani HEIGHT si riferisce all’altezza della parte posteriore del piano.
Per PLANE 1 e 2 ELEVATION si riferisce all’altezza della parte anteriore del piano.
Per PLANE 1 e 2 DISTANCE si riferisce alla distanza effettiva tra la parte anteriore del
gruppo e l’inizio del piano.
Per tutti i piani, selezionando SEATED o STANDING, il livello dell’orecchio viene posizionato
a 1,3 o 1,7 m sopra al rispettivo piano.
COVERAGE
Specificare le distanze di copertura orizzontali dalla parte anteriore dell’array.
Selezionare modalità SUSPENDED o STACKED nella sezione di installazione array per
determinare il tipo di supporto dello stesso.
In modalità SUSPENDED, la griglia è sospesa e gli cabinet sono attaccati sotto.
In modalità STACKED la griglia forma una base e i diffusori sono posizionati sopra.
36
ARRAY INSTALLATION
MODALITA’ SOSPENSIONE
ITALIANO
AUTO H SETTING - MIN TRIM HEIGHT
(IMPOSTAZIONE AUTOMATICA DELL’ALTEZZA - ALTEZZA ASSETTO MINIMA)
Questo è il limite inferiore dell’array e viene definito come la minima distanza consentita
dal punto più basso dell’array al piano sottostante.
AUTO H SETTING - MAX SUSPENSION POINT
(IMPOSTAZIONE AUTOMATICA DELL’ALTEZZA - PUNTO DI SOSPENSIONE MASSIMO)
Impostarlo alla massima altezza dell’array consentita (solitamente la parte più alta del fly bar).
L’altezza massima del punto di appendimento viene solitamente scelta in modo da consentire
la massima altezza possibile, meno uno spazio ragionevole per eventuali moschettoni, stinger,
briglie e ganci sospesi. Lasciare 1 m per uno stinger tra ogni aletta sospesa sulla griglia e il
relativo gancio motorizzato per garantire che i carrelli motorizzati a catena non si appoggino
sulla griglia o sul cabinet superiore, modificando l’angolo di inclinazione.
MANUAL H SETTING (IMPOSTAZIONE MANUALE DELL’ALTEZZA)
In modalità manuale è possibile inserire l’altezza richiesta per il sollevamento del sistema.
È possibile impostare il numero di cabinet, anche in base alla loro disponibilità.
NUMEOR DI MODULI E
SUBWOOFERS
HDL20-A
VENUE
- Rappresentazioni grafiche dell’array e della location
- Angolo di apertura di puntamento tra ogni coppia di cabinet
-Altezza dell’array e altezza raggiunta dal fondo dell’array partendo dal pavimento
- Pick point sul fly bar per raggiungere l’angolo calcolato.
- Peso dell’array
- Risultato del controllo meccanico
RISULTATI DELL’RCF SHAPE
DESIGNER
PAGINA ARRAY
37
ITALIANO
38
- Caratteristiche meccaniche cluster
- Fattori di sicurezza meccanici
PAGINA DELLE MECCANICHE
- Configurazione dei preset DSP
PAGINA DEL PROCESSORE
- Angolo di puntamento per ogni cabinet come differenza dal punto orizzontale a 0°
- Svariati angoli e portate calcolati in base alle dimensioni dell’ambiente
- Rappresentazione SPL sull’area riservata al pubblico
PAGINE SPL & REPORT
ATTENZIONE: è possibile visualizzare le differenti pagine solo IN SEQUENZA (venue >
array > mechanics > processor > spl and report, e in senso contrario), per essere certi che
tutte le pagine siano mostrate all’utente, compresa quella riguardante la meccanica.
WARNING
MODALITA’ MANUALE
ITALIANO
RCF Shape Designer opera in una delle due modalità base:
- AUTOMATIC MODE (impostazione predefinita): RCF Shape Designer seleziona i valori
ottimali di apertura angolare tra i cabinet, angolo di puntamento dell’array, punto di
aggancio sul fly bar e preset DSP.
- MANUAL MODE: fornisce un controllo parziale sulla configurazione dell’array. Gli angoli
apertura tra gli involucri possono essere aumentati con incrementi di 2° per ogni diffusore
adiacente, allo scopo di mantenere una configurazione dell’array a spirale. Dopodiché
l’angolo di puntamento dell’array e il punto di appoggio sul fly bar possono essere inseriti
manualmente attivando gli indicatori BOX 1 + GRID CHANGEABLE e MANUAL H.
Finestra array: impostazione manuale degli angoli di apertura
Modifica manuale degli angoli
OPTIMIZZARE
L’ARRAY
Una volta finita la progettazione (numero di elementi e angoli di apertura verticale) tramite
il software Shape Designer, è possibile ottimizzare realmente l’array in base all’ambiente
e all’uso, tramite le molteplici impostazioni DSP memorizzate. Gli array sono solitamente
suddivisi in due o tre zone, in base al progetto e alle dimensioni dell’array stesso.
Per ottimizzare ed equalizzare l’array vengono utilizzate differenti strategie per le alte
frequenze (gittate lunghe o corte) e per le basse frequenze.
Maggiore è la distanza, più alta sarà l’attenuazione alle alte frequenze. Generalmente le
alte frequenze necessitano di una correzione per compensare l’energia perduta lungo il loro
percorso; la correzione necessaria di solito è proporzionale alla distanza e all’assorbimento
delle alte frequenze causato dall’aria. Per le distanze da brevi a medie, l’assorbimento dell’aria
non è quasi rilevante, in queste aree le alte frequenze necessitano di una piccola correzione
aggiuntiva.
STRATEGIE DI EQUALIZZAZIONE
DELLE ALTE FREQUENZE
La figura seguente mostra l’equalizzazione corrispondente alle impostazioni HF per NEAR e
FAR:
39
ITALIANO
Mentre tramite le onde è possibile controllare parti isolate delle svariate aree di copertura da
media ad alta frequenza, la sezione in bassa frequenza di un gruppo HDL richiede ancora un
accoppiamento reciproco, con la stessa ampiezza e la stessa fase, per ottenere un direzionamento
migliore. Il direzionamento in bassa frequenza dipende meno dagli angoli di apertura relativi del
gruppo e di più dal numero di elementi del gruppo.
EFFETTO DI ACCOPPIAMENTO
DELLE BASSE FREQUENZE
Alle basse frequenze, più elementi ci sono nel gruppo (più è lungo il gruppo), più questo diventa
direzionale, fornendo più SPL in questo intervallo. Il controllo direzionale del gruppo si ottiene
quando la lunghezza dello stesso è simile o maggiore della lunghezza d’onda delle frequenze
riprodotte dal gruppo.
Anche se il gruppo può (e solitamente deve) essere suddiviso in zone per realizzare diverse
curve di equalizzazione per le alte frequenze, la stessa equalizzazione deve essere mantenuta
con tutti i filtri a bassa frequenza.
Impostazioni di equalizzazione in bassa frequenza diverse nello stesso gruppo peggiorano
l’effetto di accoppiamento desiderato. Per la stessa ragione, non sono consigliate differenze
di guadagno per gruppi in linea, poiché regolando le varie aree con un controllo di ampiezza
complessivo per ognuna causa una riduzione dell’altezza massima in bassa frequenza e del
direzionamento.
In ogni caso i gruppi in linea solitamente necessitano di una correzione per compensare
l’energia ai livelli bassi.
STRATEGIE PER LE BASSE
FREQUENZE
La figura seguente mostra l’equalizzazione corrispondente alle impostazioni del CLUSTER,
con riferimento a varie quantità di diffusori, da 2-3 fino a 10-16. Aumentando il numero degli
cabinet le curve di risposta diminuiscono per compensare l’accoppiamento reciproco della
sezione in bassa frequenza.
HDL20-A
POSIZIONATO A TERRA
I diffusori HDL possono essere impilati sopra ai subwoofer RCF con i relativi accessori.
Subwoofer compatibili con HDL 20-A:
- SUB 8004-AS
- SUB 8006-AS
- HDL 18-AS
Subwoofer compatibili con HDL 10-A:
- SUB 8004-AS
- SUB 8006-AS
- HDL 15-AS
40
ITALIANO
1) Fissare la barra di sospensione HDL sui subwoofer come illustrato nella figura.
2) La stacking bar aggiunge un valore fisso all’angolo di inclinazione del blocco di diffusori
HDL. Il valore dell’angolo di regolazione può variare da +7,5° a −7,5°.
3) Collegare la staffa anteriore del primo diffusore HDL utilizzando 2 perni a bloccaggio
rapido.
41
ITALIANO
4) La parte frontale del diffusore inferiore in un array a stacking non deve essere
necessariamente parallelo al palco o al telaio. Se necessario può essere inclinato verso l’alto
o verso il basso. In questo modo gli array ad arco possono essere realizzati rapidamente da
una posizione di fissaggio a terra.
5) Il diffusore inferiore in un array a stacking può essere inclinato per poter scegliere
l’area di copertura adeguata (da +7,5 a -7,5). Per il montaggio si posiziona la prima cassa
sopra al ply bar e si collega adesso con lo stacking bar, scegliendo l’opportuno angolo di
inclinazione. Il tutto viene infine bloccato usando i pin a corredo.
In seguito aggiungere i diffusori HDL uno a uno come indicato per le configurazioni
sospese. Possono essere impilati e interconnessi fino a quattro diffusori HDL, utilizzando i
componenti di fissaggio D-LINE standard e i subwoofer D-LINE come piano di appoggio.
6) È possibile impilare i diffusori HDL sul pavimento utilizzando la relativa stacking bar
come illustrato nelle figure.
42
HDL 20-A
HDL 10-A
55 Hz - 20 kHz
65 Hz - 20 kHz
135 dB
133 dB
100°
100°
15° max
15° max
2” , 3.0” voice coil
2” , 2.5” voice coil
-
-
2x10”, 2.5” voice coil
2x8”, 2.0” voice coil
XLR-JACK
XLR-JACK
XLR
XLR
-2 dBu / +4 dBu
-2 dBu / +4 dBu
800 Hz
800 Hz
Thermal, RMS
Thermal, RMS
Soft limiter
Soft limiter
Cluster, HF, High Curving, Indoor
Cluster, HF, High Curving, Indoor
1400 W Peak, 700 W RMS
1400 W Peak, 700 W RMS
High frequencies
200 W RMS
200 W RMS
Low frequencies
500 W RMS
500 W RMS
Cooling
Convection
Convection
Powercon Connector in
Powercon Connector link
Powercon Connector in
Powercon Connector link
PHISICAL
Height
294 mm (11.5”)
294 mm (11.5”)
Width
705 mm (27.7”)
569 mm (22.4”)
Depth
445 mm (17.5”)
434 mm (17.09”)
Weight
29 Kg (63.93 lbs)
20.4 Kg (44.9 lbs)
Cabinet
Composite PP
Composite PP
Rigging flyware
Rigging flyware
2 side
2 side
ACOUSTICAL
Frequency response
Max SPL
Horizontal Coverage angle
Vertical Coverage angle
Compression Driver
Midrange
Woofer
INPUT SECTION
Input connector
Output connector
Input sensitivity
PROCESSOR SECTION
Crossover frequencies
Protections
Limiter
Controls
AMPLIFIER
Total power
Connection
Hardware
Handles
ITALIANO
SPECIFICATIONS
µ
±
÷
43
RCF S.p.A.
Via Raffaello Sanzio, 13
42124 Reggio Emilia - Italy
Tel +39 0522 274 411
Fax +39 0522 232 428
e-mail: [email protected]
10307302 Rev I
www.rcf.it
Scaricare