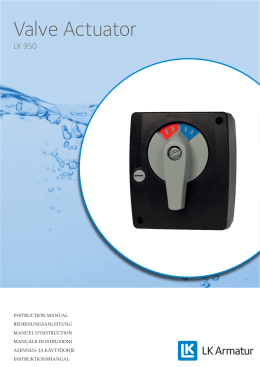
NR24/230
Mischerantrieb
Servomoteur de vanne
Servocomando per valvole
Valve actuator
A
Deutsch
Informationen
Français
Informations
Italiano
Informazione
English
Information
Art. No. 503638.14a / 70801-00002
20.03.2006
C
B
E
D
F
G
Montageanleitung
Instruction de montage
Istruzione di montaggio
Mounting instruction
1. Die Achse de Mischers A im Gegenuhr-zeigersinn in
die Endstellung drehen (OFFEN oder ZU).
2. Verdrehsicherung B in ein geeignetes Gewindeloch
des Mischers schrauben (falls notwendig vorhandene
Schraube entfernen), damit der Verdrehbolzen in
einen der Schlitze am Antriebboden passt.
3. Adapter C auf die Mischerachse stecken.
4. Mischerantrieb D auf den Adapter C stecken
(Ausliefe-rungzustand des Antriebs - im Gegenuhrzeigersinn am Anschlag), wenn nötig leicht im
Uhrzeigersinn drehen bis der Verdrehbolzen B in
einen der Schlitze am Antrieb geschoben werden
kann
5. Das Stellungsanzeige-Schild E so drehen damit die
Anzeigeskala mit der gewünschten Funktion (OFFEN
/ ZU) übereinstimmt und dann auf den Mischerantrieb
stecken.
6. Handverstellgriff F mit Pfeilmarke auf das linke
Skalenende zeigend auf die Antriebsachse stecken
und die ganze Einheit mit Schraube G festziehen.
7. Mit Schraubendreher (Nr. 3) den Handverstellknopf
am Antrieb von «A» auf «☞» stellen und mittels
Handgriff F den Mischer von einer Endstellung in die
andere drehen. Der Antrieb muss unbedingt von
einem Endanschlag zum anderen bewegt werden
können (90°).
8. Antrieb an der Nennspannung anschliessen.
9. Handverstellknopf auf «A» stellen, der Antrieb läuft in
die gewünschte Stellung.
1. Tourner l'axe de la vanne mélangeuse A en sens
inverse horaire dans la position finale.(OUVERTE ou
FERMEE)
2. Visser l’arrêt anti-rotation B dans un trou fileté
convenant de la vanne (si nécessaire enlever une vis
existante).
3. Enficher l’adapteur C sur l'axe de la vanne.
4. Enficher le servomoteur D sur l’adaptateur C et (état
de livraison du servomoteur: en butée dans le sens
inverse horaire), si nécessaire, le tourner légèrement
en sens horaire jusqu'à ce qu'il puisse être engagé
dans une des fentes dans le boîtier du servomoteur
5. Tourner le cadran E pour qu'il coïncide avec la
fonction désirée (OUVERT / FERMEE) et le glisser
sur l'axe du servomoteur.
6. Enficher la poignée F d'actionnement manuel sur le
servomoteur dans la position pour que la flèche
montre la limite gauche de la graduation sur le
cadran. Ensuite, fixer l'ensemble au moyen de la vis
G
7. A l’aide d’un tourne-vis (No. 3) tourner le bouton de
débrayage sur le servomoteur de la position «A» sur
» et tourner la vanne manuellement à l'aide de la
«
poignée F d'une position finale à l'autre. Il est
important que le servomoteur puisse être tourné
d'une butée interne à l'autre (90°).
8. Raccorder le servomoteur à la tension nominale.
9. Remettre le bouton de débrayage sur «A» et le
servomoteur tourne dans la position désirée.
1. Girare l'asse della valvola miscelatrice A nel senso
contrario orario nella posizione finale (APERTA o
CHIUSA).
2. Avvitare l’arresto anti-rotazione B in un foro filettato
adeguato alla valvola (se necessario togliere una
vite esistente).
3. Inserire l’adattore C sull'asse della valvola.
4. Inserire il servocomando D sull’adattore C e, se
necessario, girarlo leggermente in senso orario
finché possa inserire in una fessure dell’involucro del
servocomando (il servocomando é consegnato:
chiuso nel senso inverso orario).
5. Girare il quadrante E per farlo coincidere con la
funzione desiderata (APERTA/ CHIUSA)e infilarlo
sull'asse del servocomando.
6. Inserire la manovella F di messa in moto manuale
sul servocomando nella posizione adeguata finché la
freccia indichi il limite sinistra della graduazione sul
quadrante. Poi, fissare l’insieme con la vite G.
7. Con un cacciavite (No. 3), girare il pulsante di
disinnesto sul servocomando dalla posizione «A»
» e girare la valvola manualmente con la
sulla «
manovella F da una posizione finale all'altra. È
importante che il servocomando possa essere
girato da un limite di rotazione all'altro (90°).
8. Allacciare il servocomando alla tensione nominale.
9. Rimettere il pulsante di disinnesto sulla «A» e il
servocomando gira nel senso desiderato.
1. Turn the spindle of the valve A counter clockwise to
the end position (OPEN or CLOSED). Remove the
handle supplied with the valve body from the valve
spindle.
2. Screw the anti-rotation stop B in a convenient hole
on the valve (if necessary remove an existing
screw).
3. Slide the linkage C over the valve spindle.
4. Place the actuator D onto the linkage C and if
necessary rotate it slightly clockwise until the antirotation stop B engages in the slot of the actuator
(the actuator is supplied in the anti-clockwise
position).
5. Turn the scale E into the position relevant to the
requested function (OPEN/ CLOSED) and place it
onto the actuator.
6. Place the handle F onto the actuator ensuring that
the arrow points to the left end position of the scale.
Tighten the whole unit by means of the screw G.
7. Using a screwdriver (No. 3) turn the disengaging
»
button on the housing cover from «A» to «
position and rotate the valve by means of the
handle F from one end position to the other. It is
important that the actuator can be moved from
one end stop to the other (90°).
8. Connect the actuator to the power supply.
9. Turn the disengaging button back to the«A»
position and the actuator will turn in the required
position.
☞
☞
☞
Deutsch
Français
Mischerantrieb NR24/230
Anwendung
Der Mischerantrieb NR24/230 wird für die Motorisierung von
Mischhahnen eingesetzt. Die Ansteuerung erfolgt je nach Modell durch
handelsübliche Regelsysteme mit 3-Punkt Ausgang.
Wirkungsweise
Der Mischerantrieb wird mit Hilfe einer einzigen Schraube auf dem
Mischhahn befestigt. Der mitgelieferte Stehbolzen dient als Verdrehsicherung. Die Montagelage kann in 90°-Schritten beliebig gewählt
werden. Durch seine kompakte und kleine Bauform passt der NR24/230
in die meisten Ausschnitte der Armaturen-Isolationen.
Der Drehwinkel ist auf 90° begrenzt. Bei Erreichen der Endanschläge wird
der Antrieb elektrisch abgeschaltet und ist somit stromlos.
Bei allfälligen Störungen des Regelsystems kann der Antrieb mittels
Drehknopf am Gehäuse auf Handbetrieb gestellt werden. Dadurch wird
das Getriebe ausgerastet und der Mischerhahn kann durch Drehen des
Handgriffs am Mischerantrieb in jede beliebige Stellung gebracht werden.
Die Stellung wird an einer umkehrbaren Skala angezeigt.
English
Italiano
Servomoteur de vanne NR24/230
Application
Applicazione
Le servomoteur de vanne NR 24/230 est utilisé pour la motorisation de
vannes mélangeuses. La commande se fait par des systèmes de régulation
3-points usuels.
Il servocomando NR24/230 viene usato per la motorizzazione di valvole
miscelatrici. Il comando avviene tramite usuale sistema di regolazione a
3 punti.
Mode de fonctionnement
Funzionamento
Le servomoteur de vanne est monté sur la vanne mélangeuse à l'aide d'une
seule vis de fixation. La tige de guidage fournie avec l'appareil sert d'arrêt
anti-rotation. La position de montage peut être choisie par pas de 90°. Par
sa forme compacte et sa petite taille, le NR24/230 peut être encastré dans
la plupart des ouvertures des coffrets d'isolation prévues à cet effet.
L'angle de rotation est limité à 90°. Lorsqu'il touche les butées finales, il est
électriquement coupé, c.à.d. il ne consomme plus de courant.
Lors de dérangements éventuels du système de régulation, le servomoteur
peut être mis en fonctionnement manuel au moyen d'un bouton sur le
boîtier. En tournant ce bouton, le réducteur est débrayé et la vanne
mélangeuse peut ainsi être mise dans n'importe quelle position en tournant
la poignée du servomoteur. La position de la vanne mélangeuse est
indiquée sur le cadran reversible.
Il servocomando viene montato sulla valvola miscelatrice tramite una sola
vite. L’asta consegnata serve d’arresto anti-rotazione. La posizione de
montaggio può essere scelta in passi di 90°. Grazie alla sua forma
compatta e alla sua piccolezza, il NR24/230 può essere inserito nella
maggior parte degli involucri d’isolazione.
L'angolo di rotazione è limitato a 90°. Al raggiungimento dei limiti di
funzionamento avviene un disinserimento elletrico, il motorino rimane
pertanto senza tensione.
In caso di guasti del sistema di regolazione il servocomando può venir
portato nella posizione manuale tramite commutatore sull'involucro. In
questa posizione può venir sganciato il meccanismo tramite un pulsante e
girando la manovella, il servocomando può venir portato in qualsiasi
posizione. La posizione è rilevabile su una scala riversibile.
Schema di allacciamento
Anschluss-Schema
Commande 3 points
Sicherheitshinweis
Der elektrische Anschluss
hat gemäss den gesetzlichen
Vorschriften zu erfolgen.
L1 N L1
~
24V~/230V~
L1 N L1
~
24V~/230V~
The actuator is mounted directly to the slipper valve spindle and fixed with
one screw. An anti-rotation bolt is supplied with the actuator. The
mounting position of the actuator can be chosen in steps of 90°. Thanks
to its small size and compact form the NR24/230 fits most of the cut-outs
of the isolation boxes.
The angle of rotation is limited to 90°. When the actuator reaches either
end position the voltage supply is interrupted by limit switches.
In case of a failure by the controller the actuator can be put into a manual
mode by turning the button on the housing cover which will disengage the
gears. The actuator can now be put in any position by turning the handle
and this position is indicated by means of a reversible scale.
Controller
Consigne de sécurité
Importante
Le branchement électrique
doit être conforme aux prescriptions légales.
I collegamenti elettrici devono
essere conformi alle normative
vigenti.
L1 N L1
~
24V~/230V~
1 2 3
NR 24/230
NR 24/230
Operation
Regolatore
1 2 3
1 2 3
The valve actuator NR24/230 can be used for motorising slipper valves.
These acuators can be operated by any controller/compensator with a
3-point output.
3-point control
Controllo a tre punti
Régulateur
Regler
Application
Wiring diagram
Schéma de raccordement
Dreipunktsteuerung
Valve actuator NR24/230
Servocomando per valvole NR24/230
The equipment must be connected to the electric power
supply in a manner which
complies with the legal
requirements applicable at the
place of use.
L1 N L1
~
24V~/230V~
1 2 3
NR 24/230
NR 24/230
Technische Daten NR24/230
Caractéristiques NR24/230
Dati tecnici NR24/230
Technical data NR24/230
Speisespannung
Leistungsverbrauch
Dimensionnierung
Schutzklasse
Anschluss
Drehwinkel
Drehmoment
Laufzeit
Drehsinn
Handverstellung
Stellungsanzeige
Umgebungstemperatur
Wartung
Gewicht
Tension d'alimentation
Consommation
Dimensionnement
Classe de protection
Raccordement
Angle de rotation
Couple de rotation
Temps de marche
Sens de rotation
Positionnement manuel
Indication de position
Température ambiante
Entretien
Poids
Tensione di alimentazione 24 V~/ 230 V~ 50 Hz
Potenza assorbita
2,5 W (5 Nm) 3,5 W (10 Nm)
Dimensionamente
2,5 VA (5Nm), 3,5 VA (10Nm)
Classe di protezione
II (isolamento di protezione)
Allacciamento
morsettiera
Angolo di rotazione
90° limitato elettr.
Momento torcente
5 Nm o 10 Nm
Tempo di rotazione
70 s, 140 s o 280 s
Senso di rotazione
selezionabile alla morsettiera
Azionamento manuale
disinnestamento meccanico
Indicazione della posizione su scala riversibile
Temperatura ambiente
0°C...+50°C
Manutenzione
nessuna
Peso
400 g
Power supply
Power consumption
For wiring sizing
Protection class
Connection
Angle of rotation
Torque
Running time
Direction of rotation
Manual operation
Indication of position
Ambient temperature
Maintenance
Weight
24 V ~/ 230 V~ 50 Hz
2,5 W (5 Nm) 3,5 W (10 Nm)
2,5 VA (5Nm), 3,5 VA (10Nm)
II (schutzisoliert)
Klemmen
90° elektrisch begrenzt
5 Nm oder 10 Nm
70 s, 140 s oder 280 s
wählbar an Klemmen
mech. Getriebeausrastung
umkehrbares Anzeigeschild
0°C...+50°C
wartungsfrei
400 g
MONTAGEBEISPIEL AUF DER RÜCKSEITE
24 V~/ 230 V~ 50 Hz
2,5 W (5 Nm) 3,5 W (10 Nm)
2,5 VA (5Nm), 3,5 VA (10Nm)
II (isolation de sécurité)
bornier
90° limité électriquement
5 Nm ou 10 Nm
70 s, 140 s ou 280 s
sélectable aux bornes
débrayage mécanique
cadran reversible
0°C...+50°C
sans entretien
400 g
EXEMPLE DE MONTAGE AU VERSO
Danger
ESEMPIO DI MONTAGGIO SUL RETRO
24 V ~/ 230 V~ 50 Hz
2,5 W (5 Nm) 3,5 W (10 Nm)
2,5 VA (5Nm), 3,5 VA (10Nm)
II (without earth wire)
terminals
electrically limited to 90°
5 Nm or 10 Nm
70 s, 140 s or 280 s
selectable on terminals
mechanical disengagement
reversible scale
0°C...+50°C
maintenance-free
400 g
FITTING INSTRUCTIONS SEE OVERLEAF
Art. No. 503638.14a
Scaricare