GETTING STARTED If using the DC Adaptor to power the clock, plug the adaptor to the clock. If using battery, insert 2pcs AA size batteries into the battery compartment, pay attention to the polarity. PRODUCT DESCRIPTION 1. 2. 3. 4. SNOOZE / LIGHT key REVERSE key LCD display PROJECTOR 5. 6. 7. 8. MODE key SET key ADJUST key RECEIVE key 9. 10. 11. 12. RESET key DC adaptor FOCUS key Battery door DISPLAY SYMBOLS 1.Time 2.Month 3.Date 4. Day of the week 5.Temperature 6. Signal strength indicator 7. Daylight savings time 8. Low battery indicator US version display No signal quality Weak signal quality Excellent signal quality The unit is already synchronized with the time signal transmitter. Otherwise the antenna segment will disappear from the LCD display. NOTE You may use the RECEIVE button to receive the time signal manually. NOTE Time-zone offset from the received clock signal time is available for US version. You can change the time zone of Pacific time, Mountain time, Central time and Eastern time as indicated on the MAP shown on the display. To adjust time-zone offset. 1. Press “MODE” to enter Alarm Time mode. 2. Press “ADJUST” to toggle different time zones. 3. Press “MODE” to back to clock mode Adjust the projected image focus by turning the FOCUS key. NOTE If using DC power, press the “SNOOZE/LIGHT” key and the “ ” key will invert the projected image by 180 degree. 3. Press “SET” key again to step the setting items. The setting sequence will be: Hour > Minute > Second >12 / 24Hr > Date > Month > Year > Language (GB=English FR=French DE=German ES=Spanish IT=Italian) 4. Press “MODE” key to save and exit the setting mode. SETTING THE ALARM 1. In normal time display, press “MODE” key to enter the Alarm Time Mode. 2. Enable the alarm by pressing “ADJUST” key so that the bell icon “ ” appears. 3. Enable the snooze function by pressing “ADJUST” key so that the snooze icon “Zz” appears. 4. Press “SET” key for 2 seconds until the HOUR digit flashing. 5. Press “ADJUST” key to increase the setting value. 6. Press “SET” key again to step the setting items. The sequence will be: Hour > Minute. 7. Press “MODE” key to save and exit the setting modee. NOTE When alarm sounds and the snooze button is pressed, the alarm will automatically start again after 4 minutes. The snooze function can be repeated for 4 times per day, and alarm will sound again until the next day. The alarm duration is 2 minutes. 1. In normal time display, press “set” key to toggle between oC / oF temperature format. PRECAUTIONS • • • • • • Do not clean the unit with abrasive or corrosive materials. Do not tamper with the unit’s internal components. Doing so will invalidate the warranty on the unit and may cause unnecessary damage. The unit contains no user-serviceable parts. Only use fresh batteries as specific in the user’s instructions. Do not mix new and old batteries. Due to printing limitations, the displays shown in this manual may differ from the actual display. The contents of this manual may not be reproduced without the permission of the manufacturer. Do not dispose this product as unsorted municipal waste. Collection of such waste separately for special treatment is necessary. Note The technical specifications for this product and the contents of the user manual are subject to change without notice. ABOUT OREGON SCIENTIFIC Visit our website (www.oregonscientific.com ) to learn more Oregon Scientific products. For international inquiries, please visit: http://corporate.oregonscientific.com/afterSales_contactUs.asp EU-DECLARATION OF CONFORMITY Hereby, Oregon Scientific, declares that this Radio-Controlled Projection Clock with Indoor Temperature (Model: TW223) is in compliance with R&TTE99 / 5. A copy of the signed and dated Declaration of Conformity is available on request via our Oregon Scientific Customer Service. COUNTRIES RTTE APPROVAL COMPLIED ALL EU countries, Switzerland and Norway FCC Compliance Statement This device complies with part 15 of the FCC Rules. Operation is subject to the following two conditions: (1) This device may not cause harmful interference, and (2) this device must accept any interference received, including interference that may cause undesired operation. Changes or modifications nor expressly approved by the party responsible for compliance could void the user’s authority to operate the equipment. FCC WARNING This equipment has been tested and found to comply with the limits for a Class B digital device, pursuant to Part 15 of the FCC Rules. These limits are designed to provide reasonable protection against harmful interference in a residential installation. This equipment generates, uses and can radiate radio frequency energy and, if not installed and used in accordance with the instructions, may cause harmful interference to radio communications. However, there is no guarantee that interference will not occur in a particular installation. If this equipment does cause harmful interference to radio or television reception, which can be determined by turning the equipment off and on, the user is encouraged to try to correct the interference by one or more of the following measures: • Reorient or relocate the receiving antenna. • Increase the separation between the equipment and the receiver. • Connect the equipment into an outlet different from that to which the receiver is connected. 7.Tasto ADJUST 8.Tasto RECEIVE 9.Tasto RESET 10. Alimentatore DC 11.Rotellina FOCUS 12. Vano batterie • DESCRIPTION 1. 2. 3. 4. 5. 6. Bouton PAUSE / LUMIÈRE Bouton RETOUR EN ARRIÈRE Affichage LCD PROJECTEUR Bouton MODE Bouton RÉGLAGE Questo prodotto è progettato per sincronizzare automaticamente l’ora con un segnale orario. Versione EU: segnale DCF-77 da Francoforte, Germania Versione USA: segnale WWVB-60 da Fort Collins Colorado, USA Versione Regno Unito: segnale MSF-60 da Anthorn, Inghilterra L’indicatore del segnale indica diversi livelli di forza dello stesso. No signal quality Weak signal quality Excellent signal quality Se l’orologio RC riceve un segnale ottimale, sul display LCD appare il simbolo Sync-time “ ”. L’unità è già sincronizzata con il trasmettitore del segnale orario. In caso contrario, il segmento dell’antenna scompare dal display LCD. NOTA Si può ricevere il segnale orario manualmente usando il tasto RECEIVE. NOTA Per la versione statunitense è disponibile un fuso orario diverso dal segnale orario ricevuto. È possibile cambiare il fuso orario scegliendo tra ora del Pacifico, della zona delle Montagne, ora Centrale e ora Orientale, come indicato sulla MAPPA presente sul display. Regolazione della differenza di fuso orario: 1. Premere “MODE” per accedere alla modalità Ora Sveglia. 2. Premere “ADJUST” per alternare i vari fusi orari. 3. Premere “MODE” per tornare alla modalità Orologio. 1. 2. 3. 4. 5. 6. 7. 8. ruoterà di 180°. Girare la rotellina FOCUS per mettere a fuoco l’immagine proiettata. NOTA Se si utilizza l’alimentazione DC, premere il tasto ” si inverte “SNOOZE/LIGHT” quindi il tasto “ l’immagine proiettata. Se l’orologio non riceve un buon segnale orario, è possibile impostarlo manualmente. 1. Premere il tasto “SET” per 2 secondi, finché non lampeggia la cifra dell’ora. 2. Premere il tasto “ADJUST” per regolare il valore. 3. Premere nuovamente il tasto “SET” per navigare tra le diverse voci. L’ordine delle impostazioni è: Ore > Minuti > Secondi >12 / 24h > Data > Mese > Anno > Lingua (GB=inglese FR=francese DE=tedesco ES=spagnolo IT=italiano) 4. Premere il tasto “MODE” per uscire dalla modalità impostazioni. Consult the dealer or an experienced radio/TV technician for help. CAUTION : 1. RISK OF EXPLOSION IF BATTERY IS REPLACED BY AN INCORRECT TYPE. 2. DIPOSE OF USED BATTERIES ACCORDING TO THE INSTRUCTIONS. 3. Use only with the provided adaptor model 4. The socket-outlet shall be installed near the equipment and install be easily accessible. The following information is not to be used as contact for support or sales. Please call our customer service number (listed on our website at www.oregonscientific.com or on the warranty card for this product) for all inquiries instead. We Name: Oregon Scientific, Inc. Address:19861 SW 95th AVe., Tualatin, Oregon 97062 USA Telephone No.:1-800-853-8883 Declare that the product Product No.:TW223 Product Name:Radio-Controlled Projection Clock with Indoor Temperature Manufacturer: Oregon Scientific, Inc. Address: Block C, 9/F, Kaiser Estate, Phase 1, 41 Man Yue St., Hung Hom, Kowloon, Hong Kong is in conformity with Part 15 of the FCC Rules. Operation is subject to the following two conditions: 1) This device may not cause harmful interference. 2) This device must accept any interference received, including interference that may cause undesired operation. 1. Nella visualizzazione normale dell’ora, premere il tasto “MODE” per accedere alla Modalità Ora Sveglia. 2. Attivare la sveglia premendo il tasto “ADJUST”: apparirà l’icona della campanella “ ”. 3 Attivare la funzione snooze premendo il tasto “ADJUST”: apparirà l’icona dello snooze “Zz”. 4. Premere il tasto “SET” per 2 secondi, finché non lampeggia la cifra dell’ora. 5. Premere il tasto “ADJUST” per aumentare il valore dell’impostazione. Cet appareil est conçu pour synchroniser son horloge automatiquement avec un signal horaire. Version U.E. : DCF-77 signal émis depuis Francfort, Allemagne Version U.S.A.: WWVB-60 signal émis depuis Fort Collins, Colorado, USA Version R.U.: MSF-60 signal émis depuis Anthorn, Angleterre L’indicateur de signal affiche les différents niveaux de puissance de signal. No signal quality Weak signal quality Excellent signal quality Si l’horloge radio-contrôlée reçoit bien un ” signal, un symbole de synchronisation “ apparait sur l’écran LCD. L’horloge est déjà synchronisée avec l’émetteur de signal horaire. Sinon, le segment d’antenne disparait de l’affichage LCD. REMARQUE Vous pouvez utiliser le bouton RECEIVE pour recevoir le signal horaire manuellement. REMARQUE Un décalage par rapport au signal horaire reçu est disponible pour la version US. Vous pouvez changer les fuseaux horaires Pacifique, Montagne, Central and Est comme il est indiqué sur la carte montrée sur l’écran. Pour ajuster le décalage de fuseau horaire : 1. Appuyer sur “MODE” pour entrer dans le mode Heure d’Alarme. 2. Appuyer sur “ADJUST” pour alterner entre les différents fuseaux horaires. 3. Appuyer sur “MODE” pour revenir au mode heure. Appuyer sur le bouton SNOOZE / LIGHT pour allumer le projecteur et le rétroéclairage de l’écran pendant 5 secondes. Appuyer et tenir le bouton SNOOZE / LIGHT pendant 3 secondes, le projecteur resteront allumés pendant 30 minutes. Si l’adaptateur CA est branché, le projecteur reste en marche. Appuyer sur le bouton “ ” pour tourner l’image de 180 degrés. Ajuster la mise au point de l’image projetée en tournant le bouton FOCUS. REMARQUE Si vous utilisez la puissance DC, appuyez sur “SNOOZE/LIGHT” puis touche “ ” permet d’inverser l’image projetée. Si l’horloge ne réussit pas à recevoir le signal horaire, il est possible de régler l’heure manuellement. 1. Appuyer sur le bouton “SET” pendant 2 secondes jusqu’à ce que les chiffres de l’heure clignotent. 2. Appuyer sur le bouton “ADJUST” pour ajuster les chiffres. 3. Appuyer sur le bouton “SET” de nouveau pour passer d’une étape à l’autre. La séquence de réglage est : Heure > Minute > Seconde >12 / 24Hr > Date > Mois > An > Langue (GB=Anglais FR=Français DE=Allemand ES=Espagnol IT=Italien) 4. Appuyer sur le bouton “MODE” pour sortir du mode réglage. RÉGLAGE DE L’ALARME 6. Premere nuovamente il tasto “SET” per navigare tra le diverse voci. L’ordine delle impostazioni è: Ore > Minuti. 7. Premere il tasto “MODE” per uscire dalla modalità impostazioni. NOTA Se suona la sveglia e si preme il pulsante snooze, la sveglia riprenderà a suonare dopo 4 minuti. La funzione snooze può essere ripetuta fino a 4 volte al giorno, e la sveglia suonerà ancora fino al giorno successivo. La durata della sveglia è di 2 minuti. VISUALIZZAZIONE DELLA TEMPERATURA 1. En mode d’affichage horaire normal, appuyer sur le bouton “MODE” pour entrer dans le Mode Heure d’Alarme. 2. Activer l’alarme en appuyant sur le bouton “ADJUST” pour que l’icône de sonnerie “ ” apparaisse. 3. Activer la fonction pause en appuyant sur le bouton “ADJUST” pour que l’icone de pause “Zz” apparaisse. 4. Appuyer sur le bouton “SET” pendant 2 secondes jusqu’à ce que les chiffres de l’heure clignotent. 5. Appuyer sur le bouton “ADJUST” pour augmenter les valeurs de réglage. 6. Appuyer sur le bouton “SET” de nouveau pour passer d’une étape à l’autre. La séquence est : Heure > Minute. 7. Appuyer sur le bouton “MODE” pour sortir du mode de réglage. REMARQUE Quand l’alarme sonne et que l’on appuie sur le bouton pause, l’alarme sonnera de nouveau dans 4 minutes. La fonction pause peut être répétée 4 fois par jour et l’alarme ne sonnera plus jusqu’au lendemain, quand elle se déclenchera de nouveau. La durée de l’alarme est de 2 minutes. AFFICHAGE DE LA TEMPÉRATURE PRECAUZIONI 1. En affichage horaire normal, appuyer sur le bouton “set” pour alterner entre les formats de température Co / Fo. • • • • • • Non immergere l’unità nell’acqua. Se si sparge del liquido sull’unità, asciugarla immediatamente con un panno asciutto privo di lanugine. Non pulire l’unità con sostanze abrasive o corrosive che potrebbero grafûare le parti di plastica e corrodere il circuito elettrico. Utilizzare solo batterie nuove, come speciûcato nel manuale di istruzioni. Non mescolare batterie vecchie e nuove, poiché dalle batterie vecchie possono fuoriuscire liquidi. A causa delle limitazione della stampa, le illustrazioni riportate in questo manuale possono differire dalle visualizzazione reali. Non è consentito riprodurre il contenuto di questo manuale senza il permesso del produttore. Non smaltire questo prodotto come riûuto urbano comune. Ma è necessario smaltirlo e conferirlo separatamente come riûuto differenziato. NOTA Le speciûche tecniche di questo prodotto e il contenuto del manuale sono soggetti a modiûche senza preavviso INFORMAZIONI SU OREGON SCIENTIFIC Per avere maggiori informazioni sui nuovi prodotti Oregon Scientific visita il nostro sito internet www. oregonscientific.com, dove potrai trovare tutte le informazioni di cui hai bisogno. Per ricerche di tipo internazionale puoi visitare invece il sito http://corporate.oregonscientific.com/afterSales_contactUs.asp. DICHIARAZIONE DI CONFORMITÀ EU Con la presente, Oregon Scientific dichiara che questo Orologio Radiocontrollato con Proiezione e Indicazione della Temperatura Interna (Modello: TW223) è conforme con la Direttiva R&TTE99 / 5. Una copia della Dichiarazione di Conformità completa di data e firma è disponibile su richiesta attraverso il nostro servizio clienti Oregon Scientific. PRECAUTIONS Cet appareil est conçu pour vous donner satisfaction pendant de nombreuses années si vous le manipulez soigneusement. Voici quelques precautions: • Ne faites pas subir à l’appareil des forces, des chocs, de la poussière, des changements de température ou de l’humidité excessifs car cela pourrait avoir pour conséquence un mauvais fonctionnement, une durée de vie électronique abrégée, des piles endommagées et des pièces déformées. • Le placement de cet appareil sur une surface en bois avec certaines ûnitions, comme un vernis clair, peut endommager le vernis. Consulter les instruction du fabricant de meuble pour des indications sur le type d’objets qui peuvent être placé sans dommage sur la surface du bois. Oregon Scientiûc ne sera pas tenu pour responsable pour tout dommage aux surfaces en bois résultant du contact avec cet appareil. • Ne plongez pas l’appareil dans l’eau. S’il se trouve en contact avec de l’eau, essuyez-le immédiatement avec un chiffon doux. • Ne nettoyez pas l’appareil avec des produits • • • • • abrasifs ou corrosifs. Ceci pourrait rayer les pièces en plastique et corroder le circuit électronique. Ne manipulez pas les composants internes. Ceci annulera la garantie de l’appareil et pourrait cause des dégâts inutiles. L’appareil ne contient pas de pièces utilisables par l’usager. Utilisez seulement des piles neuves comme il est indiqué dans les instructions. Ne mélangez pas les piles neuves et usagées car les vieilles piles peuvent fuir. En raison des limites de service d’impression, les afûchages montrés dans ce manuel peuvent différer de ceux de l’appareil. Le contenu de ce manuel ne peut pas être reproduit sans la permission du fabricant. Ne pas mettre cet appareil à la poubelle. Un traitement spéciûque est dédié au recyclage des déchets électroniques. REMARQUE Les caractéristiques techniques de cet appareil et le contenu de ce manuel sont sujets à changement sans préavis. À PROPOS D’OREGON SCIENTIFIC Pour plus d‘informations sur les produits Oregon Scientific France, rendez-vous sur notre site [email protected]. Pour des renseignements internationaux, rendez vous sur le site: http://corporate.oregonscientific.com/ afterSales_contactUs.asp. DÉCLARATION DE CONFORMITÉ U.E. Oregon Scientific déclare par la présente que cette Horloge Radio-Contrôlée à Projection avec Température Intérieure (Modèle : TW223) est en conformité avec la directive R&TTE99 / 5. Une copie de la Déclaration de Conformité signée et datée est disponible sur demande auprès de notre Service Clients d’Oregon Scientific. PAESI CONFORMI ALLA DIRETTIVA R&TTE Tutti I Paesi UE, Svizzera e Norvegia 7. ADJUST (ÄNDERN)-Taste 8. RECEIVE (EMPFÄNGER)-Taste 9. RESET-Taste 10. Netzadapter 11. FOKUS-Taste 12. Batteriefach 1. 2. 3. 4. 5. 6. 7. 8. Uhrzeit Monat Datum Wochentag Temperatur Anzeige der Signalstärke Sommerzeit Anzeige für schwache Batterie Dieses Produkt synchronisiert seine Uhr automatisch mit einem Zeitsignal. EU-Version : Signal DCF-77 von Frankfurt, Deutschland US-Version : Signal WWVB-60 von Fort Collins, Colorado, USA GB-Version : Signal MSF-60 von Anthorn, England Die Signalanzeige stellt verschiedene Stufen der Signalstärke dar. No signal quality Weak signal quality Excellent signal quality Wenn die Funkuhr ein Signal erfolgreich empfängt, wird ein „Sync-Zeit“-Symbol “ ” auf dem LCD-Display angezeigt. Das Gerät ist bereits mit dem Sender des Zeitsignals synchronisiert. Andernfalls würde das Antennensegment auf der Anzeige erlöschen. HINWEIS Sie können die RECEIVE-Taste verwenden, um den Empfang des Zeitsignals manuell einzustellen. HINWEIS Der Zeitzonenausgleich der empfangenen Signalzeit ist für die US-Version verfügbar. Sie können die Zeitzonen der Pacific Time, Mountain Time, Central Time und Eastern Time ändern, wie auf der im Display angezeigten KARTE angegeben. So stellen Sie den Zeitzonenausgleich ein. 1. Drücken Sie auf “MODE”, um den Alarmzeitmodus aufzurufen. 2. Drücken Sie auf “ADJUST”, um zwischen den verschiedenen Zeitzonen zu wechseln. 3. Drücken Sie auf “MODE”, um zum Uhrzeitmodus zurückzukehren. VERWENDUNG DES PROJEKTORS Drücken Sie auf die SNOOZE- / LIGHTTaste, um den Projektor einzuschalten und die Hintergrundbeleuchtung 5 Sekunden lang zu aktivieren. Halten Sie die SNOOZE- / LIGHT-Taste 3 Sekunden lang gedrückt, um den für 30 Minuten zu aktivieren. Bei Verwendung des Netzadapters ist die Projektorfunktion ständig aktiviert. Drücken Sie auf die Taste “ ”, um das projizierte Bild um 180 Grad umzukehren. Sie können das projizierte Bild scharfstellen, indem Sie die FOKUS-Taste drehen. HINWEIS Bei Verwendung von Gleichstrom, drücken Sie auf “SNOOZE/LIGHT” dann “ ”-Taste wird das projizierte Bild zu invertieren. MANUELLE EINSTELLUNG VON UHRZEIT UND DATUM Wenn die Uhr das Zeitsignal nicht erfolgreich empfängt, können Sie die Uhr auch manuell einstellen: 1. Drücken Sie 2 Sekunden lang auf die “SET”Taste, bis die Stelle STUNDE blinkt. 2. Drücken Sie auf die “ADJUST”-Taste, um den Wert zu ändern. 3. Drücken Sie erneut auf die “SET”-Taste, um die Einstellungspunkte zu durchschreiten. Die Reihenfolge der Einstellungen lautet: Stunde > Minute > Sekunde >12 / 24Std > Datum > Monat > Jahr > Sprache (GB=Englisch FR=Französisch DE=Deutsch ES=Spanisch IT=Italienisch) 4. Drücken Sie auf die “MODE”-Taste, um den Einstellungsmodus zu beenden. EINSTELLUNG DES ALARMS 1. Drücken Sie bei der normalen Anzeige der Uhrzeit auf die “MODE”-Taste, um den Alarmzeitmodus aufzurufen. 2. Aktivieren Sie den Alarm durch Drücken der “ADJUST”-Taste; das Glockensymbol “ ” wird angezeigt. 3. Aktivieren Sie die Schlummerfunktion durch Drücken der “ADJUST”-Taste; das Schlummersymbol “Zz” wird daraufhin angezeigt. 4. Drücken Sie 2 Sekunden lang auf die “SET”Taste, bis die Stelle STUNDE blinkt. 5. Drücken Sie auf die “ADJUST”-Taste, um den Einstellungswert zu erhöhen. 6. Drücken Sie erneut auf die “SET”-Taste, um die Einstellungspunkte zu durchschreiten. Die Reihenfolge lautet: Stunde > Minute. 7. Drücken Sie auf die “MODE”-Taste, um den Einstellungsmodus zu beenden. HINWEIS Wenn der Alarm ertönt und die Schlummertaste gedrückt wird, wird der Alarm nach 4 Minuten automatisch erneut ausgelöst. Die Schlummerfunktion kann pro Tag 4-mal wiederholt werden; der Alarm wird bis zum darauffolgenden Tag erneut ausgelöst. Die Alarmdauer beträgt 2 Minuten. TEMPERATURANZEIGE 1. Drücken Sie bei der normalen Anzeige der Uhrzeit auf die “SET”-Taste, um zwischen den Temperaturformaten o C / oF zu wechseln. 1. Nella visualizzazione normale dell’ora, premere il tasto “set” per alternare il formato della temperatura o C / oF. L’unità è stata progettata per fornire un servizio soddisfacente per diversi anni, purché manipolata con attenzione. Di seguito sono riportate alcune importanti precauzioni: • Non otturare i fori di aerazione. Assicurarsi che eventuali oggetti come giornali, tovaglie, tende, etc. non coprano accidentalmente i fori di aerazione. • Non sottoporre l’unità a sforzi, scosse, polvere, temperature o umidità eccessivi, che potrebbero provocare malfuzionamenti, ridurre la durata dei componenti elettronici, danneggiare le batterie e deformare le parti. • Non manomettere i componenti interni dell’unità. Ciò potrebbe invalidare la garanzia e causare danni superûui. L’unità non contiene parti riparabili dall’utente. • La collocazione di questo prodotto su superûci delicate (ad esempio legno) con particolari tipi di riûniture, ad esempio vernice trasparente, può danneggiare le riûniture. Oregon Scientiûc non è responsabile dei danni alle superûci provocati dal contatto con questo prodotto. SNOOZE- / LIGHT-(SCHLUMMER-LICHT)-Taste REVERSE (ZURÜCK)-Taste LCD-Display PROJEKTOR MODE (MODUS)-Taste SET (EINSTELL)-Taste CÓMO EMPEZAR Si utiliza el adaptador de CA para alimentar el reloj, conecte el adaptador al reloj. Si usa pilas, introduzca 2 pilas AA en el compartimiento para pilas. Tenga en cuenta la polaridad. DESCRIPCIÓN DEL PRODUCTO 1. 2. 3. 4. 5. 6. Botón SNOOZE / LUZ Botón ATRÁS Pantalla LCD PROYECTOR Botón MODO Botón CONFIG 7. Botón AJUSTE 8. Botón RECIBIR 9. Botón REINICIO 10. Adaptador de CC 11. Botón ENFOQUE 12. Tapa del compartimiento de la batería SÍMBOLOS DE LA PANTALLA 1. 2. 3. 4. 5. 6. 7. 8. FUNKGESTEUERTE UHR RÉGLAGE MANUEL DE L’HEURE ET LA DATE IMPOSTAZIONE MANUALE DI ORA E DATA PRODUKTBESCHREIBUNG Heure Mois Date Jour de la semaine Température Indicateur de puissance du signal Heure d’été Indicateur de piles faibles UTILISATION DU PROJECTEUR Premere il tasto SNOOZE / LIGHT per accendere il proiettore e attivare la retroilluminazione per 5 secondi. Premere il tasto SNOOZE / LIGHT per 3 secondi, il proiettore rimarranno attivi per 30 minuti. Se si utilizza l’alimentatore, il proiettore rimarrà sempre acceso. Premendo il tasto “ ” l’immagine proiettata ERSTE SCHRITTE SYMBOLE AUF DER ANZEIGE HORLOGE RADIO-CONTRÔLÉE OROLOGIO RADIOCONTROLLATO Reloj proyector controlado por radio con temperatura interior Modelo: TW223 Manual de usuario Wenn Sie die Uhr mit dem Netzadapter verwenden möchten, müssen Sie diesen an das Gerät anschließen. Ansonsten legen Sie bitte 2 Stk. Batterien des Typs AA in das Batteriefach ein und beachten Sie die Polaritäten. 1. 2. 3. 4. 5. 6. 7. Bouton AJUSTEMENT 8. Bouton RÉCEPTION 9. Bouton REMISE À ZÉRO 10. Adaptateur CA 11. Bouton MISE AU POINT 12. Couvercle des piles SYMBOLES AFFICHÉS IMPOSTAZIONE DELLA SVEGLIA TEMPERATURE DISPLAY This product is engineered to give you years of satisfactory service if you handle it carefully. Here are a few precautions: • Do not cover the ventilation holes. Make sure items that are nearby such as newspapers, tablecloths, curtains etc cannot accidentally cover the ventilation holes. • Do not subject the unit to excessive force, shock, dust, temperature or humidity, which may result in malfunction, shorter electronic life span, damaged battery and distorted parts. • Placement of this product on wood surfaces with certain types of finishes, such as clear varnish, may result in damage to the finish. Consult the furniture manufacturer’s care instructions for direction as to the types of objects that may safely be placed on the wood surface. Oregon Scientific shall not be responsible for any damage to wood surfaces from contact with this product. • Do not immerse the unit in water. If you spill liquid over it, dry it immediately with a soft, lint-free cloth. 1.Tasto SNOOZE / LIGHT 2.Tasto REVERSE 3. Display LCD 4.PROIETTORE 5.Tasto MODE 6.Tasto SET USO DEL PROIETTORE MANUAL SETTING THE TIME AND DATE If the clock does not receive the time signal successfully, you can set the clock manually. 1. Press “SET” key for 2 seconds until HOUR digit flashing. 2. Press “ADJUST” key to adjust the value. DESCRIZIONE DEL PRODOTTO DÉMARRAGE Si l’adaptateur CA est utilisé pour alimenter l’horloge, brancher l’adaptateur. Si les piles sont utilisées, installer 2 piles AA dans le compartiment à piles en faisant attention aux polarités. 1.Ora 2.Mese 3.Data 4. Giorno della settimana 5.Temperatura 6. Indicatore della forza del segnale 7. Ora legale 8. Indicatore di batteria in esaurimento USING THE PROJECTOR Press the SNOOZE / LIGHT key to turn on the projector and display backlight for 5 seconds. Press and hold the SNOOZE / LIGHT key for 3 seconds, the projector will be turned on for 30 minutes. If using DC power, the projector will be always ON. ” key will invert the projected image Press the “ by 180 degree. OPERAZIONI PRELIMINARI Se si utilizza un alimentatore DC per alimentare l’orologio, collegarlo allo stesso. Se invece si utilizzano le batterie, inserire nel vano 2 batterie AA facendo attenzione alla polarità. SIMBOLI DEL DISPLAY RADIO-CONTROLLED CLOCK This product is designed to synchronize its clock automatically with a clock signal. EU version : DCF-77 signal from Frankfurt, Germany US version : WWVB-60 signal from Fort Collins Colorado, USA UK version : MSF-60 signal from Anthorn, England The signal indicator displays different level of signal strength. italiano English USER MANUAL Funkgesteuerte Projektionsuhr mit Innentemperatur Modell: TW223 Bedienungsanleitung español Model : TW223 Horloge Radio-Contrôlée à Projection avec Température Intérieure Modèle : TW223 Mode d’emploi Deutsch Orologio radiocontrollato con proiezione e indicazione della temperatura interna Modello: TW223 Manuale per l’utente français Radio-Controlled Projection Clock with Indoor Temperature PAYS CONCERNÉS RTT&E Tous les pays Européens, la Suisse et la Norvège VORSICHTSMASSNAHMEN Dieses Gerät wurde entworfen, um Ihnen jahrelang Freude zu bereiten, wenn Sie es sorgfältig handhaben. Hier sind einige Vorsichtsmaßnahmen: • Sie dürfen die Belüftungsöffnungen nicht abdecken. Stellen Sie sicher, dass in der Nähe beûndliche Gegenstände, wie Zeitungen,Tischtücher, Vorhänge, usw., die Belüftungsöffnungen nicht versehentlich verdecken können. • Setzen Sie das Gerät keiner extremen Gewalteinwirkung und keinen Stößen aus, und halten Sie es von übermäßigem Staub, Hitze oder Feuchtigkeit fern, da dies zu Funktionsstörungen, einer kürzeren elektronischen Lebensdauer, beschädigten Batterien und verformten Einzelteilen führen kann. • Wenn dieses Produkt auf Holzûächen mit bestimmten Oberûächenausführung wie Klarlack gestellt wird, kann die Oberûäche beschädigt werden. Entsprechende Hinweise zu Gegenständen, die sicher auf Holzûächen gestellt werden können, entnehmen Sie bitte der Pûegeanleitung Ihres Möbelherstellers. Oregon Scientiûc ist nicht haftbar für Beschädigungen von Holzûächen, die durch die Berührung mit diesem Produkt verursacht werden. • Tauchen Sie das Gerät niemals in Wasser. Falls Sie eine Flüssigkeit über das Gerät verschütten, trocknen Sie es sofort mit einem weichen, • • • • • • faserfreien Tuch. Reinigen Sie das Gerät keinesfalls mit scheuernden oder ätzenden Mitteln. Diese können die Kunststoffteile zerkratzen und die elektronische Schaltung zerstören Machen Sie sich nicht an den internen Komponenten des Geräts zu schaffen. Dies kann zu einem Verlust der Garantie führen und eine unnötige Beschädigung des Geräts verursachen. Das Gerät enthält keine durch den Benutzer wartbare Teile. Verwenden Sie nur neue Batterien, wie in der Bedienungsanleitung angegeben. Verwenden Sie keinesfalls neue und alte Batterien gemeinsam, da alte Batterien auslaufen können. Aufgrund der Druckbeschränkungen können sich die in dieser Anleitung dargestellten Abbildungen vom Original unterscheiden. Der Inhalt dieser Anleitung darf ohne Genehmigung des Herstellers nicht vervielfältigt werden. Entsorgen Sie das Gerät nicht im allgemeinen Hausmüll, sondern ausschließlich in den dafür vorgesehenen kommunalen Sammelstellen, die Sie bei Ihrer Gemeinde erfragen können. HINWEIS Die technischen Daten für dieses Produkt und der Inhalt der Bedienungsanleitung können ohne Benachrichtigung geändert werden. ÜBER OREGON SCIENTIFIC Per avere maggiori informazioni sui nuovi prodotti Oregon Scientific visita il nostro sito internet [email protected], dove potrai trovare tutte le informazioni di cui hai bisogno. Per ricerche di tipo internazionale puoi visitare invece il sito http://corporate.oregonscientific.com/afterSales_contactUs.asp. EU-KONFORMITÄTSERKLÄRUNG Hiermit erklärt Oregon Scientific, dass diese funkgesteuerte Projektionsuhr mit Innentemperatur (Modell: TW223) mit der Richtlinie R&TTE99 / 5 übereinstimmt. Eine Kopie der unterschriebenen und mit Datum versehenen Konformitätserklärung erhalten Sie auf Anfrage über unseren Oregon Scientific Kundendienst. KONFORM IN FOLGENDEN LÄNDERN Alle Länder der EU, Schweiz und Norwegen Hora Mes Fecha Día de la semana Temperatura Indicador de la potencia de la señal Horario de verano Indicador de pila gastada RELOJ CONTROLADO POR RADIO Este producto ha sido diseñado para sincronizar automáticamente su reloj con una señal de reloj. Versión UE: Señal DCF-77 de Frankfurt, Alemania Versión EEUU: Señal WWVB-60 de Fort Collins, Colorado, Estados Unidos Versión Reino Unido: señal MSF-60 de Anthorn, Inglaterra El indicador de señal muestra distintos niveles de potencia de señal. La unidad ya está sincronizada con el transmisor de señal de la hora. De lo contrario, el segmento de antena desaparecerá de la pantalla LCD. NOTA Puede utilizar el botón RECIBIR para recibir manualmente la señal de la hora. NOTA En la versión para Estados Unidos existe la opción de elegir el huso horario de la señal de la hora que se recibe. Puede cambiar la zona horaria a hora del Pacífico, hora de Montaña, hora Central y hora del No signal Weak signal Excellent Este, tal y como indica el MAPA que aparece en quality quality signal quality pantalla. Cómo configurar el huso horario. 1. Pulse “MODO” para acceder al modo de Alarma. 2. Pulse “AJUSTE” para alternar entre distintas Si el reloj controlado por radio recibe correctamente zonas horarias. una señal, aparece en pantalla el símbolo “ ” de 3. Pulse “MODO” para volver al modo de reloj sincronización de tiempo. CÓMO UTILIZAR EL PROYECTOR Pulse SNOOZE/LIGHT para encender el proyector y la retroiluminación durante 5 segundos. Pulse el botón SNOOZE / LUZ y manténgalo pulsado durante 3 segundos y el proyector se encenderán durante 30 minutos. Si utiliza alimentación CC, el proyector siempre estará encendido. Si pulsa el botón “ ”, la imagen proyectada girará 180º. Use el botón ENFOQUE para enfocar la imagen proyectada. NOTA Si se utiliza corriente continua, pulsar la tecla “SNOOZE/LIGHT” y luego “ “ se invierte la imagen proyectada. CONFIGURACIÓN MANUAL DE HORA Y FECHA Si el reloj no recibe correctamente la señal de la hora, puede configurarla manualmente. 1. Pulse “CONFIG” durante 2 segundos, hasta que el dígito de la HORA empiece a parpadear. 2. Pulse el botón “AJUSTE” para configurar el valor. 3. Pulse el botón “CONFIG” de nuevo para alternar entre los elementos del ajuste. La secuencia de configuración será: Hora > Minuto > Segundo >12 / 24 h > Fecha > Mes > Año > Idioma (GB=Inglés FR=Francés DE=Alemán ES=Español IT=Italiano) 4. Pulse el botón “MODO” para salir del modo de configuración. CONFIGURACIÓN DE LA ALARMA 1. En la pantalla de la hora normal, pulse el botón “MODO” para acceder al modo de hora de la alarma. 2. Para activar la alarma, pulse el botón “AJUSTE” para hacer aparecer el icono de la campana “ ”. 3. Para activar la función de repetición de alarma, pulse el botón “AJUSTE” para hacer aparecer el icono de repetición de alarma “Zz”. 4. Pulse “CONFIG” durante 2 segundos, hasta que el dígito de la HORA empiece a parpadear. 5. Pulse el botón “AJUSTE” para incrementar el valor. 6. Pulse el botón “CONFIG” de nuevo para alternar entre los elementos del ajuste. La secuencia será: Hora > Minuto. 7. Pulse el botón “MODO” para salir del modo de configuración. NOTA Cuando la alarma suene, si pulsa el botón de repetición de alarma, la alarma se reiniciará automáticamente al cabo de 4 minutos. Esta función puede repetirse 4 veces al día, y la alarma sonará de nuevo al día siguiente. La duración de la alarma es de 2 minutos. PANTALLA DE TEMPERATURA 1. En la pantalla de la hora normal, pulse el botón “CONFIG” para alternar entre formatos de temperatura o C / oF. PRECAUCIÓN Este producto está diseñado para funcionar durante muchos años, si se usa correctamente. Aquí tiene algunos consejos: • No obstruya los oriûcios de ventilación. Asegúrese de que los objetos cercanos, como diarios, manteles, cortinas, etc. no cubran accidentalmente los oriûcios de ventilación. • No exponga la unidad a fuerza excesiva, descargas, polvo, temperatura o humedad excesivas, lo cual podría resultar en problemas de funcionamiento, disminución de la vida útil, pilas gastadas y componentes dañados. • La colocación de este producto en superûcies de madera con cierto tipo de acabados, como por ejemplo barniz claro, puede provocar que este acabado sufra daños. Consulte las instrucciones del fabricante del mueble para saber qué tipo de objetos se pueden colocar sobre la superûcie de madera. Oregon Scientiûc no asume ninguna responsabilidad en caso de daños en superûcies de madera como resultado del contacto con este producto. • No sumerja el dispositivo en agua. Si se vertiera líquido en la unidad, límpiela con un paño suave y sin electricidad estática. • • • • • • No limpie la unidad con materiales abrasivos o corrosivos. El hacerlo podría provocar rayones en os componentes de plástico y corroer el circuito electrónico. No manipule los componentes internos. De hacerlo anulará la garantía de la unidad y podría causar daños innecesarios. La unidad contiene componentes que el usuario no debe manipular. Use solamente pilas nuevas como las indicadas en las instrucciones de uso. No mezcle pilas nuevas con pilas viejas, ya que las viejas podrían tener fugas. Debido a limitaciones de imprenta, las pantallas que se muestran en este manual pueden diferir de las pantallas reales. Los contenidos de este manual no pueden reproducirse sin permiso del fabricante. No tire este producto a un contenedor de basura municipal sin clasiûcar. Es necesario que recicle este tipo de basura para un tratamiento especial. NOTA La ûcha técnica de este producto y los contenidos de este manual de usuario pueden cambiarse sin aviso. ACERCA DE OREGON SCIENTIFIC Visite nuestra página web (www.oregonscientific.com) para conocer más sobre los productos de Oregon Scientific. Para consultas internacionales, por favor visite http://corporate.oregonscientific.com/afterSales_contactUs.asp. DECLARACIÓN DE CONFORMIDAD DE LA UE Oregon Scientific declara por la presente que este reloj proyector controlado por radio con temperatura interior (Modelo: TW223) cumple la norma R&TTE99 / 5. Puede solicitar una copia firmada y fechada de la Declaración de conformidad mediante nuestro servicio de atención al cliente de Oregon Scientific. PAÍSES BAJO LA DIRECTIVA RTTE Todos los países de la UE, Suiza y Noruega 560mm x 410mm
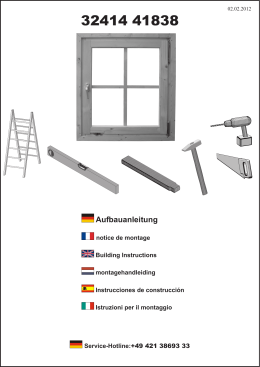
Scaricare