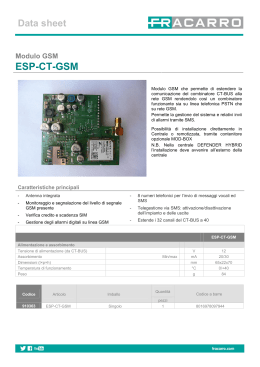
QUICK START GUIDE
INSTRUKCJA SZYBKIEJ INSTALACJI
LOSTnFOUND® LENTICUS pro Endgerät
Urządzenia LOSTnFOUND® LENTICUS pro
Vielen Dank für Ihren Entscheid, die LOSTnFOUND® LENTICUS pro Lösung einzusetzen. Damit Sie das LENTICUS pro Endgerät erfolgreich in Ihrem Fahrzeug installieren
können, bitten wir Sie, die folgende Installations-Kurzanleitung zu befolgen.
Dziękujemy za wybór rozwiązania LENTICUS pro firmy LOSTnFOUND®. Zanim podłączysz
urządzenie do pojazdu, proszę zapoznaj się z Instrukcją Szybkiej Instalacji.
Folgende Bestandteile sind für die Installation notwendig
Komponenty instalacji
Antena GSM
Antenne GSM
Przewód
zasilania
Netzkabel
Installationsablauf
GPS-Antenne
1. Motor und Zündung sind beim zu installierenden Fahrzeug ausgeschaltet.
2. Netzkabel mit Sicherungshalter am LENTICUS pro Endgerät anschliessen und
danach die Drähte wie folgt anschliessen:
a) ROTES Kabel mit dem PLUSPOL der Starterbatterie verbinden
b) SCHWARZES Kabel mit dem MINUSPOL der Starterbatterie verbinden
c) GELBES Kabel mit der ZÜNDUNG verbinden
d) ORANGENES Kabel wird nicht verbunden
e) Es dürfen keine Schalter zwischen dem LENTICUS pro Endgerät und der
Starterbatterie geschaltet sein.
3. GSM-Antenne und GPS-Antenne gemäss Beschriftung auf dem LENTICUS pro
Endgerät anschliessen und die beiden Antennen an einem Ort platzieren, der
einen guten Empfang ermöglicht.
4. Nachdem beim Fahrzeug die Zündung eingeschaltet worden ist, sollten die beiden
LED‘s
zu blinken beginnen und spätestens nach 5 Minuten konstant
rot leuchten.
5. Das Gerät benutzt einen G-Force Sensor, um die Fahrzeugbewegung zu messen.
Die Definition der X, Y und Z Achsen sind abhängig von der Ausrichtung in der
das Gerät installiert wird.
Falls nach der Installation die beiden LED‘s nicht konstant leuchten, bitten wir sie den
Standort des Fahrzeugs zu prüfen: Befindet sich das Fahrzeug zum Beispiel in einer
Tiefgarage, kann es sein, dass kein GPS oder GSM Empfang möglich ist. Bei Fragen zur
Installation des LENTICUS pro Endgerätes oder anderen technischen Bereichen können
Sie uns unter [email protected] kontaktieren.
Instrukcja instalacji
Antena GPS
1. Upewnij się, że silnik i zapłon pojazdu, w którym ma być instalowane urządzenie są
wyłączone.
2. Podłącz przewód zasilania do urządzenia LENTICUS pro i połącz kable w następujący
sposób:
a) CZERWONY kabel połącz (+) z dodatnim zasilaniem pojazdu
b) CZARNY kabel połącz z ujemnym (-) zasilaniem pojazdu
c) ŻÓŁTY kabel połącz z zapłonem
d) POMARAŃCZOWY kabel nie musi być do niczego podłączony
e) Zwróć uwagę, by między urządzeniem a zasilaniem nie było żadnego wyłącznika.
3. Podłącz anteny GPS i GSM jak pokazano na powyższym rysunku. Zainstaluj anteny
w ten sposób by im zapewnić wystarczający odbiór sygnałów nadawczych.
4. Po włączeniu zapłonu pojazdu, obie diody LED
przeciągu 5 minut i będą się stale świeciły na czerwono.
włączą się w
5. Urządzenie jest wyposażone w czujnik G-Force (do mierzenia przemieszczenia się
pojazdu). Zdefiniowanie miejsca X,Y i Z jest uzależnione od miejsca w którym jest
zainstalowane urządzenie.
Jeśli diody LED nie będą się świeciły światłem stałym proszę o sprawdzenie położenia
pojazdu: np. czy nie znajduje się on w podziemnym garażu, gdzie odbiór sygnałów GPS
lub GSM może być utrudniony. Jeśli masz pytania dotyczące procesu instalacji lub innymi
pytaniami technicznymi proszę skontaktuj się z naszym zespołem wsparcia pod adresem
e-mailowym: [email protected].
Quick Installation
Guide LENTICUS pro
Version 1.0 / July 2013
Ihr LOSTnFOUND Team
Twój zespół LOSTnFOUND
© LOSTnFOUND AG - www.lostnfound.com
MANUEL D’INSTALLATON RAPIDE
QUICK START GUIDE
GUIDA RAPIDA
Boîtier LOSTnFOUND® LENTICUS pro
LOSTnFOUND® LENTICUS pro terminal device
Terminale di bordo LOSTnFOUND® LENTICUS pro
Merci d’avoir choisi LOSTnFOUND® et le terminal LENTICUS pro. Merci de suivre les
instructions d’installation ci-dessous.
Thank you very much for your decision to deploy the LOSTnFOUND® LENTICUS pro solution. In order that you are able to install the LENTICUS pro terminal device successfully in
your vehicle, we request you to kindly follow the quick start installation guide below.
Liste des composants
The following components are required for the installation
La ringraziamo per aver scelto di utilizzare la soluzione LOSTnFOUND® LENTICUS pro.
Al fine di essere in grado di installare con successo sul Suo veicolo il terminale di bordo
LENTICUS pro, Le chiediamo gentilmente di seguire la guida rapida all’installazione
sotto riportata.
I seguenti component sono richiesti per l’installazione
GSM antenne
Adapter cable
Procédure d’installation
GSM antenna
Adapter
cable
GPS antenne
1. Attention: L’installation du boitier se fait moteur à l’arrêt et contact coupé.
2. Connecter le faisceau au boitier et les câbles suivant les instructions ci-dessous:
a) CABLE ROUGE connecté à un PLUS PERMANENT du véhicule (12 ou 24 V)
b) CABLE NOIR connecté à la masse du véhicule
c) CABLE JAUNE connecté AU PLUS APRÈS CONTACT du véhicule
d) CABLE ORANGE n’est pas utilisé
e) IMPORTANT: LENTICUS pro doit être alimenté en permanence et aucun switch
ne doit se trouver entre le terminal et la batterie.
3. Connecter l’antenne GPS, Important: antenne GPS, face noir en direction du ciel.
4. Mise en marche: Activer le contact du véhicule, les LED du boitier Lenticus pro
clignotent, après 5mn elles doivent être fixes et de couleur rouge.
IMPORTANT
Le boitier doit toujours être fixé au véhicule (utiliser des colliers plastic). Procéder
à l’installation du boitier à l’extérieur: En procédant ainsi vous vous garantissez
d’avoir une couverture GPS et d’une bonne réception GSM.
En cas de problème ou si vous souhaitez une assistance contactez nous directement à
l’adresse suivante : [email protected].
Votre équipe LOSTnFOUND
Antenne GSM
Cavo
d’adattamento
GPS Antenna
Installation procedure
1. The engine and the ignition are switched off in the vehicle in which the system is
being installed.
2. Connect the adapter cable with the safety switch to the LENTICUS pro terminal
device and then connect the wires as follows:
a) The RED cable must be connected to the PLUS terminal of the starter battery
b) The BLACK cable must be connected to the MINUS terminal of the starter battery
c) The YELLOW cable must be connected to the IGNITION
d) The ORANGE cable is not connected
e) There should be no switch connected between the LENTICUS pro terminal
device and the starter battery.
3. Connect the GSM antenna and the GPS antenna according to the labelling on the
LENTICUS pro terminal device and place both the antennas at a location that
enables good quality reception.
4. After the ignition is switched on in the vehicle, both the LEDs of the
start flashing and light up after 5 minutes continuously in red colour.
5. The device uses a G-Force sensor to measure the vehicle movement. The definition
of the X, Y and Z axes depend on the orientation in which the device is installed.
If the two LEDs do not light up continuously after the installation, we request you to check
the location of the vehicle: If the vehicle, for example, is located in an underground garage
it may happen that GPS or GSM reception is not possible. In case of queries regarding the
installation of the LENTICUS pro terminal device or other technical issues, you may contact
us at [email protected].
The LOSTnFOUND Team
Procedura d’installazione
Antenne GPS
1. Durante l’installazione il motored eve essere spento e la chiave in posizione “stop”.
2. Collegate il cavo di adatttamento coll’interruttore di sicurezza al terminale di
bordo LENTICUS pro e quindi collegate I cavi come sotto descritto:
a) IL CAVO ROSSO deve essere connesso al terminale POSITIVO della batteria
d’avviamento
b) IL CAVO NERO deve essere connesso al terminale NEGATIVO della batteria
d’avviamento
c) IL CAVO GIALLO deve essere connesso all’ACCENSIONE
d) IL CAVO ARANCIO non è connesso
e) Non ci devono essere interruttori connessi tra il terminale di bordo LENTICUS
pro e la batteria d’avviamento.
3. Connettete le antenne GSM e GPS secondo le etichette sul terminale di bordo
LENTICUS pro e posizionate entrambe le antenne in modo che sia assicurata
una buona ricezione.
4. Dopo l’accensione del veicolo, entrambi I LED di
inizieranno a
lampeggiare e si accenderanno continuativamente in colore rosso dopo 5 minuti.
5. Il dispositivo utilizza un accelerometro per misurare il movimento del veicolo, La
definizione degli assi X, Y e Z dipende dall’orientamento secondo cui il dispositivo
è installato.
Se I 2 LED non si accendono continuativamente dopo l’installazione, Vi chiediamo di
controllare dove si trova il veicolo: se, ad esempio, il veicolo si trova in un garage sotterraneo può succedere che la ricezione GPS o GSM non sia possibile. In caso di domande
relative all’installazione di LENTICUS pro o di alter domande tecniche, potete contattare
[email protected].
Il team LOSTnFOUND
Scarica