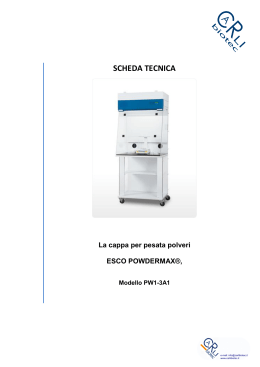
IT Libretto Istruzioni
3
GB Instruction Manual
11
FR Manuel d’Instructions
19
DE Bedienungsanleitung
27
NL Gebruiksaanwijzing
35
Diamond - Quartz
Gentile Signora, Caro Signore,
Se seguirà con cura le raccomandazioni
contenute in questo Libretto Istruzioni,
la sua Cappa si manterrà efficiente nel tempo
e le consentirà di ottenere costantemente
le migliori prestazioni.
INDICE
CONSIGLI E SUGGERIMENTI
4
CARATTERISTICHE
5
INSTALLAZIONE
6
USO
9
MANUTENZIONE
IT
10
3
CONSIGLI E SUGGERIMENTI
INSTALLAZIONE
• Il produttore declina qualsiasi responsabilità per danni dovuti ad
installazione non corretta o non conforme alle regole dell’arte.
• La distanza minima di sicurezza tra il Piano di cottura e la Cappa
deve essere di 650 mm.
• Verificare che la tensione di rete corrisponda a quella riportata nella
targhetta posta all’interno della Cappa.
• Per Apparecchi in Classe Ia accertarsi che l’impianto elettrico domestico garantisca un corretto scarico a terra.
• Collegare la Cappa al Condotto di scarico con tubazione di diametro pari o superiore a 120 mm. Il percorso della tubazione deve
essere il più breve possibile.
• Non collegare la Cappa a condotti di scarico dei fumi prodotti da
combustione (caldaie, caminetti, ecc.).
• Nel caso in cui nella stanza vengano utilizzati sia la Cappa che
Apparecchi non azionati da energia elettrica (ad esempio Apparecchi utilizzatori di gas), si deve provvedere ad una aerazione sufficiente dell’ambiente. Se la cucina ne fosse sprovvista, praticare
un’apertura che comunichi con l’esterno, per garantire il richiamo
d’aria pulita.
650 mm min.
USO
• La Cappa è stata progettata esclusivamente per Uso domestico,
per abbattere gli Odori della cucina.
• Non fare mai uso improprio della Cappa.
• Non lasciare fiamme libere a forte intensità sotto la Cappa in
funzione.
• Regolare sempre le fiamme in modo da evitare una evidente fuoriuscita laterale delle stesse rispetto al fondo delle pentole.
• Controllare le friggitrici durante l’Uso: l’olio surriscaldato potrebbe infiammarsi.
• La Cappa non deve essere utilizzata da bambini o persone non
abilitate all’Uso corretto.
MANUTENZIONE
• Prima di procedere a qualsiasi operazione di Manutenzione,
scollegare la Cappa togliendo la spina elettrica o spegnendo l’interruttore generale.
• Effettuare una scrupolosa e tempestiva Manutenzione dei Filtri
secondo gli intervalli consigliati.
• Per la pulizia delle superfici della Cappa è sufficiente utilizzare un
panno umido e detersivo liquido neutro.
IT
4
CARATTERISTICHE
Ingombro
358
320
760
760 min
1160 max
478
37
900
500
478
358
Componenti
12b
15
Rif.
1
14.1
9
7.2.1
12a
2.1
12e
2
11
2
2.1
2.2
9
14.1
15
Q.tà Componenti di Prodotto
1 Corpo Cappa completo di: Comandi, Luce,
Gruppo Ventilatore, Filtri
1 Camino Telescopico formato da:
1 Camino Superiore
1 Camino Inferiore
1 Flangia di Riduzione ø 150-120 mm
2 Prolunga Raccordo Uscita Aria
1 Raccordo Uscita Aria
Rif. Q.tà Componenti di Installazione
7.2.1 2 Staffe Fissaggio Camino Superiore
11
6 Tasselli
12a
6 Viti 4,2 x 44,4
12b
4 Viti 3,5
12e
6 Viti 2,9 x 9,5
2.2
11
12a
Q.tà Documentazione
1 Libretto Istruzioni
1
IT
5
INSTALLAZIONE
1÷2
Foratura Parete e Fissaggio Staffe
650 min.
12a
116 116
323
11
X
7.2.1
Tracciare sulla Parete:
• una linea Verticale fino al soffitto o al limite superiore, al centro della zona prevista per il montaggio della Cappa;
• una linea Orizzontale a: 650 mm min. sopra il Piano di Cottura.
• Appoggiare come indicato la Staffa 7.2.1 a 1-2 mm dal soffitto o dal limite superiore, allineando il
suo centro (intagli) sulla linea Verticale di riferimento.
• Segnare i centri dei Fori della Staffa.
• Appoggiare come indicato la Staffa 7.2.1 a X mm sotto la prima staffa (X = altezza Camino
Superiore in dotazione), allineando il suo centro (intagli) sulla linea Verticale di riferimento.
• Segnare i centri dei Fori della Staffa.
• Segnare come indicato, un punto di riferimento a 116 mm dalla linea Verticale di riferimento, e 323
mm sopra la linea Orizzontale di riferimento.
• Ripetere questa operazione dalla parte opposta.
• Forare ø 8 mm i punti segnati.
• Inserire i tasselli 11 nei fori.
• Fissare le Staffe, utilizzando le Viti 12a (4,2 x 44,4 ) in dotazione.
• Avvitare 2 Viti 12a (4,2 x 44,4) in dotazione nei fori per il fissaggio del corpo Cappa, lasciando uno
spazio di 5-6 mm fra la parete e la testa della vite.
IT
6
Montaggio Corpo Cappa
• Prima di agganciare il Corpo Cappa, serrare le 2
Viti Vr situate sui punti di aggancio del Corpo
Cappa.
• Agganciare il Corpo Cappa alle Viti 12a
predisposte.
• Serrare definitivamente le Viti 12a di supporto.
• Agire sulle Viti Vr per livellare il Corpo Cappa.
Vr
12a
Connessioni
USCITA ARIA VERSIONE ASPIRANTE
Per installazione in Versione Aspirante collegare la Cappa alla tubazione di uscita per mezzo di un
tubo rigido o flessibile di ø150 o 120 mm, la cui scelta è lasciata all'installatore.
• Per collegamento con tubo ø120 mm, inserire la
Flangia di riduzione 9 sull’Uscita del Corpo Cappa.
• Fissare il tubo con adeguate fascette stringitubo.
Il materiale occorrente non è in dotazione.
• Togliere eventuali Filtri Antiodore al Carbone
attivo.
ø 150
ø 120
9
IT
7
USCITA ARIA VERSIONE FILTRANTE
• Inserire a pressione il Raccordo 15 sull’Uscita
Aria.
• Inserire lateralmente le Prolunghe Raccordo 14.1
sul Raccordo 15.
• Fissare le Prolunghe Raccordo 14.1 al Raccordo
15 con 4 Viti 12b (3,5) in dotazione.
• Assicurarsi della presenza del Filtro Antiodore
al Carbone attivo.
15
12b
14.1
CONNESSIONE ELETTRICA
• Collegare la Cappa all’Alimentazione di Rete interponendo un Interruttore bipolare con apertura
dei contatti di almeno 3 mm.
Montaggio Camino
Camino superiore
• Allargare leggermente le due falde laterali, agganciarle dietro le Staffe 7.2.1 e richiuderle fino
a battuta.
• Fissare lateralmente alle Staffe con 4 Viti 12e
(2,9 x 9,5) in dotazione.
Camino inferiore
• Allargare leggermente le due falde laterali del
Camino, agganciarle tra il Camino superiore e la
parete e richiuderle fino a battuta.
• Fissare lateralmente la parte inferiore al Corpo
Cappa, con 2 Viti 12e (2,9 x 9,5) in dotazione.
12e
2.1
12e
2
2.2
12e
IT
8
USO
Quadro comandi
L
V1
V2
V3
V4
L
Luci
Accende e spegne l’Impianto di Illuminazione.
V1
Motore
Accende e spegne il motore Aspirazione a velocità minima, adatta ad un ricambio
d’aria continuo particolarmente silenzioso, in presenza di pochi vapori di cottura.
V2
Velocità
Diminuisce la velocità di esercizio.
V3
V4
Velocità
Velocità
intensiva
Aumenta la velocità di esercizio.
Velocità massima, adatta a fronteggiare le massime emissioni di vapore di intensi
va cottura. Si spegne automaticamente dopo 10 minuti dall’entrata in funzione.
Può essere disinserita manualmente premendo il tasto.
IT
9
MANUTENZIONE
Filtri antigrasso
PULIZIA FILTRI ANTIGRASSO METALLICI AUTOPORTANTI
Sono lavabili in lavastoviglie e necessitano di essere lavati ogni 2 mesi di utilizzo o più frequentemente, per un uso particolarmente intenso.
• Togliere i Filtri uno alla volta, spingendoli verso
la parte posteriore del gruppo e tirando contemporaneamente verso il basso.
• Lavare i Filtri evitando di piegarli e lasciarli asciugare prima di rimontarli.
• Rimontare i Filtri facendo attenzione a mantenere la Maniglia verso la parte visibile esterna.
Filtro antiodore (Versione Filtrante)
SOSTITUZIONE FILTRO ANTIODORE AL CARBONE ATTIVO
Non è lavabile e non è rigenerabile, va sostituito
ogni 4 mesi di utilizzo o più frequentemente, per
un uso particolarmente intenso.
• Togliere i Filtri antigrasso metallici.
• Rimuovere il Filtro antiodore al Carbone attivo
saturo, agendo sugli appositi agganci.
• Montare il nuovo Filtro agganciandolo nella sua
sede.
• Rimontare i Filtri antigrasso metallici.
Illuminazione
SOSTITUZIONE LAMPADE
Lampade alogene da 20 W.
• Togliere le 2 viti che fissano il Supporto illuminazione e sfilarlo dalla Cappa.
• Estrarre la Lampada dal Supporto.
• Sostituirla con una nuova di uguali caratteristiche, facendo attenzione di inserire correttamente i due spinotti nella sede del Supporto.
• Rimontare il Supporto fissandolo con le due Viti
precedentemente tolte.
IT
10
Dear Customer,
If you follow the recommendations
contained in this Instruction Manual,
your appliance will give you constant
high performance and will remain
efficient for many years to come.
CONTENTS
RECOMMENDATIONS AND SUGGESTIONS
12
CHARACTERISTICS
13
INSTALLATION
14
USE
17
MAINTENANCE
18
GB
11
RECOMMENDATIONS AND SUGGESTIONS
INSTALLATION
• The manufacturer will not be held liable for any damages resulting
from incorrect or improper installation.
• The minimum safety distance between the cooker top and the
extractor hood is 650 mm.
• Check that the mains voltage corresponds to that indicated on the
rating plate fixed to the inside of the hood.
• For Class I appliances, check that the domestic power supply
guarantees adequate earthing.
Connect the extractor to the exhaust flue through a pipe of minimum
diameter 120 mm. The route of the flue must be as short as possible.
• Do not connect the extractor hood to exhaust ducts carrying
combustion fumes (boilers, fireplaces, etc.).
• If the extractor is used in conjunction with non-electrical appliances
(e.g. gas burning appliances), a sufficient degree of aeration must
be guaranteed in the room in order to prevent the backflow of
exhaust gas. The kitchen must have an opening communicating
directly with the open air in order to guarantee the entry of clean
air.
650 mm min.
USE
• The extractor hood has been designed exclusively for domestic use
to eliminate kitchen smells.
• Never use the hood for purposes other than for which it has ben
designed.
• Never leave high naked flames under the hood when it is in
operation.
• Adjust the flame intensity to direct it onto the bottom of the pan
only, making sure that it does not engulf the sides.
• Deep fat fryers must be continuously monitored during use:
overheated oil can burst into flames.
• The hood should not be used by children or persons not instructed
in its correct use.
MAINTENANCE
• Switch off or unplug the appliance from the mains supply before
carrying out any maintenance work.
• Clean and/or replace the Filters after the specified time period.
• Clean the hood using a damp cloth and a neutral liquid detergent.
GB
12
CHARACTERISTICS
Dimensions
358
320
760
760 min
1160 max
478
37
900
500
478
358
Components
12b
15
Ref.
1
14.1
9
7.2.1
12a
2.1
12e
2
11
2
2.1
2.2
9
14.1
15
Q.ty Product Components
1 Hood Body, complete with: Controls, Light,
Blower, Filters
1 Telescopic Chimney comprising:
1 Upper Section
1 Lower Section
1 Reducer Flange ø 150-120 mm
2 Air Outlet Connection Extension
1 Air Outlet Connection
Ref. Q.ty Installation Components
7.2.1 2 Upper Chimney Section Fixing Brackets
11
6 Wall Plugs
12a
6 Screws 4,2 x 44,4
12b
4 Screws 3,5
12e
6 Screws 2,9 x 9,5
2.2
11
12a
Q.ty Documentation
1 Instruction Manual
1
GB
13
INSTALLATION
1÷2
Wall drilling and bracket fixing
650 min.
12a
116 116
323
11
X
7.2.1
Wall marking:
• Draw a vertical line on the supporting wall up to the ceiling, or as high as practical, at the centre
of the area in which the hood will be installed.
• Draw a horizontal line at 650 mm above the hob.
• Place bracket 7.2.1 on the wall as shown about 1-2 mm from the ceiling or upper limit aligning the
centre (notch) with the vertical reference line.
• Mark the wall at the centres of the holes in the bracket.
• Place bracket 7.2.1 on the wall as shown at X mm below the first bracket (X = height of the upper
chimney section supplied), aligning the centre (notch) with the vertical line.
• Mark the wall at the centres of the holes in the bracket.
• Mark a reference point as indicated at 116 mm from the vertical reference line and 323 mm above
the horizontal reference line.
• Repeat this operation on the other side.
• Drill ø 8 mm holes at all the centre points marked.
• Insert the wall plugs 11 in the holes.
• Fix the brackets using the 12a screws (4,2 x 44,4) supplied.
• Insert the two screws 12a (4,2 x 44,4) supplied in the hood body fixing holes, leaving a gap of 56 mm between the wall and the head of the screw.
GB
14
Mounting the hood body
• Before attaching the hood body, tighten the two
screws Vr located on the hood body mounting
points.
• Hook the hood body onto the screws 12a
• Fully tighten support screws 12a
• Adjust screws Vr to level the hood body.
Vr
12a
Connections
DUCTED VERSION AIR EXHAUST SYSTEM
When installing the ducted version, connect the hood to the chimney using either a flexible or rigid
pipe ø 150 or 120 mm, the choice of which is left to the installer.
• To install a ø 120 mm air exhaust connection,
insert the reducer flange 9 on the hood body
outlet.
• Fix the pipe in position using sufficient pipe
clamps (not supplied).
• Remove any activated charcoal filters.
GB
ø 150
ø 120
9
15
RECIRCULATION VERSION AIR OUTLET
• Push the connection 15 onto the air outlet.
• Insert the connection extension pieces laterally
14.1 in connection 15.
• Fix the connection extension 14.1 to the
connection 15 using the 4 screws 12b (3,5)
supplied.
• Ensure that the activated charcoal filters have
been inserted.
15
12b
14.1
ELECTRICAL CONNECTION
• Connect the hood to the mains through a two-pole switch having a contact gap of at least 3 mm.
Flue assembly
Upper exhaust flue
• Slightly widen the two sides of the upper flue
and hook them behind the brackets 7.2.1, making
sure that they are well seated.
• Secure the sides to the brackets using the 4
screws 12e (2,9 x 9,5) supplied.
Lower exhaust flue
• Slightly widen the two sides of the flue and
hook
them between the upper flue and the wall,
making sure that they are well seated.
• Fix the lower part laterally to the hood body
using the 2 screws 12e (2,9 x 9,5) supplied.
12e
2.1
12e
2
2.2
12e
GB
16
USE
Control panel
L
V1
V2
V3
V4
L
Light
Switches the lighting system on and off.
V1
Motor
Switches the extractor motor on and off at low speed. Used to provide a continuos and silent air change in the presence of light cooking vapours.
V2
Speed
Reduces the operating speed.
V3
Speed
Increases the operating speed.
V4
Intensive
speed
Maximum speed, used for eliminating the highest cooking vapour emission.
Switches off automatically after 10 minutes operation. Can also be switched off
manually by pressing the button.
GB
17
MAINTENANCE
Grease filters
CLEANING METAL SELF- SUPPORTING GREASE FILTERS
The filters must be cleaned every 2 months of
operation, or more frequently with heavy usage,
and can be washed in a dishwasher.
• Remove the filters one at a time by pushing
them towards the back of the group and pulling
down at the same time.
• Wash the filters, taking care not to bend them.
Allow them to dry before refitting.
• When refitting the filters, make sure that the
handle is visible on the outside.
Activated charcoal filter (Recirculation version)
REPLACING THE ACTIVATED CHARCOAL FILTER
This filter is not washable and cannot be
regenerated, and must be replaced every 4 months
of operation, or more frequently with heavy usage.
• Remove the metal grease filters
• Remove the saturated activated carbon filter by
releasing the fixing hooks
• Fit the new filter by hooking it into its housing
• Replace the metal grease filters.
Lighting
LIGHT REPLACEMENT
20 W halogen light.
• Remove the two screws fixing the Lighting
support, and pull it out of from the Hood.
• Extract the Lamp from the Support.
• Replace with another of the same type, making
sure that the two pins are properly inserted in
the lamp holder socket holes.
• Replace the Support, fixing it in place with the
two screws removed as above.
GB
18
Quest’apparecchio è conforme alla norma europea sulla bassa tensione C.E.E. 73/23 relativa alla sicurezza elettrica e alle
norme europee: C.E.E. 89/336 relativa alla compatibilità elettromagnetica e C.E.E. 93/68 relativa alla marcatura CE.
This appliance conforms to European Low Voltage Directive 73/23/CEE governing electrical safety, European Directive 89/
336/CEE on Electromagnetic Compatibility and Directive 93/68/CEE regarding CE Marking.
Cet appareil est conforme à la norme européenne en matière de basse tension C.E.E. 73/23 de sécurité électrique ainsi qu’aux
normes européennes : C.E.E. 89/336 en matière de compatibilité électromagnétique et C.E.E. 93/68 en matière de label CE.
Dieses Gerät entspricht folgenden EG-Richtlinien: Niederspannungsrichtlinie EWG 73/23 hinsichtlich elektrischer Sicherheit,
Richtlinie Elektromagnetische Verträglichkeit EWG 89/336 und Richtlinie EWG 93/68 hinsichtlich der CE-Kennzeichnung.
Dit apparaat voldoet aan de Europese laagspanningsnorm 73/23/EEG inzake de elektrische veiligheid en de Europese normen:
89/336/EEG inzake de elektromagnetische compatibiliteit en 93/68/EEG inzake de CE-markering.
436001146 02 - 021119
Scaricare