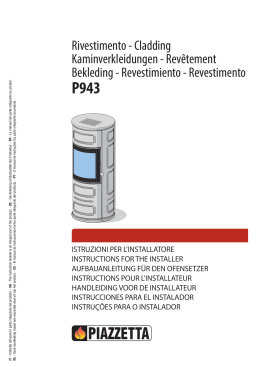
IT - Il libretto istruzioni è parte integrante del prodotto. - UK - The instruction booklet is an integral part of the product. - DE - Die Anleitung ist Bestandtel des Produktes. - FR - Le manuel fait partie intégrante du produit.
NL - Deze handleiding maakt een wezenlijk deel uit van het product. - ES - El manual de instrucciones forma parte integrante del producto. - PT - O manual de instruções faz parte integrante do produto.
Rivestimento - Cladding
Kaminverkleidungen - Revêtement
Bekleding - Revestimiento - Revestimento
P943 M
ISTRUZIONI PER L’INSTALLATORE
INSTRUCTIONS FOR THE INSTALLER
AUFBAUANLEITUNG FÜR DEN OFENSETZER
INSTRUCTIONS POUR L’INSTALLATEUR
HANDLEIDING VOOR DE INSTALLATEUR
INSTRUCCIONES PARA EL INSTALADOR
INSTRUÇÕES PARA O INSTALADOR
IT - Gentile Cliente, La ringraziamo per aver preferito uno dei nostri prodotti, frutto di lunga esperienza e di una continua ricerca per un prodotto superiore
in termini di sicurezza, affidabilità e prestazioni. In questo manuale troverà tutte le informazioni ed i consigli utili per poter utilizzare il suo prodotto nel
massimo della sicurezza ed efficienza.
DT2010001-01
INDICAZIONI IMPORTANTI
DT2010002-02
• Questo manuale è stato redatto dal costruttore e costituisce parte integrante del prodotto. Le informazioni in esso contenute sono indirizzate all’installatore,
e a tutte quelle persone che a vario titolo concorrono all’installazione, all’uso e alla manutenzione del prodotto.
• Leggete con attenzione le istruzioni e le informazioni tecniche contenute in questo manuale, prima di procedere all’installazione, all’utilizzo e a qualsiasi
intervento sul prodotto. Tutte le quote presenti nel seguente libretto sono espresse in cm.
• L’attenta progettazione e l’analisi dei rischi fatti dal costruttore hanno permesso la realizzazione di un prodotto sicuro; tuttavia prima di effettuare
qualsiasi operazione, si raccomanda di attenersi scrupolosamente alle istruzioni riportate nel seguente documento, e di tenerlo sempre a disposizione.
• Controllare l’esatta planarità del pavimento dove verrà installato il prodotto.
• Fare molta attenzione nel movimentare i particolari in ceramica.
• Nel movimentare le parti in acciaio del rivestimento o le parti in ceramica, si consiglia di utilizzare guanti puliti in cotone, evitando di lasciare impronte
difficili da togliere per la prima pulizia.
• Il montaggio del rivestimento deve essere eseguito da due persone.
• Le immagini riportate nel presente libretto sono a titolo esplicativo e talvolta possono non rappresentare esattamente il prodotto.
• Per verificare la compatibilità tra interni, rivestimenti e accessori, consultare il listino.
Nota del costruttore:
Il rivestimento è realizzato in maiolica semirefrattaria (da non confondere con altri materiali quali la porcellana).
I “cavilli” e i “puntini” o “vulcani d’aria” presenti sulla superficie smaltata sono caratteristiche estetiche del materiale e non influiscono minimamente sulla
funzionalità e durata del prodotto.
Il rivestimento in ceramica è il risultato di una esclusiva lavorazione artigianale, ogni pezzo in ceramica è un esemplare unico, eventuali mancanze negli
accoppiamenti o allineamenti sono dovute alla elevata artigianalità del prodotto.
Per i termini, limiti ed esclusioni fare riferimento al certificato di garanzia allegato al prodotto.
Il costruttore nell’intento di perseguire una politica di costante sviluppo e rinnovamento del prodotto può apportare, senza preavviso alcuno, le modifiche
che riterrà opportune.
Questo documento è di proprietà del costruttore; non può essere divulgato totalmente o in parte a terzi senza autorizzazione scritta del
costruttore. Il costruttore si riserva i diritti a rigore di legge.
UK - Dear Customer, Thank you for having chosen one of our products, which is the result of years of experience and continuous research aimed at
making a superior product in terms of safety, reliability and performance. This booklet contains information and advice for safe and efficient use of your
product.
DT2010001-01
IMPORTANT INFORMATION
DT2010002-02
• This booklet has been prepared by the manufacturer and must always accompany the product. The information it contains is for the installer and all those
persons who are concerned with installing, using and maintaining the product.
• Carefully read the instructions and the technical information contained in this booklet before installing or using the product or carrying out any work on it.
All the dimensions on this instruction manual are in cm.
• Meticulous design and risk analysis by the manufacturer have resulted in the manufacture of a safe product. It is, however, strongly recommended that when
carrying out any operation on the product you scrupulously comply with the instructions given in the following booklet and keep it in a handy place for reference.
• Check that the floor where the product will be installed is perfectly level.
• Take great care in handling the ceramic parts.
• When handling the steel parts of the cladding or the ceramic parts it is advisable to wear clean cotton gloves to avoid leaving fingerprints that are difficult
to remove at first time of cleaning.
• The cladding must be assembled by two persons.
• The product you have purchased may differ slightly from the one illustrated in this booklet since the pictures are only given as an indication and not an
exact portrayal.
• To verify the compatibility of structure, cladding and accessories, see the price list.
Manufacturer’s note:
The stove has semi-refractory majolica cladding (not to be confused with other materials such as porcelain).
“Crazing”, “dimples” or “blisters” on the glazed surface are aesthetic features of the material and in no way affect the functionality and durability of the product.
The ceramic cladding is the result of exclusive craftsmanship; each ceramic piece is unique and any discrepancy in fit or alignment is due to much of the
product being hand made.
See the guarantee certificate enclosed with the product for the terms, limitations and exclusions.
In line with its policy of constant product improvement and renewal, the manufacturer may make changes without notice.
This document is the property of the manufacturer; no part of it may be disclosed to third parties without the written permission of the
manufacturer.
All rights reserved by the manufacturer.
2
DT2002541_H07032970_00
DE - Liebe Kundin, lieber Kunde, wir gratulieren Ihnen zur Wahl eines unserer Produkte, welches das Ergebnis langjähriger technologischer Erfahrung
und kontinuierlicher Forschung ist. Ein Produkt, das in Bezug auf Sicherheit, Zuverlässigkeit und Leistung den höchsten Ansprüchen genügt. In dieser
Aufbauanleitung finden Sie alle nützlichen Informationen und Tipps, die für die Sicherheit und Effizienz Ihres Produktes erforderlich sind.
DT2010001-01
WICHTIGE HINWEISE
DT2010002-02
• Diese Betriebsanleitung wurde vom Hersteller verfasst und ist Bestandteil des Produktes. Die darin enthaltenen Informationen sind für den ofenstezer
sowie für alle Personen, die für die Aufstellung und Wartung zuständig sind, bestimmt.
• Lesen Sie die Anweisungen und technischen Informationen in dieser Aufbauanleitung sowohl vor dem Aufbau, als auch vor Heizbeginn und vor jeglicher
Tätigkeit aufmerksam durch. Alle Maßangaben dieser Bedienungsanleitung sind in cm.
• Der Hersteller durchgeführte Planung und Gefahrenanalyse haben die Realisierung eines sicheren Produktes ermöglicht. Es wird jedoch empfohlen, sich
bei jedem Eingriff sorgfältig an die Anweisungen zu halten und diese immer griffbereit zu haben.
• Vor Aufstellung des Produktes die vollkommene Ebenheit des Fußbodens.
• Sehr vorsichtig mit den Keramikteilen umgehen.
• Es wird empfohlen beim Anfassen der Stahlteile saubere Baumwollhandschuhe zu tragen, um Fingerabdrücke, die später schwierig zu entfernen sind,
zu vermeiden.
• Der Aufbau der Verkleidung muss zu zweit durchgeführt werden.
• Die Abbildungen in der Betriebsanleitung dienen nur zur Erklärung und geben nicht immer exakt das Produkt wider.
• Um die Kompatibilität zwischen Heizeinsatz, Verkleidung und Zubehör festzustellen, siehe die Preisliste.
Hinweis des Herstellers:
Die Ofenverkleidung besteht aus einer feuerfesten Kachel (nicht zu verwechseln mit anderen Materialien wie z. B. Porzellan).
Die Krakeleerisse oder Pickel in der Glasur sind herstellungsbedingte, charakteristische Eigenschaften des Materials und beeinträchtigen nicht die
Funktionalität und Lebensdauer des Produktes.
Die Keramikverkleidung der Öfen ist das Ergebnis einer exklusiven handwerklichen Verarbeitung. Jede Kachel ist ein Unikat. Eventuelle Abweichungen der
einzelnen Kacheln voneinander sind Kennzeichen eines hochwertigen handwerklichen Erzeugnisses.
Sonstige Gewährleistungsbestimmungen und Haftungsbeschränkungen sind in der Garantiekarte des Liefergegenstandes zu lesen.
Der Hersteller behält sich jedoch vor, aufgrund ständiger technologischer Entwicklung und Erneuerung des Produktes, ohne vorherige Ankündigung,
Änderungen daran vorzunehmen.
Diese Aufbauanleitung ist Eigentum des Hersteller. Sie darf nicht ohne vorherige schriftliche Genehmigung seitens des
Herstellers für Dritte teilweise oder im Ganzen vervielfältigt werden. Der Hersteller behält sich alle Rechte vor.
FR - Cher Client, Nous vous remercions d’avoir choisi l’un de nos produits. Cet appareil est le fruit d’une longue expérience et d’une recherche continue,
afin d’améliorer sans cesse la sécurité, la fiabilité et les performances de nos produits. Dans ce manuel, vous trouverez toutes les informations et les
conseils utiles pour pouvoir utiliser votre produit en toute sécurité et avec la meilleure efficacité.
DT2010001-01
INDICATIONS IMPORTANTES
DT2010002-02
• Le présent manuel a été rédigé par le Fabricant, et fait partie intégrante du produit. Les informations qu’il contient sont destinées à l’installateur et à
toutes les personnes qui, à différents titres, installent, utilisent et entretiennent l’appareil.
• Lisez attentivement les instructions et les informations techniques reportées dans ce manuel avant d’installer et d’utiliser l’appareil et avant une
quelconque intervention sur celui-ci. Tout les dimensions dans le manuels sont en cm.
• La conception exemplaire et l’analyse des risques effectuées par le constructeur ont permis de réaliser un produit extrêmement sûr; toutefois, avant
d’engager une quelconque opération, il est recommandé d’observer scrupuleusement les instructions reportées dans le présent manuel; celui-ci doit
toujours être à disposition pour pouvoir le consulter en cas de besoin.
• Contrôlez la planéité du sol et la perpendicularité des parois, sur lequel vous installez le poêle.
• Faites très attention quand vous manipulez les pièces en céramique.
• Nous vous conseillons de porter des gants en coton propres pendant que vous manipulez les parties en acier du revêtement ou les parties en céramique,
afin de ne pas laisser d’empreintes difficiles à nettoyer.
• Le montage du revêtement doit être effectué par deux personnes.
• Les images sont proposées dans ce livret à titre indicatif. Elles ne sont donc pas toujours parfaitement conformes au produit proposé.
• Pour vérifier la compatibilité entre les intérieurs, finitions et accessoires, veuillez vous reporter à la liste de prix.
Remarque du Fabricant.
Le revêtement du poêle est réalisé en faïence semi-réfractaire (à ne pas confondre avec d’autres matériaux comme la porcelaine).
Les “craquelures”, les “piqûres” ou les “bulles éclatées” présentes sur la surface émaillée sont des caractéristiques esthétiques propres à ce matériau, et
ne sont absolument pas préjudiciables à la fonctionnalité et à la durabilité du produit.
Le revêtement en céramique étant issu d’un travail exclusivement artisanal, et chaque pièce en céramique étant de ce fait un exemplaire unique, quelques
petites difficultés d’emboîtement ou d’alignement lors de l’installation pourraient éventuellement survenir.
Pour les termes, les limites et les exclusions, reportez-vous au certificat de garantie qui accompagne le produit.
Dans le but de poursuivre une politique de développement constant et de renouvellement du produit, le Fabricant se réserve la faculté d’apporter, sans
préavis, toutes les modifications qu’il jugera utiles.
Ce document appartient au fabricant; il ne peut être divulgué à tiers ni totalement ni partiellement sans l’autorisation écrite du fabricant.
Le fabricant se réserve tous droits aux termes de la loi.
DT2002541_H07032970_00
3
NL - Beste klant, wij danken u dat u gekozen heeft voor één van onze producten, die het resultaat zijn van jarenlange ervaring en continu onderzoek,
bedoeld om voor wat betreft veiligheid, betrouwbaarheid en prestaties een superieur product te kunnen bieden.
Dit boekje bevat informatie en advies voor een veilig en efficiënt gebruik van het product.
DT2010001-01
BELANGRIJKE AANWIJZINGEN
DT2010002-02
• Dit boekje is opgesteld door de fabrikant en maakt een wezenlijk deel uit van het product. De informatie die erin staat is bestemd voor de installateur en
alle personen die op enige wijze betrokken zijn bij de installatie, het gebruik en het onderhoud van het product.
• Lees de aanwijzingen en de technische informatie die dit boekje bevat aandachtig voordat de kachel geïnstalleerd wordt, er gebruik van gemaakt wordt
en er eventuele reparaties aan uitgevoerd worden. Alle maten in dit boekje zijn aangegeven in cm.
• Door het zorgvuldige ontwerp en de risicoanalyse, die door de fabrikant verricht is, was het mogelijk een veilig product te vervaardigen; alvorens echter
iets te gaan doen, raden wij u nadrukkelijk aan om u strikt aan de aanwijzingen die in dit document staan te houden en ervoor te zorgen dat dit document
altijd beschikbaar is.
• Controleer of de vloer waar het product geïnstalleerd zal worden volledig vlak is.
• Wees heel voorzichtig bij het verplaatsen van de keramische delen.
• Bij het verplaatsen van de stalen delen van de bekleding wordt geadviseerd om schone katoenen handschoenen aan te trekken om te voorkomen
dat u vingerafdrukken erop achterlaat die tijdens de eerste schoonmaakbeurt moeilijk te verwijderen zijn.
• Het monteren van de bekleding moet door minimaal twee personen gedaan worden.
• De afbeeldingen die in dit boekje staan zijn bedoeld ter verduidelijking maar het kan soms gebeuren dat deze niet exact kloppen met uw product.
• Om na te gaan of het binnenwerk, de bekleding en de accessoires compatibel zijn, verzoeken wij u vriendelijk om de prijslijst te raadplegen.
Opmerkingen van de fabrikant:
De bekleding van het product is gemaakt van halfvuurvaste majolica (niet te verwarren met ander materiaal zoals porselein).
“Haarscheurtjes”, “spikkels”, “putjes” of “blaasjes” in het geglazuurde oppervlak zijn esthetische kenmerken van het materiaal en
hebben absoluut geen invloed op de werking en de levensduur van het product.
De bekleding van keramiek is het resultaat van een exclusieve ambachtelijke bewerking. Elk deel van keramiek is een uniek exemplaar;
eventuele afwijkingen in de verbindingen of rechtlijnigheid zijn toe te schrijven aan het hoge ambachtelijke niveau van het product.
Voor wat betreft de termijnen, de beperkingen en de uitsluitingen van de garantie, zie het garantiebewijs dat bij het product gevoegd is. In lijn met de
bedrijfsfilosofie, waarbij naar constante verbetering en vernieuwing gestreefd wordt, kan de fabrikant, zonder voorafgaande kennisgeving, de wijzigingen
doorvoeren die hij noodzakelijk vindt.
Dit document is eigendom van de fabrikant; niets uit dit document mag, noch geheel noch gedeeltelijk, bekend gemaakt worden aan derden
zonder schriftelijke toestemming van de fabrikant. Alle volgens de wet bepaalde rechten zijn voorbehouden aan de fabrikant.
ES - Estimado Cliente: Le damos las gracias por haber preferido uno de nuestros productos, fruto de una larga experiencia y de la continua búsqueda
de un producto superior en términos de seguridad, fiabilidad y prestaciones. En este manual de instrucciones encontrará todas las informaciones y los
consejos útiles para poder utilizar su producto con la máxima seguridad y eficiencia.
DT2010001-01
INDICACIONES IMPORTANTES
DT2010002-02
• Este manual de instrucciones ha sido redactado por el constructor y constituye parte integrante del producto. Las informaciones contenidas en el mismo
están destinadas para el instalador y a todas aquellas personas que, de una manera u otra, participen en la instalación, el uso y el mantenimiento del producto.
• Lea con atención las instrucciones y las informaciones técnicas contenidas en este manual, antes de comenzar la instalación, utilización y cualquier
intervención en el producto. Todos los datos que hay en el siguiente manual se expresan en cm.
• El atento proyecto y el análisis de los riesgos llevados a cabo por el productor han permitido la realización de un producto seguro; sin embargo, antes
de realizar cualquier operación, se recomienda seguir escrupulosamente las instrucciones indicadas en el siguiente documento y mantenerlo siempre a
disposición.
• Controle la exacta planitud del suelo donde se instalará el producto.
• Preste mucha atención al desplazar las piezas de cerámica.
• Al mover las partes de acero del revestimiento, se aconseja utilizar guantes limpios de algodón, para no dejar huellas que serían difíciles de quitar.
• El montaje del revestimiento debe ser realizado por dos personas.
• Las imágenes indicadas en el presente manual tienen una finalidad explicativa y a veces pueden no representar exactamente el producto.
• Para verificar la compatibilidad entre monobloques, revestimientos y acessorios, vease la lista de precios.
Nota del constructor:
El revestimiento de la estufa está realizado en mayólica semirrefractaria (que no debe confundirse con otros materiales como la porcelana).
El “cuarteado” y los “puntitos” o “volcanes de aire” presentes en la superficie esmaltada son características estéticas del material y no influyen mínimamente
en la funcionalidad y duración del producto.
El revestimiento de cerámica es el resultado de una exclusiva elaboración artesanal, por lo que cada pieza de cerámica es un ejemplar único; eventuales
fallos en los acoplamientos o alineaciones se deben a la elevada artesanalidad del producto.
Para conocer las condiciones, los límites y las exclusiones, se remite al certificado de garantía adjunto al producto.
El constructor, en su intento de perseguir una política de constante desarrollo y renovación del producto, puede aportar, sin ningún preaviso, las
modificaciones que considere más oportunas.
Este documento no puede ser divulgado totalmente o en parte a terceros sin autorización escrita. El constructor se reserva todos los derechos
de conformidad con la Ley.
4
DT2002541_H07032970_00
PT - Prezado Cliente, Agradecemos por ter escolhido um dos nossos produtos, fruto de uma longa experiência e de uma contínua investigação para obter
um produto superior em termos de segurança, fiabilidade e desempenho.
Neste manual encontrará todas as informações e conselhos úteis para poder utilizar o seu produto com a máxima segurança e eficiência.
DT2010001-01
INFORMAÇÕES IMPORTANTES
DT2010002-02
• Este manual de instruções foi redigido pelo fabricante e faz parte integrante do produto. As informações destinam-se ao comprador e a todos os que, a
diversos títulos, concorrem para a instalação, utilização e manutenção do produto.
• Leia com atenção as instruções e as informações técnicas constantes neste manual, antes de efectuar a instalação, utilização ou qualquer intervenção
no produto. Todas as medidas presentes neste manual estão expressas em centímetros.
• O atento design e a análise dos riscos realizados pelo fabricante permitiram a realização de um produto seguro; todavia antes de efetuar qualquer
operação, recomenda-se respeitar rigorosamente as instruções apresentadas neste documento, e de o ter sempre à disposição.
• Controle se é totalmente plano o piso onde for instalado o produto.
• Feitos muito atenção quando manipula as peças de cerâmica.
• Ao movimentar as partes em aço do revestimento, recomenda-se a utilização de luvas limpas de algodão, evitando deixar marcas difíceis de remover
ao fazer a primeira limpeza.
• A montagem de revestimento deve ser executada pelo menos por duas pessoas.
• As figuras deste manual são a título explicativo e podem não representar com exactidão o produto.
• Para verificar a compatibilidade entre partes internas, revestimentos e acessórios, consultar a tabela.
Nota do fabricante:
O revestimento da salamandra é de maiólica semirrefratária (a não confundir com outros materiais como a porcelana).
Os “craquelês” e os “pontinhos” ou “bolhas de ar” presentes na superfície esmaltada são características estéticas do material e não influenciam em nada
a funcionalidade e durabilidade do produto.
O revestimento em cerâmica é o resultado de um trabalho artesanal exclusivo, e cada peça em cerâmica é única. Eventuais imperfeições nas junções ou
alinhamentos devem-se ao elevado caráter artesanal do produto.
Para os termos, limites e exclusões consulte o certificado de garantia anexado ao produto.
Com o objectivo de aplicar uma política de constante desenvolvimento e renovação do produto, o fabricante pode fazer as modificações que considerar
oportunas sem aviso prévio.
Este manual não pode ser divulgado total ou parcialmente a terceiros sem autorização escrita. O fabricante reserva-se todos os direitos na
forma da lei.
DT2002541_H07032970_00
5
1.0 DIMENSIONI - DIMENSIONS - ABBMESSUNGEN
AFMETINGEN - DIMENSIONES - DIMENSÕES
1.1 P943 M
DT1020651-00
C
132
A
B
53
18
55
9
A
8 cm
B
7.5 cm
57
C
6 cm
A = Diametro scarico fumi.
Flue gas outlet diameter.
Durchmesser des Rauchabzugs.
Diamètre départ fumées.
Diameter van de rookgasfvoer.
Diàmetre de la salida de humos.
Diâmetro da descarga de fumos.
6
54
B = Canalizzazione Multifuoco System / Multifuoco System Plus.
Multifuoco System / Multifuoco System Plus Ducting.
Kanalisierung Multifuoco System / Multifuoco System Plus.
Canalisation Multifuoco System / Multifuoco System Plus.
Kanalisatie Multifuoco System / Multifuoco System Plus.
Canalización Multifuoco System / Multifuoco System Plus.
Canalização Multifuoco System / Multifuoco System Plus.
DT2002541_H07032970_00
C = Aria combuerente.
Combustion air inlet.
Brennluft.
Air comburant.
Verbrandingslucht.
Aire comburente.
Ar comburente.
2.0 ESPLOSO - EXPLODED VIEW - EXPLOSIONSZEICHNUNG - VUE ÉCLATÉE
EXPLOSIETEKENING - DIBUJO DE DESPIECE - DESENHO EXPLODIDO
2.1 P943 M
4
1
6
3
5
2
7
N°Descrizione
Q.tà
1 Pannello 01 piano superiore..........................................................1
2 Pannello 02 frontale inferiore.........................................................1
3 Pannello 03 laterale destro............................................................1
4 Pannello 04 laterale sinistro...........................................................1
5 Pannello 05 frontale centrale.........................................................1
6Pannello 06 frontale superiore.......................................................1
7 Basamento V. Charc......................................................................1
No.Description
Qty.
1 Top surface panel 01.....................................................................1
2 Lower front panel 02.....................................................................1
3 Right side panel 03......................................................................1
4 Left side panel 04........................................................................1
5 Central front panel 05...................................................................1
6 Upper front panel 06.....................................................................1
7 Charcoal painted basement...........................................................1
Nr.Beschreibung
Menge
1 Topplatte 01.................................................................................1
2 Unteres Frontpaneel 02.................................................................1
3 Rechtes Seitenpaneel 03...............................................................1
4 Linkes Seitenpaneel 04.................................................................1
5 Zentrales Frontpaneel 05...............................................................1
6 Oberes Frontpaneel 06..................................................................1
7 Grau lackierte Basis (Charcoal)......................................................1
N°Désignation
Q.té
Plaque 01 supérieure....................................................................1
2 Panneau 02 frontal inférieur..........................................................1
3 Panneau 03 latéral droit................................................................1
4 Panneau 04 latéral gauche............................................................1
5 Panneau 05 frontal central............................................................1
6 Panneau 06 frontal supérieur.........................................................1
7 Base Peinte Coul. Charcoal............................................................1
Nr.Beschrijving
Aantal
1 Paneel 01 boven...........................................................................1
2 Paneel 02 vooraan onder...............................................................1
3 Paneel 03 zijkant rechts................................................................1
4 Paneel 04 zijkant links...................................................................1
5 Paneel 05 vooraan midden............................................................1
6 Paneel 06 vooraan boven..............................................................1
7 Houtskoolkleurig onderstel.............................................................1
N°Descripción
Cantidad
1 Panel 01 tapa superior..................................................................1
2 Panel 02 frontal inferior.................................................................1
3 Panel 03 lateral derecho................................................................1
4 Panel 04 lateral izquierdo..............................................................1
5 Panel 05 frontal central.................................................................1
6 Panel 06 frontal superior...............................................................1
7 Base Pintada Charcoal..................................................................1
N°Descrição
Quant.
1 Painel 01 tampo superior..............................................................1
2 Painel 02 frontal inferior................................................................1
3 Painel 03 lateral direito..................................................................1
4 Painel 04 lateral esquerdo.............................................................1
5 Painel 05 frontal central................................................................1
6 Painel 06 frontal superior..............................................................1
7 Base pintada cinzento escuro........................................................1
DT2002541_H07032970_00
7
DT2012760-00
3.0 PRELIMINARI ALL’INSTALLAZIONE - PREPARATIONS FOR INSTALLATION
TRAVAUX AVANT L’INSTALLATION - HINWEISE FÜR DEN INSTALLATION
VOORBEREIDINGEN VOOR DE INSTALLATIE - RECOMENDACIONES PREVIAS A LA INSTALACION
OPERAÇÕES A REALIZAR ANTES DA INSTALAÇÃO
IT - Prima di installare il prodotto è importante leggere attentamente il manuale
di istruzioni allegato. Solo successivamente si può costruire l’eventuale
controparete, posizionare il prodotto ed effettuarne il collaudo.
• Si consiglia di realizzare una buona coibentazione utilizzando materiali,
spessori e distanze a norma secondo quanto indicato nel libretto istruzioni
del prodotto. Le distanze riportate sono le minime utili per l’installazione su
pareti non infiammabili.
• Per la posa è necessario seguire scrupolosamente le indicazioni e attenersi
alle misure seguenti. Qualora il vostro apparecchio sia fissato a parete,
controllare che questa sia idonea a sostenere il peso dell’apparecchio e del
rivestimento. In caso contrario, prendere adeguate contromisure.
• Nella realizzazione dell’eventuale parete in cartongesso, utilizzare solo
materiale garantito in classe A1 (incombustibile).
• In riferimento alle norme vigenti sulla sicurezza degli apparecchi elettrici,
per l’installazione del rivestimento, è obbligatorio rivolgersi ad un Centro
Assistenza Tecnica o a personale qualificato.
• Sballare il rivestimento e l’apparecchio con tutti i suoi particolari attinenti:
questa operazione deve essere fatta da almeno due persone.
• Prima di procedere all’installazione provvedere ad una idonea attrezzatura
per l’assemblaggio del prodotto.
• Per posizionare l’apparecchio tenere presenti distanze e posizioni della
canna fumaria secondo quanto consigliato nel libretto istruzioni allegato.
• Se si esegue l’installazione per la prima volta è consigliato procedere
con l’installazione completa senza l’uso di collanti per verificare l’esatta
e la completa fattibilità dell’operazione. Una volta portata a compimento
smontare e rimontare tutto seguendo con attenzione le istruzioni del
presente libretto d’installazione.
• Per compensare eventuali errori di planarità e irregolarità, troverete in
dotazione al prodotto (in base ai modelli) del nastro in fibra-vetro adesivo.
UK - Before installing the product it is important to read the instruction booklet
carefully. Only after having done this, proceed with eventually erect the lining
wall, placing the appliance and test it.
• It is advisable to insulate well using standard materials, thickness and
distances in accordance with indications given in the appliance instruction
booklet. The reccomended distances are the minimum for installation in
non-flammable walls.
• Scrupulously follow the installation instructions and comply with the
measurements given below. If your appliance is to be wall mounted, check
that the wall can support the combined weight of the appliance and the
cladding and if in doubt take adequate countermeasures.
• When constructing any dry wall, only use class A1 (incombustible)
guaranteed material.
• Pursuant to current regulations regarding the safety of electrical
appliances, an After-Sales Service Centre or qualified persons must be
called in for installing the cladding.
• Unpack the cladding and the stove with all its relevant parts: we advise
that unpacking and installation be carried out by at least two people.
• Before proceeding with installation ensure that you have the correct tools
to assemble the product.
• When locating the stove, comply with the distances and positions of the
flue as advised in the enclosed instruction booklet.
• If carrying out installation for the first time, we advise that you complete
the installation without permanently fixing the parts in order to check
the complete feasibility of the operation. Once this has been checked
satisfactorily, dismantle then reassemble everything scrupulously following
the instructions in this installation booklet.
• To compensate for any errors in levelness and unevenness, adhesive
fibreglass tape is provided with the product (according to model).
DE - Vor dem Installieren des Produkt ist es wichtig, die Bedienungsanleitungen
zum Produkt gut durchzulesen. Erst im Nachnienein kann man mit dem
Positionieren des Produkt fortfahren, eine Prüfung vornehmen und die
eventuelle Gipskartonwand bauen.
• Es empfiehit sich, für eine gute Wärmedämmung mit vornschriftsmäßigen
Materialen, Abstandhaltern und Entfernungen laut Betriebsanleitungen des
Produkt zu sorgen. Bei den Entfernungen handelt es sich um die für die
Installation an nicht entflammbaren Wänden erfroderliche Mindestdistanzen.
• Für die Aufstellung ist es erforderlich, sich strikt an die Anleitungen
und nachstehenden Maße sowie die in der Betriebsanleitung zum
Produkt angeführten Maße zu halten. Bei Wandinstallation unbedingt
prüfen, dass die jeweilige Wand für das Gewicht des Geräts und der
Verkleidung entsprechend tragfähig ist. Sollte dies nicht der Fall sein, sind
entsprechende Vorkehrungen zu treffen.
• Achten Sie beim Realisieren einer eventuellen Gipskartonwand darauf,
nur Material der Baustoffklasse A1 (nicht brennbar) zu verwenden.
• Laut gültigen Sicherheitsbestimmungen für elektrische Geräte, müssen
Sie sich für den Aufbau der Verkleidung an einen Technischen Kundendienst
oder an Fachpersonal wenden.
• Packen Sie die Verkleidung und sie den Heizeinsatz mit sämtlichem
Zubehör aus: muss zu zweit durchgeführt werden.
• Bevor Sie mit dem Aufbau beginnen, vergewissern Sie sich, dass Sie
entsprechendes Werkzeug für die Montage des Produktes haben.
• Beim Aufbau des Ofens müssen die Abstände und Position des
Schornsteinrohres gemäß den Angaben der Bedienungsanleitung für den
Heizeinsatz berücksichtigt werden.
• Wird die Installation zum erstem Mal ausgeführt, so empfiehlt es sich,
diese erst einmal komplett ohne Kleber durchzuführen, damit Sie die
Ausführbarkeit Ihrer Tätigkeit überprüfen können. Haben Sie dieses
erfolgreich beendet, zerlegen Sie den Ofen wieder und bauen ihn gemäß
der Aufbauanleitung wieder auf.
• Verwenden Sie die beigefügte Glasfaserdichtung, um eventuelle
Unebenheiten auszugleichen (je nach Model).
FR - Avant d’installer le produit, il est important de lire attentivement le
livret d’instructions du produit. Seulement après cela, il est possible de
construire la paroi en plaques de plâtre, positionner le produit et d’en faire
le contrôle de réception.
• Il est conseillé de réaliser une bonne isolation en respectant les
matériaux, les épaisseurs et les distances prescrits par les normes en
vigueur et indiqués dans le livret d’instructions du produit. Les distances
indiquées sont les distances minimales utiles pour l’installation contre des
parois ininflammables
• Pour la pose, observez scrupuleusement les instructions et respectez
impérativement les dimensions indiquées ci-après. Si vous avez l’intention
de fixer l’appareil au mur, vérifiez si celui-ci a été construit de manière à
supporter le poids de l’appareil et du revêtement. En cas contraire, prenez
les mesures qui s’imposent.
• Pour réaliser éventuellement la paroi en plaques de plâtre, utilisez
exclusivement un matériau classé A1 garanti (incombustible).
• Conformément aux normes en vigueur en matière de sécurité des appareils
électriques, pour le montage du revêtement, il est impératif de s’adresser
à un Centre d’Assistance Technique ou à des professionnels qualifiés.
• Déballez le revêtement et le poêle avec toutes ses pièces: nous
conseillons de faire effectuer le déballage et l’installation par au moins
deux personnes.
• Avant de procéder à l’installation, prévoyez tous les outils nécessaires à
l’assemblage du poêle.
• Positionnez le poêle dans le respect des distances et des positions du
conduit d’évacuation indiquées dans le manuel annexé.
• Si le poêle est installé pour la première fois, il est conseillé de le monter
complètement sans utiliser de colle pour vérifier si tout correspond. Une
fois que vous l’avez monté, démontez-le et remontez-le une autre fois en
suivant scrupuleusement les instructions du présent manuel.
• Pour parer aux éventuels problèmes de planéité et d’irrégularité, utilisez
le ruban en fibre de verre adhésif fourni en dotation avec le produit (selan
le modèle).
8
DT2002541_H07032970_00
NL - Alvorens het product te installeren is het belangrijk om eerst de
bijgevoegde gebruiksaanwijzing aandachtig te lezen. Pas daarna kan een
eventuele wand van gipsplaten geplaatst worden, kan het product geplaatst
en getest worden.
• Er wordt geadviseerd om voor goede isolatie te zorgen waarbij
goedgekeurde materialen, dikten en afstanden toegepast moeten worden
volgens datgene wat in de gebruiksaanwijzing van het product vermeld is.
De vermelde afstanden zijn de minimum afstanden om het product tegen
niet-ontvlambare wanden aan te plaatsen.
• Voor de plaatsing moeten de aanwijzingen zorgvuldig opgevolgd worden
en moeten de volgende maten aangehouden worden. Indien uw toestel
aan de wand bevestigd is moet u controleren of de wand geschikt is om
het gewicht van het toestel en de bekleding te verdragen. Als dit niet het
geval is moet u de nodige maatregelen nemen.
• Bij het maken van een eventuele wand van gipsplaat mag u uitsluitend
gegarandeerd materiaal van klasse A1 (onbrandbaar) gebruiken.
• Onder verwijzing naar de geldende normen met betrekking tot
de veiligheid van elektrische toestellen is het voor het plaatsen van
de bekleding verplicht om zich tot een technisch servicecentrum of
vakmensen te wenden.
• Haal de bekleding en het toestel met alle bijbehorende delen uit de
verpakking: dit moet door minimaal twee personen gedaan worden.
• Alvorens met het installeren te beginnen moet gezorgd worden voor
geschikt gereedschap om het product te monteren.
• Om het product te plaatsen moet er rekening gehouden worden met
de afstand en de plaats van het rookgaskanaal volgens datgene wat in
bijgevoegde gebruiksaanwijzing wordt geadviseerd.
• Als de kachel voor de eerste keer geïnstalleerd wordt, wordt geadviseerd
om de kachel eerst volledig te installeren zonder lijm te gebruiken om na te
gaan of het allemaal klopt en of dit uitvoerbaar voor u is.
Zodra u dit gedaan heeft moet u alles er weer af halen en daarna opnieuw
aanbrengen, waarbij u de aanwijzingen die in deze installatievoorschriften
staan zorgvuldig moet opvolgen.
• Om eventuele afwijkingen in de vlakheid en ongelijkheid te compenseren
wordt er bij het product (op basis van de modellen) zelfklevende
glasvezeltape geleverd.
ES - Antes de instalar el producto, es importante leer atentamente el manual de
instrucciones adjunto. Sólo después se puede construir el eventual trasdosado,
colocar el producto y realizar la prueba.
• Se aconseja realizar un buen aislamiento utilizando materiales,
elementos de espesor y distancias conforme a lo indicado en el manual de
instrucciones del producto. Las distancias indicadas son las útiles mínimas
para la instalación en paredes no inflamables.
• Para la colocación, es necesario seguir escrupulosamente las
indicaciones y las medidas siguientes. En caso de fijación del aparato a la
pared, controle que ésta sea idónea para soportar el peso del aparato y del
revestimiento. En caso contrario, adopte las medidas necesarias.
• En la realización de una eventual pared de cartón de yeso, utilice sólo
material garantizado de clase A1 (incombustible).
• Con referencia a las normas vigentes sobre la seguridad de los aparatos
eléctricos, para la instalación del Revestimiento, es obligatorio dirigirse a
un Centro de Asistencia Técnica o a personal cualificado.
• Desembale el revestimiento y el aparato con todas sus piezas: esta operación
debe ser realizada al menos por dos personas.
• Antes de proceder a la instalación, equípese con un utensilio adecuado
para ensamblar el producto.
• Para colocar la estufa, mantenga las distancias y posiciones del humero
según las indicaciones del manual de instrucciones adjunto.
• Si se realiza la instalación por primera vez, es aconsejable proceder con la
instalación completa sin el uso de colas, para verificar la exacta y completa
factibilidad de la operación. Una vez realizada dicha instalación, desmonte
y vuelva a montarlo todo siguiendo con atención las instrucciones del
presente manual de instalación.
• Para compensar eventuales errores de planaridad e irregularidad, el
producto se suministra (en base a los modelos) con cinta adhesiva de
fibra de vidrio.
PT - Antes de instalar o produto, é importante ler com atenção o manual de
instruções anexado. Apenas depois pode-se construir a eventual parede falsa,
posicionar o produto e ensaiá-lo.
• Recomenda-se realizar um bom isolamento respeitando as distâncias e
utilizando materiais e calços segundo a norma, conforme as indicações do
manual de instruções do produto. As distâncias indicadas são as mínimas
úteis para a instalação em paredes não inflamáveis.
• Para a instalação é necessário seguir rigorosamente as indicações e
observar as seguintes medidas. Se o seu aparelho for fixado na parede,
controlar se a mesma é apropriada para sustentar o peso do aparelho e do
revestimento. Caso contrário, tomar as providências necessárias.
• Ao fazer a eventual parede em gesso cartonado, utilizar apenas material
garantido de classe A1 (incombustível).
• No que diz respeito às normas vigentes relativas à segurança dos
aparelhos elétricos, para a instalação do Revestimento é obrigatório
contactar um Centro de Assistência Técnica ou pessoal qualificado.
• Desembalar o revestimento, o aparelho e todos os seus componentes: esta
operação deve ser feita por pelo menos duas pessoas.
• Antes de iniciar a instalar, assegurar-se de ter à disposição as ferramentas
apropriadas para montar o produto.
• Para posicionar a salamandra, considerar as distâncias e as posições da
chaminé segundo as recomendações do manual de instruções anexado.
• Se for a primeira instalação que se faz, recomenda-se completar toda
a instalação sem utilizar colas para verificar se a operação foi feita de
forma correta e completa. Uma vez feito isso, desmontar e voltar a montar
seguindo com cuidado as instruções deste manual de instalação.
• Para compensar eventuais erros de horizontalidade do pavimento e
irregularidades, é fornecido com o produto (consoante o modelo) uma fita
adesiva em fibra de vidro.
DT2002541_H07032970_00
9
4.0 INSTALLAZIONE - INSTALLATION - INSTALLATIE - INSTALACION - INSTALAÇÃO
H
IT - Posizionare la stufa nel punto di installazione e regolare l’altezza dei
quattro piedini per garantire la planarità del prodotto. La distanza (H) tra la
parte anteriore in metallo e il pavimento deve rispettare i seguenti valori:
H = 36 mm.
UK - Place the stove where it is to be installed and adjust the height of the
four feet to ensure that it is level. Distance (H) between the front metallic
section and the floor must respect the following:
H = 36 mm.
DE - Den Ofen am Installationspunkt positionieren und die Höhe durch
Einstellung der Füße nivellieren. Der Abstand (H) zwischen dem Vorderteil
aus Metall und dem Boden muss den folgenden Werten entsprechen:
H = 36 mm.
FR - Placez le poêle à l’endroit prévu pour l’installation et réglez la hauteur
des quatre pieds afin de garantir la planéité du produit. La distance (H)
entre la partie avant en métal et le sol doit respecter les valeurs suivantes :
H = 36 mm.
NL - Plaats de kachel op de installatieplaats en regel de hoogte van de vier
poten om ervoor te zorgen dat het toestel perfect horizontaal geplaatst is.
De afstand (H) tussen het metalen gedeelte vooraan en de vloer dient als
volgt te zijn:
H = 36 mm.
ES - Coloque la estufa en el punto de instalación y regule la altura de los
cuatro pies para que el producto quede nivelado. La distancia (H) entre la
parte delantera de metal y el suelo debe cumplir los siguientes valores:
H = 36 mm.
PT - Coloque a salamandra no ponto de instalação e regule a altura dos
quatro pés para garantir o nivelamento do produto. A distância (H) entre a
a parte dianteira em metal e o chão deve respeitar os seguintes valores:
H = 36 mm.
10
DT2002541_H07032970_00
B
4
A
IT - Applicare alla superficie inferiore del basamento (7) i piedini in gomma
(A) presenti della confezione accessori del rivestimento.
Procedere con l’inserimento del basamento dal lato anteriore della stufa
facendolo scorrere tra il pavimento e la parte inferiore della stufa.
Utilizzando le viti in dotazione (B) centrare il basamento mediante i 2 fori
presenti nella parte inferiore in metallo della stufa.
UK - Fit the rubber feet (A) supplied in the pack of cladding accessories to
the bottom surface of the base (7).
Insert the base from the front side area of the stove allowing it slide
between the floor and the lower section of the stove.
Using the screws provided (B), centre the base using the 2 holes in the
lower metallic section of the stove.
DE - An der unteren Oberfläche der Basis (7) die in der Zubehörverpackung
der Verkleidung beiliegenden Gummifüße (A) anbringen.
Das Paneel von Vorne aus in den Ofen in den Schlitz zwischen Boden und
unterem Ofenteil einführen.
Die mitgelieferten Schrauben (B) verwenden und die Basis über die 2
Löcher am Ofenteil aus Metall zentrieren.
FR - Appliquez sur la surface inférieure de la base (7) les pieds en
caoutchouc (A), fournis dans la boîte des accessoires du revêtement.
Insérez ensuite la base sur le devant du poêle en la faisant glisser entre le
sol et partie inférieure du poêle.
En utilisant les vis fournies (B), centrez la base en utilisant les 2 trous
présents sur la partie inférieure en métal du poêle.
NL - Bevestig de rubberen poten (A), die zich in de verpakking met de
accessoires van de bekleding bevinden, aan het onderste oppervlak van
het onderstel (7).
Plaats het onderstel van aan de voorkant van de kachel en schuif het
tussen de vloer en de onderkant van de kachel.
Met behulp van de bijgeleverde schroeven (B), plaats het onderstel centraal
met de 2 gaten in het onderste metalen gedeelte van de kachel.
ES - Monte en la superficie inferior de la base (7) los pies de goma (A)
incluidos en el paquete de accesorios del revestimiento.
Prosiga con el montaje de la base por el lado delantero de la estufa,
haciendo que se deslice entre el suelo y la parte inferior de la estufa.
Utilizando los tornillos incluidos (B), centre la base mediante los 2 agujeros
situados en la parte inferior de metal de la estufa.
PT - Aplique na superfície inferior da base (7) os pés de borracha (A)
presentes na embalagem acessórios do revestimento.
Depois monte a base pelo lado dianteiro da salamandra, fazendo-a deslizar
entre o chão e a parte inferior da salamandra.
Utilizando os parafusos fornecidos (B), centre a base usando os 2 furos
presentes na parte inferior de metal da salamandra.
DT2002541_H07032970_00
11
A
5
2
B
C
IT - Aprire la porta del focolare e rimuovere la vite (A). Posizionare i pannelli
(2) e (5), forniti preassemblati, inserendo le linguette (B) all’interno delle
feritoie (C) e accostare con cautela la parte superiore del pannello al
corpo della stufa. Bloccare il pannello appena posizionato con la vite (A)
precedentemente rimossa. Quindi richiudere la porta del focolare.
UK - Open the firebox door and remove the screw (A). To position the
preassembled panels (2) and (5), insert the tabs (B) into the slots (C)
and carefully move the top section of the panel towards the body of the
stove. Block the panel which has just been positioned using the screw (A)
removed previously. Close the firebox door.
DE - Die Feuerraumtür öffnen und die Schraube (A) entfernen. Positionieren
Sie die schon vormontierten Paneele (2) und (5), indem Sie die Laschen
(B) in die Schlitze (C) einführen und vorsichtig den oberen Teil des Paneels
an den Ofenkörper bringen. Das soeben positionierte Paneel mit der zuvor
entfernten Schraube (A) fixieren. Dann die Tür des Feuerraums schließen.
FR - Ouvrez la porte du foyer et enlevez la vis (A). Positionnez les panneaux
(2) et (5), fournis déjà assemblés, en insérant les pattes de retenue (B) à
l’intérieur des fentes (C) et appliquez avec précaution la partie supérieure
du panneau au corps du poêle. Fixez le panneau à peine positionné, avec la
vis (A) précédemment enlevée. Refermez ensuite la porte du foyer.
NL - Open de deur van de vuurhaard en verwijder de schroef (A). Plaats
de panelen (2) en (5), die reeds geassembleerd geleverd worden, door de
haakjes (B) in de openingen (C) te steken en plaats het bovenste gedeelte
van het paneel voorzichtig tegen de behuizing van de kachel. Blokkeer het
paneel dat u zonet geplaatst heeft met de schroef (A) die u eerder heeft
verwijderd. Sluit vervolgens de deur van de vuurhaard.
ES - Abra la puerta del hogar y extraiga el tornillo (A). Coloque los paneles
(2) y (5), que vienen ya preensamblados, introduciendo las lengüetas (B) en
las ranuras (C) y arrime con cuidado la parte superior del panel al cuerpo
de la estufa. Fije el panel recién colocado utilizando el tornillo (A) extraído
previamente. A continuación cierre la puerta del hogar.
PT - Abra a porta da câmara de combustão e remova o parafuso (A). Monte
os painéis (2) e (5), fornecidos pré-montados, inserindo as patilhas (B)
dentro das fendas (C) e encoste com cuidado a parte superior do painel ao
corpo da salamandra. Fixe o painel que acabou de montar com o parafuso
(A) removido anteriormente. Depois volte a fechar a porta da câmara de
combustão.
12
DT2002541_H07032970_00
A
6
B
C
IT - Rimuovere la vite (A). Posizionare il pannello (6) inserendo le linguette
(B) all’interno delle feritoie (C) e accostare con cautela la parte superiore
del pannello al corpo della stufa. Bloccare il pannello appena posizionato
con la vite (A) precedentemente rimossa.
UK - Remove the screw (A). To position the panel (6), insert the tabs (B) into
the slots (C) and carefully move the top section of the panel towards the
body of the stove. Block the panel which has just been positioned using the
screw (A) removed previously.
DE - Die Schraube (A) entfernen. Positionieren Sie das Paneel (6) durch
Einführen der Laschen (B) in die Schlitze (C) und vorsichtig den oberen
Teil des Paneels an den Ofenkörper bringen. Das soeben positionierte
Paneel mit der zuvor entfernten Schraube (A) fixieren. Dann die Tür des
Feuerraums schließen.
FR - Enlevez la vis (A). Positionnez le panneau (6) en insérant les pattes
de retenue (B) à l’intérieur des fentes (C) et appliquez avec précaution la
partie supérieure du panneau sur corps du poêle. Fixez le panneau à peine
positionné à l’aide de la vis (A) précédemment enlevée.
NL - Verwijder de schroef (A). Plaats het paneel (6) door de haakjes (B) in
de openingen (C) te steken en plaats het bovenste gedeelte van het paneel
voorzichtig tegen de behuizing van de kachel. Blokkeer het paneel dat u
zonet geplaatst heeft met de schroef (A) die u eerder heeft verwijderd.
ES - Extraiga el tornillo (A). Coloque el panel (6) introduciendo las lengüetas
(B) en las ranuras (C) y arrime con cuidado la parte superior del panel al
cuerpo de la estufa. Fije el panel recién colocado utilizando el tornillo (A)
extraído previamente.
PT - Remova o parafuso (A). Monte o painel (6) inserindo as patilhas (B)
dentro das fendas (C) e encoste com cuidado a parte superior do painel ao
corpo da salamandra. Fixe o painel que acabou de montar com o parafuso
(A) removido anteriormente.
DT2002541_H07032970_00
13
A
4
E
3
D
B
C
14
DT2002541_H07032970_00
IT - Rimuovere la vite (A). Accostare il pannello (3) inserendo le linguette
(B) all’interno delle feritoie (C). Allineare il foro della staffa (D) al punto (E),
quindi fissare il pannello utilizzando la vite (A) precedentemente rimossa.
Verificare il corretto allineamento del pannello ai profili della stufa ed
eventualmente correggere il posizionamento utilizzando la fettuccia
adesiva in dotazione.
- Ripetere l’operazione anche per il pannello (4).
UK - Remove the screw (A). Move the panel (3) inserting the tabs (B) into
the slots(C). Align the hole in the bracket (D) with the point (E), then secure
the panel using the screw (A) removed previously.
Check that the panel is aligned correctly with the stove profiles and correct
the position if necessary using the adhesive tape supplied.
- Repeat the operation again for the other panel (4).
DE - Die Schraube (A) entfernen. Positionieren Sie das Paneel (3) durch
Einführen der Laschen (B) in die Schlitze (C). Das Bügelloch (D) am Punkt (E)
ausrichten und das Paneel mit der zuvor entfernten Schraube (A) fixieren.
Die richtige Ausrichtung des Paneels an den Ofenprofilen kontrollieren
und eventuell die Positionierung mit Hilfe der mitgelieferten KlebeUnterlegscheibe korrigieren.
- Den Vorgang auch am Paneel (4) wiederholen.
FR - Enlevez la vis (A). Appliquez le panneau (3) en insérant les pattes de
retenue (B) à l’intérieur des fentes (C). Alignez le trou de l’étrier (D) avec le
point (E), puis fixez le panneau à l’aide de la vis (A) précédemment enlevée.
Vérifiez que le panneau et les profilés du poêle soient correctement
alignés, et corrigez éventuellement le positionnement en utilisant la bande
adhésive fournie.
- Répétez l’opération pour le panneau (4).
NL - Verwijder de schroef (A). Plaats het paneel (3) door de haakjes (B) in
de openingen (C) te steken. Breng de opening van de staaf (D) op dezelfde
lijn met het punt (E). Bevestig vervolgens het paneel met behulp van de
schroef (A) die u eerder heeft verwijderd.
Controleer of het paneel op dezelfde lijn ligt met de profielen van de kachel.
Verbeter eventueel de plaatsing met behulp van de bijgeleverde kleefband.
- Herhaal de operatie voor het paneel (4).
ES - Extraiga el tornillo (A). Arrime el panel (3) introduciendo las lengüetas
(B) en las ranuras (C). Haga coincidir el agujero de la pletina (D) con el
punto (E); luego fije el panel utilizando el tornillo (A) extraído previamente.
Compruebe que el panel quede correctamente alineado a los perfiles de la
estufa y, en caso necesario, corrija la posición utilizando la cinta adhesiva
incluida.
- Repita esta operación para el panel (4).
PT - Remova o parafuso (A). Encoste o painel (3) inserindo as patilhas (B)
dentro das fendas (C). Alinhe o furo do suporte (D) com o ponto (E), depois
fixe o painel, utilizando o parafuso (A) removido anteriormente.
Verifique o correto alinhamento do painel com os perfis da salamandra e
eventualmente corrija a posição, utilizando a fita cola fornecida.
- Repita a operação também para o painel (4).
DT2002541_H07032970_00
15
B
1
D
C
A
E
F
16
DT2002541_H07032970_00
IT - Rimuovere le viti di blocco (A) da entrambi i lati del carrello scorrevole
qualora fossero ancora presenti.
- Estrarre il carrello scorrevole e posizionare il pannello (1) inserendo le
linguette posteriori (B) all’interno della sede (C) presente sul carrello.
- Allineare il foro (D) della staffa anteriore del pannello al foro di fissaggio
(E) presente nel carrello scorrevole e bloccare il pannello serrando
completamente la vite (F) in dotazione alla confezione accessori.
- Chiudere con cautela il carrello scorrevole verificando che durante lo
scorrimento non si verifichino interferenze di alcun tipo.
- Verificare il buon allineamento del pannello ed eventualmente apportare
le dovute correzioni.
UK - Remove the locking screws (A) from both sides of the sliding carriage
if still present.
- Remove the sliding carriage and position the panel (1) inserting the rear
tabs (B) into the seat (C) present on the carriage.
- Align the hole (D) in the front bracket of the panel with the retaining hole
(E) in the sliding carriage and lock the panel by fully tightening the screw
(F) supplied in the accessories pack.
- Carefully close the sliding carriage ensuring that there is nothing interferes
with the sliding mechanism.
- Check that the panel is aligned correctly and make any adjustments
necessary.
DE - Die Sperrschrauben (A) auf beiden Seiten des Gleitwagens entfernen,
falls diese noch vorhanden sind.
- Den Gleitwagen herausziehen und das Paneel (1) durch Einführung der
rückwärtigen Laschen (B) in die Sitze (C) am Wagen positionieren.
- Das Loch (D) des Vorderbügels am Fixierungsloch (E) des Gleitwagens
ausrichten und das Paneel fixieren, indem Sie die in der Zubehörpackung
befindliche Schraube (F) festziehen.
- Vorsichtig den Gleitwagen schließen und dabei kontrollieren, dass
während des Gleitens keinerlei Interferenzen auftreten.
- Die richtige Ausrichtung des Paneels kontrollieren und eventuell
korrigieren.
FR - Enlevez les vis de fixation (A) des deux côtés du chariot coulissant si
elles sont encore présentes.
- Retirez le chariot coulissant et positionnez le panneau (1) en insérant les
pattes de retenue situées à l’arrière (B) à l’intérieur du siège (C) présent
sur le chariot.
- Alignez le trou (D) de l’étrier avant du panneau et le trou de fixation
(E) présent sur le chariot coulissant, puis fixez le panneau en vissant
complètement la vis (F) fournie dans la boîte des accessoires.
- Fermez le chariot coulissant avec précaution en vérifiant qu’aucun type
d’obstacle ne gêne le coulissement.
- Vérifiez que le panneau soit correctement aligné et corrigez éventuellement
l’alignement.
NL - Verwijder de blokkeringsschroeven (A) aan beide kanten van het
schuifgedeelte, indien deze nog aanwezig zijn.
- Schuif het schuifgedeelte naar buiten en plaats het paneel (1) door de
haakjes aan de achterkant (B) in de houders (C) op het schuifgedeelte te
plaatsen.
- Breng de opening (D) van de staaf aan de voorkant van het paneel in
lijn met de bevestigingsopening (E) in de geleiders en blokkeer het paneel
door de schroef (F), die zich in de verpakking met de accessoires bevindt,
helemaal vast te draaien.
- Sluit voorzichtig het schuifgedeelte. Controleer of er tijdens het schuiven
geen blokkeringen zijn.
- Controleer of het paneel correct uitgelijnd is en breng eventueel de
nodige verbeteringen aan.
ES - Extraiga los tornillos de fijación (A) de ambos lados del carro deslizante,
si estuviesen insertados todavía.
- Extraiga el carro deslizante y coloque el panel (1) introduciendo las
lengüetas posteriores (B) en el alojamiento (C) situado en el carro.
- Haga coincidir el agujero (D) de la pletina delantera del panel con el
agujero de fijación (E) situado en el carro deslizante y fije el panel apretando
a fondo el tornillo (F) incluido en el paquete de accesorios.
- Cierre con cuidado el carro deslizante, asegurándose de que no haya
obstáculos de ningún tipo durante el deslizamiento.
- Compruebe que el panel esté bien alineado y, en caso necesario, haga
las correcciones oportunas.
PT - Remova os parafusos de fixação (A) de ambos os lados do apoio
deslizante, se ainda estiverem montados.
- Extraia o apoio deslizante e monte o painel (1), inserindo as patilhas
traseiras (B) dentro do alojamento (C) presente no apoio.
- Alinhe o furo (D) do suporte dianteiro do painel com o furo de fixação (E)
presente no apoio deslizante e fixe o painel, apertando completamente o
parafuso (F) presente na embalagem acessórios.
- Feche com cuidado o apoio deslizante, verificando se durante o
deslizamento não se verifica qualquer tipo de interferência.
- Verifique o alinhamento correto do painel e, eventualmente, faça as
correções necessárias.
DT2002541_H07032970_00
17
18
DT2002541_H07032970_00
DT2002541_H07032970_00 - (12/2014)
Via Montello, 22
31011 Casella d’Asolo (TV) - ITALY
Tel. +39.04235271 - Fax +39.042355178
www.piazzetta.it
e-mail:[email protected]
Scaricare