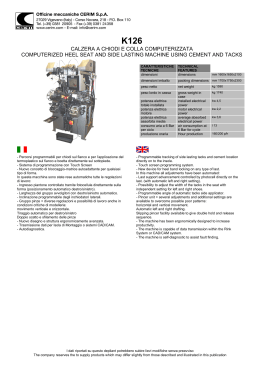
You can read the recommendations in the user guide, the technical guide or the installation guide for HOOVER HNF6167Z. You'll
find the answers to all your questions on the HOOVER HNF6167Z in the user manual (information, specifications, safety advice,
size, accessories, etc.). Detailed instructions for use are in the User's Guide.
User manual HOOVER HNF6167Z
User guide HOOVER HNF6167Z
Operating instructions HOOVER HNF6167Z
Instructions for use HOOVER HNF6167Z
Instruction manual HOOVER HNF6167Z
You're reading an excerpt. Click here to read official HOOVER
HNF6167Z user guide
http://yourpdfguides.com/dref/3249199
Manual abstract:
..........
.....
.....
..........
..........
. . 2 Italiano . . .
.....
..........
..........
.....
.....
. . . . . @@. . . . .
..........
.....
.....
..........
. . . . . . . . . 3 Do's .
.....
.....
..........
..........
.....
.....
..........
. . . . . . . 3 Don'ts. . .
.....
.....
..........
..........
.....
.....
..........
. . . . 4 Unpacking the Product . . . . . .
.....
.....
..........
. . . . . . . . . 5 Installation.
.....
.....
..........
..........
.....
.....
. . . . . . . . 7 Choose a location . .
..........
.....
.....
..........
..........
.....
7 Electricity supply . . . . .
..........
..........
.....
.....
..........
. . . 8 Water supply . . . . . . .
.....
.....
..........
..........
.....
.....
. . . . 8 Connecting to the cold water supply . . . . . .
..........
.....
.....
. . . . . . 9 Connection of the machine to the drain . . . .
..........
.....
.....
. . . . . 10 Moving the machine into position . . . . .
..........
.....
.....
. . . . . . . . 11 Adjusting the feet . .
..........
.....
.....
..........
..........
. . . . 11 Testing the installation .
.....
..........
..........
.....
. . . 12 Washing advice . .
..........
..........
.....
.....
..........
13 The Dispenser Loading your washing machine. . . . . . . . . .
.....
.....
..........
. . . . . . 13 Sorting the laundry . . . .
.....
.....
..........
..........
.....
.....
. 14 . . . . . . . . .
..........
.....
.....
..........
. . . . . 15 Detergent dosage . . . . .
.....
.....
..........
..........
.....
.....
. 15 Dispensing instructions . . . . . . . . .
..........
.....
.....
..........
. . . 16 The Control Panel . . . . . . .
.....
.....
..........
..........
. . . 17 Wash Options . .
.....
..........
..........
.....
.....
. . . . . . . 20 Automatic Features . . .
..........
.....
.....
..........
..........
. . 23 Programme Selector . . .
.....
..........
..........
.....
. . . . 24 Special Programmes .
..........
..........
.....
.....
..........
. . . . 25 Daily Programmes . . . . . .
.....
.....
..........
..........
.....
.....
26 Programme Guide. . . . . . . . . .
..........
.....
.....
..........
27 A Typical Wash . . . . . . . . . .
.....
.....
..........
..........
. . . 28 Cleaning and Routine Maintenance. .
.....
..........
. . . 30 Troubleshooting. . . . . . .
.....
.....
..........
..........
.....
32 Selecting the wash programme . . . . .
..........
..........
.....
.....
. 29 Starting the wash cycle . . . . . . . . .
..........
.....
.....
..........
. . . 29 Power Failure . . . . . . .
.....
.....
..........
..........
.....
.....
. . . @@@@Keep all documentation in a safe place for future reference or for any future owners. Delivery information Please check that the following items
are delivered with the appliance: Instruction manual Guarantee card Blanking plug Inlet hose & hooked end support (see Unpacking and Installation
Instructions) Base panel & x2 push clips Energy Label Check that no damage has occurred to the machine during transit. If it has, call for service by GIAS.
Do's All packaging materials used are environmentally-friendly and recyclable. Please help dispose of the packaging via environmentally-friendly means.
Your local council will be able to give you details of current means of disposal. To ensure safety when disposing of an old washing machine disconnect the
mains plug from the socket, cut the mains power cable and destroy this together with the plug.
To prevent children shutting themselves in the machine break the door hinges or the door lock. This machine is solely for domestic use, i.e. to wash, rinse and
spin dry household textiles and garments. 3 40001406Eng.qxd 31/08/2004 11:20 Page 4 If the appliance is not running properly or breaks down, switch it off,
disconnect the plug from the socket, turn off the water supply and do not tamper with the appliance. Consult GIAS Service for possible repair. Don'ts Do not
touch the appliance when hands or feet are damp or wet. Do not lean on the door when loading the machine or use the door to lift or move the machine. Do
not use adapters, multiple connectors and/or extensions.
Do not allow children to play with the machine or its controls. Do not try to open the door when water is visible in the drum or the door locked indicator
(Blocco Porta) is on. Failure to comply with the above can compromise the safety of the appliance. You may be charged for a service call if a problem with
your machine is caused by misuse. 4 40001406Eng.
qxd 31/08/2004 11:20 Page 5 Unpacking the product Remove the machine from its packaging close to the final location of the machine. 1. Cut carefully
around the base of the packaging. 2. Lay the machine on its back and remove the base and the two polystyrene spacers on each side of the machine.
We recommend that a second person assist in the lifting and manoeuvring of the machine. Dispose of the packaging safely. Make sure it is out of the reach of
children, it is a potential source of danger. 3. Return the machine to the upright position, remove the remainder of the packaging and the central screw in the
transit bar. 4. Remove the four retaining screws in the transit bar and pull out the transit bracket. 5 40001406Eng.qxd 31/08/2004 11:20 Page 6 We
recommend you keep the transit bracket and screws to protect the machine for future transit. The manufacturers will not be responsible for any damage to the
machine caused by not following the instructions relating to releasing the transit protection.
The user is responsible for all installation costs. 5. Take the base panel provided and fit the two self adhesive strips by removing the backing paper on one
side and locating the strips on each side of the base panel. 6. Tilt the machine forward and locate the base panel under the front of the machine. Remove the
remaining backing paper from the self-adhesive strips and offer up the base panel to the bottom of the cabinet. 7. Take the two plastic fixing clips and fix the
base panel to the base of the machine. Bring the machine back to the upright position. 6 40001406Eng.
qxd 31/08/2004 11:20 Page 7 8. Cover the central hole in the rear of the machine with the cap enclosed in the instruction bag. Installation Choose a location
After the machine has been installed, ensure that the mains plug and water supply valves are easily accessible. Make sure there is enough space for the
machine. Select a space at least 600mm wide and 850mm high.
Also leave enough space to open the door fully so you can load and unload it easily. Keep the area underneath and around the machine free of combustible
materials such as lint, paper, rags, chemicals etc. Do not plug the machine in and switch it on at the mains until the installation is completed. 7
40001406Eng.qxd 31/08/2004 11:20 Page 8 You may be charged for a service call if a problem with your machine is caused by incorrect installation.
Electricity supply Washing machines are supplied to operate at a voltage of 230V, 50 Hz single phase. Check that the supply circuit is rated to at least 10A.
Electricity can be extremely dangerous. This washing machine must be earthed. The socket outlet and the plug on the appliance must be of the same type. Do
not use multiple adapters and/or extension leads. The wires in the mains lead are coloured in accordance with the following codes: Blue Brown Green and
Yellow NEUTRAL LIVE EARTH If the mains cord on this appliance is damaged, it must be replaced by a special cord which is ONLY obtainable from the
GIAS spares service.
You're reading an excerpt. Click here to read official HOOVER
HNF6167Z user guide
http://yourpdfguides.com/dref/3249199
It must be installed by a competent person. CE Appliance complies with European Directive 89/336/EEC, 73/23/EEC and subsequent amendments. Water
supply The cold water pressure should be between 0.
05-0.8 Mpa. Do not connect the machine to a single outlet instantaneous water heater. The water supply tap should be accessible when the machine is
installed. Before connecting the fill hose, check that the water is running from the water supply tap to be used. 8 40001406Eng.qxd 31/08/2004 11:20 Page 9
Connecting to the cold water supply This machine has an inlet hose with a 19mm (3/4") threaded ferrule fitted to the end, to attach between the threaded
connector on the appliance and the water supply. Only use the new hose supplied to connect the machine and ensure that the sealing washers are in place
inside the hose connectors. Do not re-use old hoses which are attached to existing installations. Do not over-tighten the connections.
Hand tight is sufficient. Do not trap or kink the hose. 1. Connect the elbow end of the hose provided to the threaded inlet on the back of the machine. Grey
pipe to the white threaded inlet on the machine.
2. Hand tighten the connector. 3. Connect the straight ends of the pipes to the water supply; ensure that there are no kinks. Turn on the water supply and
check for leaks.
If there is a leak, turn off the water supply, disconnect the hose and check the sealing washers are in place. Refit the hose and turn on the water supply. 4. 9
40001406Eng.qxd 31/08/2004 11:20 Page 10 Connection of the machine to the drain This machine must be connected in accordance with the water supply
regulations. Water byelaws prohibit connection to a surface water drain. Decide which plumbing option suits you best then follow the instructions below. All
machines are tested with water prior to leaving the factory so a small amount of water may remain in the drum and drain hose. Flooding could occur if any
part of the installation is not completed correctly. Option 1 Waste pipe connection (waste trap) Fit the hooked end support to the outlet pipe.
Position at least 800mm off the floor. After removing the blanking plug or cutting the membrane from the waste system securely fix the outlet pipe to the
drainage system, using a hose clip. Secure the hooked end support up to at least 800mm to avoid water being drawn back into the machine. hooked end
support flexible discharge hose sink hose clip 800 mm trap with hose adaptor 10 40001406Eng.qxd 31/08/2004 11:20 Page 11 Option 2 Into a standpipe
Ensure that the standpipe is not located near an electrical socket. Fit the hooked end support to the outlet pipe. Install the hose into the standpipe ensuring
that the pipe is at least 500mm from the floor. Insert the outlet pipe approximately 100mm into the standpipe. 100 mm 500 mm min Moving the machine into
position Your machine is heavy so care must be taken when moving it. We recommend that two people move the machine to avoid strain and possible injury.
Take care not to damage flooring when moving the machine. When moving the machine to its final position take care not to kink or damage the hose at the
back of the machine. Do not drag or lift the machine by its door. Adjusting the feet Once the machine is in place the feet should be adjusted to ensure that the
machine is level. If the machine is not level it may become noisy or move.
Adjust the feet on the front corners of the machine until the machine is firm and level. When the machine is firm and level, tighten the locking nuts on the two
feet. 11 ge 100ml Detergent dosage Only use detergents which are suitable for use in a washing machine. You will obtain the best results from your wash with
the minimum use of chemical products, and the best care for your laundry if you take into consideration the degree of soiling as well as the type of detergent
to choose. The amount of detergent to use depends on: Water hardness.
Depending on the hardness of the water and the type of detergent used, it is possible to reduce the amount of detergent. The softer the water supply, the less
detergent is required. The degree of soiling. It is possible to reduce the amount of detergent used depending on the degree of soiling. Use less detergent for
less soiled items. Amount of laundry. It is possible to reduce the amount of detergent when washing only a small amount of laundry. For smaller loads use less
detergent. The dosages shown on the packaging of detergents for washing delicates often already refer to a reduced wash size. Always follow the dosage
instructions on the detergent packaging.
DO NOT exceed the maximum detergent dosage 15 40001406Eng.qxd 31/08/2004 11:20 Page 16 ARIEL Chosen and recommended by HooverZerowatt
When we produce a new washing machine we subject it to every test possible. One of the most important tests is the one that enables our experts to identify the
most suitable detergent for solving laundry problems. Ariel was able to meet our needs: to make the washing machine function efficiently; not compromise the
machine's lifespan; and produce the best wash results. Consistently excellent results, which was the main aim of the test we carried out, determined our
choice and our recommendation. The prime function of a detergent that answers all washing requirements is to work with the water to remove dirt from
fabrics, holding it in suspension, until it is removed when the water is pumped out, and to control the amount of foam forming in the washing machine, without
damaging the fibres of the items being washed. Ariel fully satisfies all these requirements, as it contains high quality elements, the result of the most advanced
research, ensuring excellent results under all conditions. Dispensing instructions Do not put any items into the drawer other than detergents that are designed
to be dispensed from the drawer as they may cause blockage or damage. The detergent drawer is split into 3 compartments: the first, labelled "I", is for
detergent utilised during Prewash. the second, labelled "II", is for detergent utilised during the main wash.
the third, labelled is for special additives such as fabric softeners, fragrances, starch, brighteners etc. Dispensing in the drum Liquid detergents and some
tablets are dispensed via the machine drum using the recommended dispensing device which is placed upright on top of the washload towards the back of the
drum. Some tablets are designed to be placed in the dispenser drawer, check the detergent pack for details. 16 40001406Eng.qxd 31/08/2004 11:20 Page 17
The Control Panel CHRONOVISION Display Door Locked Indicator (Blocco Porta) Temperature Selector (Temperatura Lavaggio) Programme Selector Pre
Wash Extra Rinse Start/Pause Delay Start (Extra (Avvio (Partenza (Pre Lavaggio) Risciacquo) Pausa) Differita) Fast Iron (Stiro Veloce) Spin Speed Selector
(Giri Centrifuga) The programme selector must be returned to the OFF position to reset the controls between each wash cycle.
You're reading an excerpt. Click here to read official HOOVER
HNF6167Z user guide
http://yourpdfguides.com/dref/3249199
Turning the machine on The machine is turned on by selecting a programme via the programme selector. This status will be indicated by the STOP indicator
light flashing, this light will continue to flash until the machine has started or the machine is returned to the OFF position. Start/Pause (Avvio/Pausa) Start
(Avvio) After selecting the programme and the required options press the Avvio Pausa button once to start the machine. The STOP light will stop flashing and
START light will illuminate and there will be a short time delay to the start of the programme while the machine sets the wash parameters for the selected
programme and options. If the duration of the programme you have selected is shorter than 60 minutes, then the time remaining indicator will illuminate
accordingly.
The Blocco Porta indicator light will also illuminate a few seconds after pressing the Avvio Pausa button. 17 40001406Eng.qxd 31/08/2004 11:20 Page 18
When starting a subsequent wash cycle the programme selector must be returned to OFF prior to the next programme being selected and started. Pause
(Pausa) The programme may be paused at any time during the wash cycle by holding down the Avvio Pausa button for about two seconds. When the machine
is in the paused mode, the time remaining for the programme in the CHRONOVISION indicator and option buttons will flash. The Blocco Porta indicator
light will remain illuminated for approximately 2 minutes. The door can be opened when this indicator goes out. To restart the programme, press the Avvio
Pausa button once again. Cancelling and changing the programme To cancel the programme the programme selector should be rotated to the OFF position.
Select a new programme and start as detailed above.
Door Locked indicator (Blocco Porta) The Blocco Porta indicator light is illuminated when the door is fully closed and the machine is ON. When Avvio Pausa
is pressed on the machine with the door closed the indicator will flash momentarily and then illuminate. If the door is not closed the indicator will continue to
flash. A special safety device prevents the door from being opened immediately after the end of the cycle. Wait for 2 minutes after the wash cycle has finished
and the Blocco Porta light has gone out before opening the door. As a safety measure, check that there is no water evident in the drum. At the end of the cycle
turn the programme selector to OFF. If the programme is paused, the door locked indicator will go out after 2 minutes and the door can be opened. Check
there is no water evident in the drum before opening the door. 18 40001406Eng.
qxd 31/08/2004 11:20 Page 19 CHRONOVISION In order to better manage your time, this washing machine features an indicator light system that keeps you
constantly informed on the remaining cycle time and the status of the start delay function. When a drying time is selected the CHRONOVISION display will
display the time remaining on the washing programme when the washing is taking place and the time remaining in the drying phase when drying is taking
place. CHRONOVISION DISPLAY WASH PROGRESS START 60' 30' Remaining time above 60 minutes Remaining time less than 60 minutes Remaining time
less than 30 minutes Remaining time less than 15 minutes End of the programme 6h 6 hours or less remaining before the programme commences 9 hours or
less remaining before the programme commences 3h START DELAY 3 hours or less remaining before the programme commences 15' STOP 9h 19
40001406Eng.qxd 31/08/2004 11:20 Page 20 Wash Options The options should be selected BEFORE pressing the Avvio Pausa button Prewash (Pre
Lavaggio) This option is available on the cottons and synthetics programmes. Prewash is automatic on the Sports programme.
This option is particularly useful for heavily soiled loads and can be used before selecting the main wash programme. Detergent for this programme should
be added to the first compartment of the soap drawer labelled "I" (Please refer to Detergent Drawer section of manual). We recommend you only use 20% of
the main wash detergent quantity. Delay Start (Partenza Differita) This option is available to delay the start of the wash cycle by up to 9 hours. The selection
of the time is completed by pressing the Partenza Differita button, the CHRONOVISION display will indicate the time selected.
When the correct delay is selected press the Avvio Pausa button to start the cycle. Extra Rinse (Extra Risciacquo) This option is available on the cottons
programmes. The option increases the number of rinses to five (including the final conditioned rinse). This can help prevent skin irritation from detergent
residue for people with particularly sensitive skin. Selecting the Extra Risciacquo button is also recommended when washing heavily soiled fabrics which
need a lot of detergent, or when the wash load contains towelling fabrics that have a greater tendency to retain detergent. 20 40001406Eng.qxd 31/08/2004
11:20 Page 21 Fast Iron (Stiro Veloce) This option is only available on synthetics, acrylics, woolmark and silk programmes. Programme Synthetics (Sintetici)
Acrylics (Acrilici) Fast Iron Function Programme is completed by a short, very low spin speed. The machine stops in the final rinse stage with the option
indicators blinking and the load will be held within the water in the drum, thus reducing creasing and enabling easier ironing. The machine will stop in the
final rinse stage with the option indicators blinking and the load will be held within the water in the drum.
This reduces creasing, thus enabling easier ironing. The machine will stop in the final rinse stage with the option indicators blinking and the load will be held
within the water in the drum. This reduces creasing, thus enabling easier ironing. Action to complete the cycle If a spin cycle is required please select the
appropriate spin (see Programme Guide). Press the Stiro Veloce button to continue with the programme. The machine will then pump out the remaining water
and the programme will conclude with a short spin. Finally, the programme carries out a brief tumbling action to loosen the items in the load. Press the Stiro
Veloce button and the machine will pump out the water and complete the cycle with a short spin cycle. Woollens (Lana) Silk (Seta) Press the Stiro Veloce
button and the machine will pump out the water to complete the cycle. The clothes load will not be spun and will therefore be very wet.
21 40001406Eng.qxd 31/08/2004 11:20 Page 22 Temperature Selector (Temperatura Lavaggio) The washing machine is equipped with a Temperature
Selector knob to set the temperature you require. Bigger energy savings can be achieved by using the lower temperature settings around the dial between and
40°C. By selecting the position, the wash temperature is limited to the water inlet temperature, thus reducing energy consumption further.
You're reading an excerpt. Click here to read official HOOVER
HNF6167Z user guide
http://yourpdfguides.com/dref/3249199
We recommend that the temperature shown on wash care garments should never be exceeded.
In the case where the temperature has been accidentally set higher than that of the chosen programme, (see Programme Guide table), the machine will lower
the temperature automatically to protect the fabrics. Spin Speed Selector (Giri Centrifuga) By adjusting the control knob it is possible to reduce the maximum
spin speed of your selected programme to suit your needs and to help reduce any creasing of fabrics. Turn the Giri Centrifuga selector knob until the
indicator aligns with the required spin speed. The maximum spin speed will vary depending on the specification of the machine. 22 40001406Eng.
qxd 31/08/2004 11:20 Page 23 Automatic Features Automatic Variable Capacity (Half Load) The washing machine is fitted with a self adjusting water level
system. This system enables the machine to use the optimum amount of water needed to wash and rinse the laundry in relation to the particular load. This
results in a reduction of the water and electricity used without in any way compromising the washing and rinsing performance. The amount of water and
electricity used will always be appropriate for the clothes load. The washing machine automatically ensures excellent washing results at minimum cost whilst
respecting the environment. Out of Balance protection This model is fitted with an electronic sensor device that checks if the load is balanced correctly. If the
load is slightly unbalanced the machine will re-balance it automatically to then carry out the normal spin. If, after several attempts, balance is not restored a
reduced spin speed will be used. If loads are seriously unbalanced the spin stage will be cancelled. This helps limit vibration, reduce noise and improve the
washing machine's reliability and life.
23 40001406Eng.qxd 31/08/2004 11:20 Page 24 Programme Selector For handling the various types of fabric and their level of soiling in your laundry the
washing machine has different programme groups according to type of wash, temperature, spin speeds and duration (see Programme Guide). Cottons
(Cotone) The programmes are designed for maximum washing and rinsing. With spin cycles in between, they guarantee the laundry is rinsed perfectly. The
final spin cycle ensures laundry is spun dry as much as possible up to the maximum speed. Synthetics and mixed fabrics (Sintetici e tessuti misti) Washing and
rinsing performance is optimised through drum rotation speeds and water levels. The delicate spin action minimises creasing. Delicates (Delicati) This is a
new concept in washing, with a cycle that comprises alternate periods of activity and pauses, particularly suitable for washing very delicate fabrics. Washing
and rinsing are carried out using a high water level to provide the best results. Rinse, Spin and Drain Individual programmes are available for rinsing,
(including the opportunity to add fabric conditioner), spinning, at 800rpm or less if selected via the Giri Centrifuga selector, and draining the water from the
machine.
24 40001406Eng.qxd 31/08/2004 11:20 Page 25 Special Programmes Woolmark (Lana) A programme dedicated to washing fabrics labelled with the
woolmark symbol . The cycle comprises of alternate periods of activity and pauses. Washing and rinsing are carried out using a high water level to provide
the best results. The programme has a maximum temperature of 30°C and concludes with 3 rinses, one for fabric conditioner, and a short spin.
Silk (Seta) This washing machine also has a gentle Silk and Hand Wash programme cycle. This programme allows a complete washing cycle for garments
specified as 'Hand Wash only' and laundry items made from silk or specified "Wash as silk" on the fabric label. The programme has a maximum temperature
of 30°C and concludes with 3 rinses, one for fabric conditioner, and no final spin. Sports Sports items have been given their own wash care programme. This
washing machine has a unique Sportswear programme.
It is specially designed to wash mixed sportswear fabrics that cannot be washed on hotter programmes and is designed to remove the soiling and staining
created by participation in sports activities. This programme starts with a cold prewash that breaks down and loosens any excess dirt and then washes at a
cool 30°C, rinses twice (one is for fabric conditioner) and spins slowly for the best care of your heavily soiled, delicate garments. Detergent for the prewash
part of the programme should be added to compartment I and detergent for the mainwash should be added to compartment II. Follow the instructions given in
'The Dispenser' section. 25 40001406Eng.qxd 31/08/2004 11:20 Page 26 `A' wash 59' (Lavaggio Classe A 59') This specially designed programme maintains
the high quality wash performance identified with the `A' rating whilst greatly reducing the wash time. The programme is designed for a maximum load of 3.5
kg and is intended for cotton fabrics and items colourfast to 60°C. The programme concludes with 2 rinses and a high speed spin sequence. Daily
Programmes (Lavaggio Rapido) By maintaining exceptional washing performance, these programmes allow you to know in advance the necessary time for
your everyday laundry.
In fact, this washing machine is equipped with two daily rapid programmes at 40°C, that were just studied for lightly soiled fabrics and medium or small
loads. Daily 44' (Rapido 44') A complete washing cycle (wash, rinse and spin), able to wash in approximately 44 minutes suitable for: a maximum load of 3.5
kgs lightly soiled fabrics (cotton and mixed fabrics) With this programme we recommend that you reduce the detergent loading dose (compared to the normal
one), in order to avoid detergent waste. Daily 29' (Rapido 29') A complete washing cycle (wash, rinse and spin), able to wash in approximately 29 minutes
suitable for: a maximum load of 2.5 kgs lightly soiled fabrics (cotton and mixed fabrics) With this programme we recommend that you reduce the detergent
loading dose (compared to the normal one), in order to avoid detergent waste. 26 40001406Eng.qxd 31/08/2004 11:20 Page 27 Programme Guide
Programme Cotone Resistente Cotone Colorato Delicato AA 40°C Fabric Type Cottons, linen Cotton, colourfast mixed fibres Cottons, mixed fabrics,
Coloureds Non-fast Cottons, mixed fabrics and synthetics Mixed fabrics and synthetics Maximum Load Size (kg) 7.5 7.5 7.5 7.
5 Maximum Water Temp (°C) 90 60 40 40 Energy label data based on Colorato programme tested in accordance with CENELEC EN60456 Tessuti misti
Delicati Sintetici Sintetici 3 50 Acrilici Synthetics, acrylics and coloured mixed fabrics Mixed Fabrics Mixed Fabrics. Spin speed of 800 rpm max. Mixed
Fabrics Machine washable wool Silks and 'Hand Wash only' garments Mixed fabrics Cotton, colourfast mixed fibres Lightly soiled cottons and mixed fabrics
Lightly soiled cottons and mixed fabrics 3 40 Rinse Spin - - Drain Special Programmes Lana Seta Sports Lavaggio Classe A 59' Rapido 44' Rapido 29' 1.
You're reading an excerpt. Click here to read official HOOVER
HNF6167Z user guide
http://yourpdfguides.com/dref/3249199
5 1.5 3 3.
5 3.5 2.5 40 30 30 60 40 40 27 40001406Eng.qxd 31/08/2004 11:20 Page 28 A Typical Wash Liquid detergents and some concentrated powders and tablets
that are to be placed directly into the drum should use the recommended dispensing device. This section summarises the main points when completing a wash
cycle.
For detailed explanations of features, options and details of the machine refer to the relevant section in the instruction manual. Preparing the laundry Select
and sort the laundry according to the wash care labels found on each garment. Always check the care labels. Loading the laundry Open the door. Put the
laundry in the washing machine. Close the door by pushing it until it clicks, ensuring that no items of laundry are obstructing the lock or door seal. Putting
detergent in machine Open the drawer, choose the detergent and put in the recommended amount. Do not exceed the dosage stated below Close the drawer
again. Compartment I II Wash Prewash (option) Main Wash (all programmes) Fabric Conditioner Maximum quantity of powder/liquid 100ml 200ml 100ml
28 40001406Eng.qxd 31/08/2004 11:20 Page 29 Selecting the wash programme Refer to the Programme Guide or the programme descriptions on the front of
the machine to select the most suitable programme.
The programme is selected by turning the programme selector and aligning the programme name with the indicator. Check that the STOP indicator is
flashing, if not check that the door is properly closed. Check that the tap is turned on and that the discharge hose is positioned correctly. Select the required
wash options Starting the wash cycle Press the Avvio Pausa button. The Blocco Porta indicator and the START light illuminate, within a few seconds the
programme will begin. Do not try to open the door when the Blocco Porta indicator is on. Do not open the dispenser drawer during the wash programme. If
you wish to pause the programme press the Avvio Pausa button and after 2 minutes the door can be opened. To cancel the programme the programme
selector should be turned to the OFF position. A new programme can be selected after cancelling the programme.
When the programme has finished Wait for the door lock to be released. The Blocco Porta indicator will go out after approximately 2 minutes and then the
door can be opened. Switch off the machine by turning the programme selector to the OFF position before selecting the next programme (this action resets the
memory in the machine). Open the door. Remove the laundry.
Disconnect the plug from the mains power supply and turn off the water supply after every use. 29 40001406Eng.qxd 31/08/2004 11:21 Page 30 Cleaning and
Routine Maintenance The washing machine needs very little maintenance, but regular attention to a few small details will ensure the continued performance
of your washing machine. Do not use abrasive cleaners, scouring pads, solvent based cleaners or polishes; wiping the outside of the machine with a damp
cloth will suffice. Cleaning the soap dispenser 1.
2. Clean the compartments occasionally to remove detergents and additives. To do this you just need to pull the drawer out firmly from the machine, but
without forcing it. 3. 4. 5. Clean the compartments and the syphon cap and cover under warm running water. Clean the soap dispenser housing to remove any
residue of soap powder Replace the drawer. Cleaning the door glass Regularly clean the door glass with a damp cloth. A build up of soiling and residues
from the water may result in water leaking from the door.
Do not use abrasive cleaners as they can scratch the surface. 30 40001406Eng.qxd 31/08/2004 11:21 Page 31 Cleaning the filter The washing machine is
fitted with a special filter to prevent items such as coins, buttons, etc. blocking the discharge hose. These may be retrieved by: 1. Removing the kickplate by
gently pulling it from the bottom in an outwards and upwards direction. Use the kickplate to collect the water still in the filter. Use a screwdriver to loosen the
screw holding the filter, turn the filter anticlockwise until it stops, remove it and clean it. After cleaning it, reassemble following the above instructions in
reverse order. 2.
3. Replace the kickplate. We recommend that the filter be cleaned frequently, at least once a month. Maintenance wash Using small quantities of detergent
and low temperature wash programmes can cause the gradual build up of grease, dirt and scale. Over time these deposits can damage your laundry and your
machine.
They can also cause your machine to smell. We recommend that you carry out a maintenance wash a couple of times per year to keep your machine and pipe
work clean and free of these deposits. Simply run the Cotone Resistente programme without a load and with the normal quantity of detergent. This wash will
take approximately 2 hours to complete. 31 40001406Eng.
qxd 31/08/2004 11:21 Page 32 Troubleshooting What might be the cause of... Defects you can remedy yourself Before calling GIAS Service for technical
advice please run through the following checklist. A charge will be made if the machine is found to be working or has been installed incorrectly or used
incorrectly. If the problem persists after completing the recommended checks, please call the GIAS Service, they may be able to assist you over the telephone.
The machine will not start... Close the door.
Check that there is power to the machine. Select a programme and press Avvio Pausa. Check if the door lock light is illuminated. If it is not, check the
following: 1. 2. 3. Is the machine connected to the electrical supply? Is the electrical supply OK, check another socket? Has the fuse on the machine blown? If
so, replace it. If the door locked light is illuminated and the machine does not start this means that the machine cannot fill with water, check the following: 1.
2. 3.
Check the programme dial is correctly aligned with the programme. Is the water supply to the machine switched on? Are the pipes kinked or restricted in any
way? Water does not drain away... Ensure that there is not a blockage in the drain hose or the hose is not kinked.
Is the drain hose installed correctly? If connected to the sink waste make sure you have cut the membrane or removed the bung from the under sink drainage
unit. Check for foreign bodies in the filter. If present, clean the filter. If you have found any of the above problems correct them and run the machine through a
spin cycle to drain the water. Is the Stiro Veloce function selected? If so, deselect the option and the programme will complete (see page 21 for complete
explanation of the function).
32 40001406Eng.qxd 31/08/2004 11:21 Page 33 Water on the floor around the washing machine.... Is the fill hose tightened? If so, replace the rubber
washers and re-tighten. Is the standpipe or the household drain blocked? If so, clear the blockage yourself or call a plumber. Is there clothing or dirt between
the door gasket and the door glass? Ensure that the door glass and gasket are kept clean and free of laundry when loading the machine.
You're reading an excerpt. Click here to read official HOOVER
HNF6167Z user guide
http://yourpdfguides.com/dref/3249199
Water has not drained from the machine? Check the points highlighted above. Have you selected an option that changes the spin profile (Stiro Veloce or
change of spin speed on the selector)? Check the feature in the description of the controls.
Is the load unbalanced? To reduce noise and vibration and improve the machine's reliability and life, the machine is fitted with an electronic sensor that
detects if the load is unbalanced. To improve the spin performance the load can be re-distributed by hand at the end of the cycle and then re-spun. Has the
transit system been fully removed? Check that the bracket and the polystyrene packing have been taken off the machine. Are there any loose items in the
pockets of clothing that can rattle in the drum and cause damage? Is the load unbalanced? Stop the programme, re-distribute the load and restart. Some
programmes do take a long time (over 2 hours). Low water pressure can increase the length of the programme. Has the programme finished? Is the STOP
light illuminated? If not the programme is not complete. Has the Blocco Porta light gone out? If not wait a further couple of minutes and the light will go out
and you will be able to open the door. Has the programme finished but the door remains locked? The START and Pre Lavaggio light will flash intermittently
indicating that the water supply has been interrupted during the wash cycle. Turn the machine to OFF to reset the machine and this will allow the door to
open.
The machine does not spin... The machine is noisy or vibrates a lot during the cycle..
. The programme takes a long time... The door will not open.
.. 33 40001406Eng.qxd 31/08/2004 11:21 Page 34 If water remains in the drum refer to 'Water does not drain away...' above. Not all the detergent has been
flushed away. 1. 2.
Check the water supply tap is fully turned on. Check the inlet hose is not kinked. Check the drawer is aligned properly Check the drawer is not clogged with
detergent (see Cleaning and routine maintenance) Problem with the dispenser... The dispenser drawer will not close properly. 1. 2. Steam is coming from the
dispenser. The machine is designed to vent through the drawer, this is nothing to worry about.
Remember, you may be charged for the service call if incorrect installation or misuse causes a problem with your machine. Note: The use of environmentallyfriendly, phosphate-free detergents (check detergent information on pack) can have the following effects: Waste water from rinsing may be cloudier because
of the presence of a white powder (zeolites) held in suspension, without the rinse performance being adversely affected. Presence of white powder on laundry
after washing, which is not absorbed by the fabric and does not alter the colour of the fabric. The presence of foam in the final rinsing water is not necessarily
an indication of poor rinsing. Carrying out more rinse cycles does not serve any purpose in such cases.
34 40001406Eng.qxd 31/08/2004 11:21 Page 35 Power Failure If there is a power failure the wash cycle will be interrupted, and the wash programme and
functions will be suspended. When the power is restored, the wash programme and functions will restart from the same point and complete the programme.
During a power failure the water can be drained and the load can be removed from the machine as follows: 1. Switch off the machine both via the programme
knob and the mains power supply.
Remove the plug from the mains power supply socket. Carefully move the machine so the rear of the machine is accessible. Please follow the safety
precautions which we recommend under the Safety Notes section of this manual. Unclip the drain hose from the rear panel of the machine and lower the hose
into a bowl on the floor. When the bowl is full raise the end of the drain pipe to a height higher than the top of the appliance to stop the flow of water. Empty
and replace the bowl and continue draining the machine until empty. Once the machine is fully drained of water, clip the hose to the rear of the machine.
Open the door and remove the load. 2. 3.
4. The door can be opened approximately 2 minutes after the power failure. Do not force open the door. 35 40001406ITA.qxd 31/08/2004 11:45 Page 36
Introduzione . . . . . .
.....
.....
..........
..........
.....
37 Informazioni sulla consegna . . . . .
..........
..........
.....
.....
. . . 37 Cosa fare . . . . . . .
..........
.....
.....
..........
..........
.....
. 37 Da non fare . . . .
..........
..........
.....
.....
..........
. . . . . . . 38 Scelta del luogo di installazione . . .
.....
. Alimentazione elettrica . . . .
..........
. . Presa dell'acqua . . . . . . . .
.....
.....
. . . . Collegamento alla presa dell'acqua fredda . Collegamento della macchina allo scarico . . Spostamento della macchina in posizione. . Regolazione dei
piedini .
..........
.....
Estrazione del prodotto dall'imballaggio. . . . .
. . . . . . . . . 39 Installazione .
..........
.....
.....
..........
..........
.....
41 . . . . .
..........
..........
.....
.....
..........
..........
.....
.....
..........
..........
.....
.....
..........
..........
.....
.....
..........
..........
.....
.....
..........
..........
.....
. . 41 42 42 43 44 45 45 Caricamento della lavatrice . . .
..........
..........
.....
.....
. . . . . . 47 Selezione della biancheria . . . .
..........
.....
.....
..........
. . . . . . 48 Collaudo dell'installazione . . . .
.....
.....
..........
. . . . . . 46 Informazioni per il lavaggio . . . .
.....
.....
..........
. . . . 47 Il dispenser . . . . . .
.....
.....
..........
..........
.....
.....
. 49 Dosaggio del detersivo . . . . . . . . .
..........
.....
.....
..........
. . . 49 Uso del cassetto dosatore . . . . . . .
.....
.....
..........
..........
. . . 50 Funzioni automatiche . .
.....
..........
..........
.....
.....
. . . . . . 57 Il pannello di comando . . . .
..........
.....
.....
..........
51 Opzioni di lavaggio . . . . . . . . . .
.....
.....
..........
. . . . . . . . 54 Selettore dei Programmi . .
.....
.....
..........
..........
58 Programmi Speciali . . . . .
.....
..........
..........
.....
.....
. . . . . 59 Lavaggio Rapido . . . . .
..........
.....
.....
..........
..........
. . 60 Guida ai programmi . . .
.....
..........
..........
.....
. . . . 61 Un tipico lavaggio .
..........
..........
.....
.....
. . . . . . . . 62 Selezione del programma di lavaggio . .
..........
.....
.....
. . . . . . . . . 63 Avvio del ciclo di lavaggio .
..........
.....
.....
..........
. . . . . . . . . 63 Pulizia e manutenzione ordinaria .
.....
.....
..........
. 64 Ricerca guasti. . . . . . . . .
.....
.....
..........
..........
.....
. 66 Interruzione di corrente. . . .
..........
..........
.....
.....
. . . . . . . . 69 36 40001406ITA.qxd 31/08/2004 11:45 Page 37 Introduzione Leggere attentamente le istruzioni per un corretto funzionamento della macchina.
Questo opuscolo fornisce importanti linee guida per una manutenzione, un uso e un'installazione sicuri. Esso contiene inoltre utili consigli che consentiranno
di sfruttare al meglio le potenzialità di questa macchina. Conservare la documentazione in un luogo sicuro per eventuali riferimenti o per futuri proprietari.
You're reading an excerpt. Click here to read official HOOVER
HNF6167Z user guide
http://yourpdfguides.com/dref/3249199
Informazioni sulla consegna Controllare che al momento della consegna la macchina sia dotata dei seguenti componenti: Libretto di istruzioni Certificato di
garanzia Spina di otturazione Tubo di presa e supporto terminale curvo (vedere le istruzioni di estrazione del prodotto dall'imballaggio e di installazione)
Pannello di base & due dispositivi di bloccaggio Etichetta efficienza energetica Verificare che durante il trasporto la macchina non abbia subito danni. In
caso contrario, rivolgersi al Centro Assistenza GIAS. Cosa fare Tutti i materiali utilizzati per l'imballaggio sono ecologici e riciclabili. Smaltite l'imballaggio
con metodi ecologici. Presso il comune di residenza si potranno reperire ulteriori informazioni sui metodi di smaltimento. Per garantire la sicurezza al
momento dello smaltimento di una vecchia lavatrice, scollegare la spina dell'alimentazione dalla presa, tagliare il cavo dell'alimentazione di rete e
distruggerlo insieme alla spina. Per evitare che i bambini possano rimanere intrappolati all'interno della lavatrice, rompere i cardini o la chiusura dell'oblò.
Questa macchina è prevista unicamente per uso domestico, ovvero per il lavaggio, il risciacquo e la centrifuga di capi e indumenti casalinghi. 37
40001406ITA.qxd 31/08/2004 11:45 Page 38 Nel caso in cui la macchina non funzioni correttamente o sia fuori uso, spegnerla, staccare la spina dalla presa,
chiudere la presa dell'acqua e non intervenire sull'apparecchio. Per la riparazione, rivolgersi al Centro Assistenza GIAS. Da non fare Non toccare
l'asciugatrice con mani o piedi umidi o bagnati.
Non appoggiarsi al portellone per caricare la macchina; non utilizzare il portellone per sollevare o spostare la macchina. Non utilizzare adattatori,
connettori multipli e/o prolunghe. Non consentire ai bambini di giocare con la macchina o con i suoi comandi. Non tentare di aprire l'oblò qualora vi sia
acqua nel cestello o la spia del Blocco Porta sia accesa. La mancata osservanza di tale procedura potrebbe compromettere la sicurezza dell'apparecchio.
La chiamata può essere soggetta a pagamento se le cause di malfunzionamento della macchina sono attribuibili a un uso improprio. 38 40001406ITA.qxd
31/08/2004 11:45 Page 39 Estrazione del prodotto dall'imballaggio Estrarre la macchina dall'imballaggio vicino al punto previsto per l'installazione. 1. Con
cautela, eseguire un taglio lungo il perimetro della base dell'imballaggio. 2. Adagiare la macchina sul lato posteriore per rimuovere la base e i due
distanziatori in polistirolo posti su entrambi i fianchi della macchina. Per le operazioni di sollevamento e spostamento della macchina si consiglia di
ricorrere all'aiuto di una seconda persona. Smaltire l'imballaggio in maniera sicura. Accertarsi che sia fuori dalla portata dei bambini, in quanto fonte
potenziale di rischio.
3. Riportare la macchina in posizione verticale e rimuovere i materiali di imballaggio rimanenti e la vite centrale nella barra per il trasporto. 4. Rimuovere le
quattro viti di fissaggio poste nella barra per il trasporto ed estrarre il supporto per il trasporto. 39 40001406ITA.qxd 31/08/2004 11:45 Page 40 Si consiglia
di conservare il supporto per il trasporto e le viti in modo da poterli riutilizzare per proteggere la macchina in caso di spostamenti futuri. Il produttore non è
responsabile di eventuali danni arrecati alla macchina nel caso in cui non siano state rispettate le istruzioni relative alla rimozione della protezione per il
trasporto. @@@@@@Accertarsi che vi sia spazio sufficiente per la macchina. @@@@@@@@L'elettricità può essere estremamente pericolosa. La
lavatrice deve essere opportunamente collegata a terra.
@@Non utilizzare adattatori multipli e/o prolunghe. @@@@Non collegare la macchina ad uno scaldacqua istantaneo ad una uscita. @@@@@@@@Non
serrare eccessivamente gli allacciamenti. È sufficiente stringerli normalmente. Non bloccare o piegare il tubo.
1. @@@@2. Stringere manualmente il connettore. 3. @@@@@@@@@@@@Pertanto, è possibile che nel cestello e nel tubo di scarico rimanga un
piccola quantità d'acqua.
Qualora l'installazione non sia stata eseguita correttamente in tutte le sue fasi, è possibile che si verifichino perdite d'acqua. Opzione 1 Collegamento alla
tubazione di scarico (sifone intercettatore) Collegare il supporto dell'estremità curva alla tubazione di scarico. L'attacco dovrà avvenire ad almeno 800 mm
di altezza dal pavimento. Dopo aver rimosso il tappo di chiusura o tagliato la membrana dall'impianto di scarico, fissare saldamente il tubo al sistema di
scarico, per mezzo di una fascetta stringitubo. Fissare il supporto dell'estremità curva ad almeno 800 mm di altezza, per evitare il riflusso dell'acqua
all'interno della macchina. hooked end support flexible discharge hose sink hose clip 800 mm trap with hose adaptor 44 40001406ITA.qxd 31/08/2004 11:45
Page 45 Opzione 2 Ad uno scarico fisso Accertarsi che lo scarico fisso non sia posto in prossimità di una presa elettrica. Collegare il supporto dell'estremità
curva alla tubazione di scarico. Collegare il tubo flessibile allo scarico fisso, il quale dovrà trovarsi ad almeno 500 mm di altezza dal pavimento. Inserire il
tubo di scarico per un tratto di 100 mm circa all'interno dello scarico fisso.
100 mm 500 mm min Spostamento della macchina in posizione A causa del suo peso, lo spostamento della macchina richiede particolare attenzione. Per
evitare eccessivi sforzi e rischi di lesioni, la lavatrice deve essere spostata da due persone. Durante lo spostamento della macchina, fare attenzione a non
danneggiare il pavimento. Durante lo spostamento della lavatrice nella posizione definitiva, prestare attenzione a non piegare o danneggiare il flessibile
posto sul retro della macchina. Non trascinare o sollevare la macchina afferrandola per l'oblò Regolazione dei piedini Una volta posizionata la macchina, si
dovrebbe procedere alla regolazione dei piedini, per garantire una perfetta messa in bolla. Se non è perfettamente in piano, la macchina può spostarsi o
risultare particolarmente rumorosa. Regolare i piedini anteriori finché la macchina non è stabile e in piano. Una volta che la macchina è stabile e in piano,
stringere i dadi di bloccaggio sui due piedini. 45 40001406ITA.qxd 31/08/2004 11:45 Page 46 Collaudo dell'installazione Per maggiori informazioni sulle
modalità di selezione dei programmi, vedere la guida ai programmi.
1. 2. 3. Aprire la presa dell'acqua e verificare che non vi siano perdite nel tubo di riempimento. Attivare l'alimentazione elettrica.
You're reading an excerpt. Click here to read official HOOVER
HNF6167Z user guide
http://yourpdfguides.com/dref/3249199
Selezionare il programma di centrifuga , quindi premere il pulsante Avvio Pausa per avviare la macchina. Lasciare proseguire il programma per un minuto,
quindi annullarlo riportando il selettore sulla posizione OFF. In questo modo viene eliminata l'acqua che potrebbe essere rimasta all'interno della macchina
dopo il collaudo in fabbrica. Per verificare il riempimento di acqua fredda della macchina: Selezionare il programma di risciacquo , quindi premere il
pulsante Avvio Pausa per avviare la macchina. Lasciare proseguire la fase di asciugatura fino a quando la macchina non ha eliminato tutta l'acqua.
Verificare che non vi siano perdite o deflussi d'acqua dall'uscita dello scarico. 5. 6. Spegnere la macchina alla fine del ciclo ruotando la manopola
programmi in posizione "OFF". Selezionare il programma di centrifuga , quindi premere il pulsante Avvio Pausa per avviare la macchina. Se lo svuotamento
della macchina richiede più di un minuto, verificare che il tubo di scarico non sia piegato. 4. Il collaudo dell'installazione è completato. Il completamento di
questo programma richiede circa 2 ore. Ora che la macchina è stata installata correttamente, consigliamo di metterla in funzione per assicurare che il
cestello sia pulito dopo il collaudo e l'immagazzinaggio.
Selezionare Cotone Resistente e far compiere alla macchina un ciclo completo utilizzando solo detersivo e acqua. 46 40001406ITA.qxd 31/08/2004 11:45
Page 47 Informazioni per il lavaggio Questi utili consigli consentiranno di sfruttare al meglio le potenzialità della macchina, nel modo più ecologico ed
economico possibile. Ai fini della durata e dell'affidabilità di funzionamento della macchina, è inoltre importante saper riconoscere i capi che non devono
essere lavati in lavatrice Caricamento della lavatrice Al fine di ridurre il consumo di elettricità, acqua e detersivo, si consiglia di caricare completamente la
macchina. Effettuando un lavaggio a pieno carico è possibile ottenere un risparmio energetico del 50% rispetto a quanto si otterrebbe con due lavaggi a metà
carico. Non sovraccaricare la macchina: la qualità del lavaggio viene ridotta, la macchina potrebbe danneggiarsi e i capi potrebbero rovinarsi. Quando è
davvero necessario il prelavaggio? Solo in caso di biancheria particolarmente sporca. Non selezionando il prelavaggio in caso di biancheria meno sporca, è
possibile ottenere un risparmio energetico del 5-15%. Pretrattare le macchie più ostinate con uno smacchiatore lavabile. Quale temperatura di lavaggio
scegliere? L'utilizzo di smacchiatori prima del lavaggio consente di evitare temperature superiori a 60°C.
Selezionando una temperatura di lavaggio di 40°C è possibile ottenere un risparmio energetico del 50%. Biancheria molto sporca Per ottenere le migliori
prestazioni in caso di biancheria molto sporca, si consiglia di ridurre il numero di capi da introdurre nella macchina. Con maggiore spazio a disposizione nel
cestello, i capi potranno muoversi più liberamente e verranno lavati meglio. 47 40001406ITA.qxd 31/08/2004 11:45 Page 48 Selezione della biancheria Capi
da evitare Non lavare in lavatrice capi privi di etichetta di lavaggio.
Si raccomanda di non lavare in lavatrice reggiseni con ferretto Nel caso in cui il ferretto dovesse staccarsi, potrebbe rovinare gli altri capi del bucato e
danneggiare la macchina. Se l'etichetta con le istruzioni per il lavaggio indica che il reggiseno è lavabile in lavatrice, si consiglia comunque di utilizzare un
sacchetto per la biancheria. Raccomandazioni Seguire sempre le indicazioni di lavaggio riportate sulle etichette dei capi. Chiudere le cerniere e i bottoni
automatici e annodare le stringhe per evitare che i capi si aggroviglino. Accertarsi che nelle tasche non rimangano monete o altri piccoli oggetti.
Controllare che nella biancheria non siano presenti oggetti metallici che potrebbero rovinare gli altri indumenti e danneggiare la macchina. Sistemare i capi
più piccoli in un sacchetto portabiancheria. Non lavare capi precedentemente trattati con solventi. 48 40001406ITA.qxd 31/08/2004 11:45 Page 49 Il
dispenser SCOMPARTIMENTO I Detersivo per il prelavaggio Dosaggio massimo 100 ml di detersivo in polvere SCOMPARTIMENTO II Detersivo per il
lavaggio principale Dosaggio massimo 200 ml di detersivo in polvere SCOMPARTIMENTO Ammorbidente Dosaggio massimo 100 ml Dosaggio del detersivo
Utilizzare solo detersivi adatti al lavaggio in lavatrice. Tenendo conto del tipo di sporco e del detergente utilizzato, è possibile ottenere ottimi risultati di
lavaggio con un minor consumo di prodotti chimici e maggior cura per i vostri capi. La dose di detersivo da utilizzare dipende da: Durezza dell'acqua. A
seconda della durezza dell'acqua e del tipo di detersivo utilizzato è possibile ridurre la quantità di detersivo. Meno dura è l'acqua, meno detersivo è
necessario. Il tipo di sporco.
È possibile ridurre la dose di detersivo utilizzata in base al tipo di sporco. Si consiglia di utilizzare meno detersivo per i capi meno sporchi. Quantità di
biancheria. È possibile ridurre la quantità di detersivo in caso di lavaggio di piccole quantità di biancheria. Si consiglia di utilizzare meno detersivo per
carichi più piccoli. I dosaggi indicati sulla confezione dei detersivi per capi delicati spesso si riferiscono a quantità ridotte di capi da lavare. Seguire sempre
le istruzioni di dosaggio riportate sulle confezioni dei detersivi. NON superare il dosaggio massimo di detersivo 49 40001406ITA.qxd 31/08/2004 11:45 Page
50 ARIEL Scelto e consigliato da HooverZerowatt Quando Hoover produce una nuova lavatrice, la sottopone ad ogni possibile tipo di test. Uno dei test più
importanti è quello che consente agli esperti Hoover di determinare quale sia il detersivo più adatto a risolvere qualsiasi problema di lavaggio.
Ariel soddisfa le esigenze di Hoover: far funzionare in maniera efficace la macchina, non compromettere il suo ciclo di vita e ottenere i migliori risultati di
lavaggio. La scelta e il consiglio di Hoover si basano sugli eccellenti risultati ottenuti, che erano lo scopo principale dei test eseguiti. La funzione essenziale
di un detersivo che risponda a tutti i requisiti di lavaggio è quella di agire insieme all'acqua per rimuovere lo sporco dai tessuti, mantenendolo in sospensione
fino al momento in cui verrà rimosso con lo scarico dell'acqua, e controllare la quantità di schiuma che si forma nella lavatrice senza danneggiare le fibre
dei capi. Ariel soddisfa pienamente questi requisiti, dal momento che contiene componenti di elevata qualità, frutto della ricerca più avanzata, che
garantiscono risultati eccellenti in qualunque condizione.
You're reading an excerpt. Click here to read official HOOVER
HNF6167Z user guide
http://yourpdfguides.com/dref/3249199
Uso del cassetto dosatore Il cassetto del detersivo è diviso in tre scomparti: Utilizzare esclusivamente detersivi appositamente studiati per essere erogati
tramite il cassetto.
Altri prodotti potrebbero provocare danni o intasamenti. il primo, contrassegnato con "I", è destinato al detersivo utilizzato nel corso del prelavaggio. il
secondo, contrassegnato con "II", è destinato al detersivo utilizzato nel corso del lavaggio principale. il terzo, contrassegnato con è destinato ad additivi
speciali, ammorbidenti, profumi, amido, ravvivanti del colore, etc. Erogazione del detersivo dal cestello I detersivi liquidi e alcuni prodotti in compresse
vengono erogati direttamente dal cestello, tramite l'apposito dispositivo da appoggiare verticalmente sopra la biancheria dal lavare nella parte posteriore del
cestello.
Si consiglia comunque di seguire le indicazioni riportate sulla confezione del prodotto, in quanto alcune compresse vanno poste nel cassetto. 50
40001406ITA.qxd 31/08/2004 11:45 Page 51 Il pannello di comando Display CHRONOVISION Blocco Porta Temperatura Lavaggio Selettore dei
Programmi Avvio Pausa Partenza Differita Pre Lavaggio Extra Risciacquo Stiro Veloce Giri Centrifuga Riportare il selettore dei programmi sulla posizione
OFF per azzerare i comandi tra un ciclo di lavaggio e l'altro. Messa in funzione della macchina La macchina si mette in funzione selezionando un
programma tramite l'apposita manopola. Lo stato di accensione viene segnalato tramite la spia STOP lampeggiante, che continua a lampeggiare finché il
programma non viene avviato o la macchina non viene riportata sulla posizione OFF. Avvio Pausa Avvio Dopo aver selezionato il programma e le opzioni
desiderate, premere una volta il pulsante Avvio Pausa per avviare la macchina. La spia STOP smette di lampeggiare, si accende la spia START e trascorre un
breve intervallo prima dell'avvio del programma durante il quale la macchina imposta i parametri di lavaggio del programma e delle opzioni selezionate. Se
la durata del programma selezionato è inferiore a 60 minuti, allora l'indicatore del tempo residuo si accende di conseguenza. Dopo aver premuto il pulsante
Avvio Pausa, per alcuni secondi si accende anche la spia del dispositivo Blocco Porta. 51 40001406ITA.
qxd 31/08/2004 11:45 Page 52 All'avvio del successivo ciclo di lavaggio, prima di selezionare e avviare un nuovo programma, il selettore dei programmi
deve essere riportato nella posizione OFF. Pausa È possibile interrompere il programma in qualunque momento durante il ciclo lavaggio tenendo premuto il
pulsante di Avvio Pausa per circa due secondi. Quando la macchina è in modalità Pausa, il tempo residuo del programma appare sull'indicatore
CHRONOVISION e i pulsanti delle opzioni lampeggiano. La spia Blocco Porta rimane accesa per circa 2 minuti. Quando questa spia si spegne, l'oblò può
essere aperto. Per riavviare il programma, premere nuovamente il pulsante di Avvio Pausa. Annullamento e modifica del programma Per annullare il
programma, ruotare il selettore dei programmi sulla posizione OFF. Selezionare un nuovo programma e avviare come descritto sopra. Spia Blocco Porta La
spia Blocco Porta si accende quando l'oblò è perfettamente chiuso e la macchina è in funzione. Premendo il pulsante Avvio Pausa con l'oblò chiuso, la spia
lampeggia inizialmente e poi rimane accesa.
Se invece l'oblò non è chiuso, la spia continua a lampeggiare. Uno speciale dispositivo di sicurezza impedisce l'apertura dell'oblò subito dopo la fine di un
ciclo di lavaggio. Al termine di un ciclo di lavaggio, attendere due minuti e lo spegnimento della spia Blocco Porta prima di aprire l'oblò. Come misura di
sicurezza, verificare che non vi sia acqua nel cestello. Al termine del ciclo, ruotare il selettore dei programmi su OFF.
Se il programma viene interrotto, dopo 2 minuti la spia Blocco Porta si spegne e l'oblò può essere aperto. Controllare che non ci sia acqua nel cestello prima
di aprire l'oblò. 52 40001406ITA.qxd 31/08/2004 11:46 Page 53 CHRONOVISION Per gestire meglio il tuo tempo, il sistema di segnalazione e led consente
di essere costantemente aggiornati sul tempo residuo alla fine del ciclo e sul stato della funzione partenza ritardata. Una volta impostato un tempo di
asciugatura, sul display CHRONOVISION viene visualizzato il tempo restante prima della fine del programma di lavaggio (se è in corso un lavaggio) o della
fase di asciugatura (se è in corso un'asciugatura).
DISPLAY CHRONOVISION STATO DI AVANZAMENTO DEL LAVAGGIO START Tempo residuo superiore a 60 minuti Tempo residuo inferiore a 60 minuti
Tempo residuo inferiore a 30 minuti Tempo residuo inferiore a 15 minuti Fine programma 6 ore 6 ore max. prima che abbia inizio il programma 9 ore max.
prima che abbia inizio il programma 3 ore PARTENZA RITARDATA 3 ore max. prima che abbia inizio il programma 60' 30' 15' 9 ore STOP 53
40001406ITA.qxd 31/08/2004 11:46 Page 54 Opzioni di lavaggio Pre Lavaggio Le opzioni devono essere selezionate PRIMA di premere il pulsante Avvio
Pausa Questa opzione è disponibile per programmi di lavaggio di indumenti sintetici e in cotone. Il prelavaggio è automatico con il programma Sports.
Questa opzione è utile in particolare per la biancheria molto sporca e può essere utilizzata prima di selezionare il programma di lavaggio principale.
Aggiungere il detersivo per questo programma nel primo scompartimento del cassetto contrassegnato con "I" (per maggiori informazioni vedere la sezione
Cassetto del detersivo in questo manuale). Si consiglia di utilizzare soltanto il 20% del dosaggio di detersivo per il lavaggio principale. Partenza Differita
Questa opzione permette di ritardare l'avvio del ciclo di lavaggio fino a 9 ore.
Per impostare il ritardo desiderato, premere il pulsante Partenza Differita: sul display CHRONOVISION verrà visualizzato il tempo selezionato. Una volta
impostato il ritardo desiderato, premere il pulsante Avvio Pausa per avviare il ciclo. Extra Risciacquo Questa opzione è disponibile per programmi di
lavaggio di indumenti in cotone. Questa opzione porta a 5 il numero di risciacqui (incluso il risciacquo finale con ammorbidente). Questo risulta
particolarmente importante per evitare irritazione da residui di detersivo nelle persone con pelli particolarmente delicate. Si consiglia inoltre di selezionare il
pulsante "Extra risciacquo" in caso di lavaggio di biancheria molto sporca che necessita di molto detersivo, oppure in caso di lavaggio di tessuti di spugna
che tendono a trattenere il detersivo. 54 40001406ITA.
You're reading an excerpt. Click here to read official HOOVER
HNF6167Z user guide
http://yourpdfguides.com/dref/3249199
Powered by TCPDF (www.tcpdf.org)
Scarica