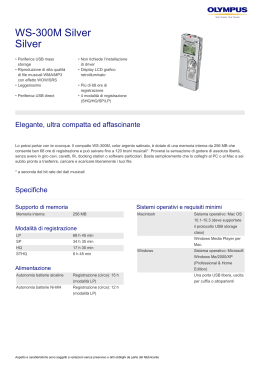
Curtarolo (Padova) Italy
www.avselectronics.com
I
T
A
Xwin
SOFTWARE DI PROGRAMMAZIONE
CENTRALI SERIE
Xtream
Sistema di Qualità
certificato
ISO9001:2008
Ist0793v5.2
1
E
N
G
Sommario
DESCRIZIONE .................................................................................................................... 3
REQUISITI DEL SISTEMA .................................................................................................. 3
INSTALLAZIONE COME AMMINISTRATORE .................................................................... 4
INSTALLAZIONE CON OPZIONE DI SINCRONIZZAZIONE TRA PC ................................ 5
SCHERMATA INIZIALE ....................................................................................................... 6
OPZIONI PROGRAMMA ..................................................................................................... 6
AGGIORNA TRAMITE FILE ZIP .......................................................................................... 7
AGGIORNA TRAMITE INTERNET ...................................................................................... 7
ANAGRAFICA CENTRALI ................................................................................................... 7
FUNZIONI XWIN ................................................................................................................. 8
TRASFERIMENTO PROGRAMMAZIONE / CONNESSIONE ............................................. 9
Connessione con Xtream 640 (con versione scheda master precedente a MA00512) ...... 9
Connessione con Xtream 64-32-6 Xtream640 (da versione scheda master MA00512) ...... 9
QUICK COMAND (Scorciatoie di programmazione) .......................................................... 10
COPIA PROGRAMMAZIONE – MODALITA’ GRIGLIA ..................................................... 10
COPIA
................................................................................................................ 11
MODALITA’ GRIGLIA
............................................................................................. 11
ATTIVARE LE PROGRAMMAZIONI ................................................................................. 12
Codice di Comunicazione .................................................................................................. 12
Account di Telegestione..................................................................................................... 12
CREAZIONE FONIE PERSONALIZZATE ......................................................................... 13
Registra fonia..................................................................................................................... 13
Crea fonia .......................................................................................................................... 14
TRASFERIRE UN FILE AUDIO IN CENTRALE ................................................................ 15
PERSONALIZZAZIONE VOCALE DELLE ZONE .............................................................. 16
PERSONALIZZAZIONE VOCALE DELLE USCITE OPEN COLLECTOR ......................... 16
XWEB ................................................................................................................................ 17
IMPOSTAZIONI WEB ........................................................................................................ 17
IMPOSTAZIONI MAPPA.................................................................................................... 18
PERSONALIZZAZIONE DELLA MAPPA ........................................................................... 18
AGGIORNAMENTO FIRMWARE XTREAM ...................................................................... 21
Consigli e problematiche frequenti ..................................................................................... 22
AGGIORNAMENTO XWIN A HPWIN ................................................................................ 23
OPZIONI PROGRAMMA ................................................................................................... 23
AGGIORNA TRAMITE FILE ZIP ........................................................................................ 23
AGGIORNAMENTO FIRMWARE XWEB........................................................................... 24
AGGIORNAMENTO FIRMWARE PERIFERICHE SERIALI .............................................. 25
Procedura se collegate a XSATHP: ................................................................................... 25
AGGIORNAMENTO PERIFERICHE COLLEGATE ALLA XTREAM ................................. 27
2
DESCRIZIONE
XWIN è il software avanzato per la completa programmazione della centrale Xtream sia in
connessione diretta utilizzando un cavo USB, sia in remoto con un modem universale a
56K o sfruttando il canale GSM. XWIN permette l’aggiornamento firmware centrale con
connessione diretta in centrale tramite porta USB.
Il software ha poi la possibilità di visionare in tempo reale lo stato del sistema dando indicazione dei consumi istantanei della centrale e lo stato delle varie apparecchiature. Oltre a
questo è possibile avere il controllo completo dello stato degli ingressi, delle uscite ed è
anche possibile intervenire, in locale o remoto, accendendo/ spegnendo il sistema. Tutte le
operazioni sono subordinate all’inserimento di un codice Utente abilitato.
La modalità REAL TIME è la nuova telegestione dinamica di AVS che permette di monitorare e gestire a 360° ogni singolo impianto.
REQUISITI DEL SISTEMA
• Windows 95B - 98E - 2000SP3 – ME - XP SP1 – VISTA - SEVEN
• Compatibilità modem: Modem standard V.90
• Compatibilità centrale: XTREAM
3
I
T
A
INSTALLAZIONE COME AMMINISTRATORE
L’installazione semplificata del prodotto prevede un CD-ROM autoinstallante.
Una volta avviata la procedura, viene proposta all’utilizzatore di procedere come AMMINISTRATORE o UTENTE.
Selezionare “AMMINISTRATORE”.
A questo punto è necessario impostare una password che servirà a proteggere il software.
Impostare anche il campo “Nome”.
Se sarà necessario cambiare la lingua (default Italiano), si potrà selezionare tra inglese,
francese.
Per completare la procedura premere “OK”
4
INSTALLAZIONE CON OPZIONE DI SINCRONIZZAZIONE TRA PC
Ci sono due strade per garantire la sincronizzazione tra più pc in cui è installato XWin.
Entrambe richiedono che ci sia un solo pc con XWin installato come amministratore e tutti
gli altri come Utente.
L'installazione amministratore fa modo da master, mentre tutte le altre da slave.
1^ soluzione VIA chiavetta USB
- Il master (admin) carica le anagrafiche clienti e l'elenco dei dispositivi slave sul pannello
"Gestione Account" (il master conosce i codici e le password di tutti i dispositivi slave)
- fatto questo, per ogni dispositivo slave si dovranno esportare i dati (mediante apposita
funzione sulla griglia "Gestione Utenti Remoti") e distribuire il files zip così creati a ciascun
installatore (a ciuscuno il suo, passandoglielo tramite chiavetta usb) che procederanno ad
importalo mediante apposita funzione del pannello Gestione Account del loro XWin (che
ricordo dovrà essere in modalità USER).
- quando un installatore aggiorna una programmazione, dovrà andare nel pannello "Gestione account" ed esportare il file zip con gli aggiornamenti. Questo file zip dovrà essere
importato dal master (solo lui può farlo), il quale dovrà anche ridistribuire gli aggiornamenti
a
tutti
gli
slave
con
la
stessa
procedura
del
punto
precedente.
(Lo scenario è questo: ogni installatore quando passa in ditta, scarica i suoi aggiornamenti
sul master e prima di andare da un cliente, si scarica dal master la versione più aggiornata
delle
programmazioni).
Attualmente gli account utente (slave) non hanno possibilità di creare nuove anagrafiche in
quanto è il master che comanda quali clienti caricare.
2^ soluzione VIA Internet: funzione Sincronizza
Questa soluzione è del tutto analoga alla precedente con la differenza che l'installatore
non deve essere fisicamente in ditta per "sincronizzare" il proprio slave con il master. Di
contro richiede uno spazio internet ftp condiviso tra master e slave.
Il prerequisito è quindi quello di disporre di un server ftp (interno all'azienda o esterno, vedi aruba) che faccia da archivio condiviso.
I dati di accesso all'area ftp vanno configurati sia sul master che sui vari slave alla prima
configurazione, o attraverso il pannello "Gestione Account".
Una volta configurato il server ftp, sarà possibile sincronizzare master e slave semplicemente attraverso il pannello Sincronizza di Xwin (naturalmente si deve essere connessi ad
Internet).
5
I
T
A
SCHERMATA INIZIALE
Anagrafica Centrali: in questo menù si possono organizzare i vari clienti
Opzioni Programma: in questo menù è possibile selezionare la procedura di Up-Grade
del software Xwin.
Gestione Connessioni: in questo menù è possibile impostare la modalità di connessione
con la centrale (RS232 – linea telefonica – USB)
Gestione Account: In questo menù è possibile configurare gli account di connessione
qual’ora il software fosse installato in dei server in rete
Sincronizza: in questo menù è possibile avviare la sincronizzazione tra i dati sul pc e
quelli residenti sul server remoto.
Esci: esce dal programma
OPZIONI PROGRAMMA
Selezionare la modalità di aggiornamento desiderata:
Aggiorna Tramite internet /Aggiorna tramite file Zip
6
AGGIORNA TRAMITE FILE ZIP
Una volta selezionata questa modalità di aggiornamento, si apre “carica aggiornamento da file”.
A questo punto è necessario caricare un file che
dovremmo aver preventivamente scaricato dal sito
Avs electronics all’area download.
NON DECOMPRIMERE IL FILE,
ma semplicemente copiarlo sul pc dove si intende
effettuare l’up-grade di Xwin
AGGIORNA TRAMITE INTERNET
Se il PC fosse collegato alla rete internet è possibile, una volta selezionata questa modalità di aggiornamento, selezionare “START” ed il software si
connetterà ai server per il download automatico.
ANAGRAFICA CENTRALI
Una volta selezionato questo passo è possibile aprire un cliente esistente oppure creare un nuovo
cliente:
Sospendi: selezionare il cliente e successivamente
la voce “ sospendi” . il cliente verrà spostato dalla
visualizzazione principale ad una secondaria.
Per visualizzare la lista clienti sospesi, è sufficiente
cliccare su “mostra clienti sospesi”. Per tornare
alla visualizzazione principale, selezionare “mostra
clienti attivi”.
Nuovo: selezionare nuovo per creare un cliente
Per creare un nuovo cliente è necessario compilare
almeno il campo:
Codice: inserire un valore numerico che individuerà il cliente
Nome: Inserire il nome assegnato al cliente
Tutti gli altri campi sono facoltativi Avanti: per
completare la creazione del cliente e passare alla
maschera successiva.
7
I
T
A
FUNZIONI XWIN
: torna al menù principale
Mostra/Modifica: si accede ai parametri di programmazione della centrale
Stampa Programmazione: permette di stampare
le programmazioni della centrale selezionando le
sezioni desiderate.
Archivia/Salva: è possibile salvare le varie modifiche di programmazione inserendo delle note. Le
programmazioni sono salvate in automatico dopo
ogni allineamento.
Archivio DB: in questo menù è possibile visualizzare tutti i salvataggi automatici e non effettuati per questo cliente. E’ poi possibile recuperare un determinato salvataggio
e”caricarlo” per poi trasferirlo alla centrale.
Carica da File: permette di caricare un cliente salvato.
Salva su file: permette di salvare un cliente
FONIE: permette di trasferire dal PC alla centrale e viceversa delle registrazioni di “file.wav”.
Aggiorna Fonie: permette di cambiare tutto il pacchetto
fonie per caricare una lingua di un'altra nazione.
Aggiungi singola: permette di caricare una singola fonia.
Gestisci archivio: permette di creare un elenco di file e di
trasferirli alla centrale.
Nota: il trasferimento dei file avviene in connessione USB /
PSTN / GSM.
Crea Fonia: permette di aprire un’applicazione per la creazione di fonie.Wav da testo.
La lingua con cui verranno convertiti i file di testo dev’essere preventivamente caricata e
selezionata sulle impostazioni del PC.
Registra Fonia: apre il registratore di suoni e permette, se il PC è provvisto di microfono,
di registrare un file.Wav.
XWEB: permette di impostare i dati relativi all’accesso da rete ethernet e di caricare la
mappa sull’XWEB.
Aggiorna Firmware: permette di aggiornare la versione firmware della centrale. Prima di
entrale in questo menù è necessario aver preventivamente scaricato dal sito AVS Electronics all’area download il file “.bim”.
Questa funzione richiede il rigoroso rispetto di alcune operazioni che devono essere eseguite in successione, Vi preghiamo di fare riferimento alle istruzioni dedicate a questa procedura.
Aggiorna periferiche: permette di trasferire in centrale un pacchetto firmware di tutte le
periferiche che si possono aggiornare in automatico.
Aggiorna Fonie: permette di cambiare tutto il pacchetto fonie per caricare una lingua di
un'altra nazione.
8
TRASFERIMENTO PROGRAMMAZIONE / CONNESSIONE
Allinea PC: permette di trasferire la programmazione che risiede in centrale al computer
Allinea Centrale: permette di trasferire la programmazione effettuata sul computer alla
centrale
Allineamento SPOT: permette di mettersi in connessione con la centrale e si visualizza la
programmazione. I cambiamenti effettuati su Xwin cambiano colore per indicarne la variazione. La programmazione sarà trasferita nel momento in cui si attiverà la sincronizzazione.
Per effettuare gli allineamenti del sistema è fondamentale aver attivato:
Codice di comunicazione in centrale per poter attivare la connessione USB
Impostare in centrale e sul PC l’account di telegestione uguale al codice cliente di Xwin
I
T
A
Connessione con Xtream 640 (con versione scheda master precedente a MA00512)
Prima di collegare il cavo USB al computer è necessario attivare la connessione USB:
Digitare il codice di comunicazione (CONNESSIONE USB – ENT) – pigiare ENT
Sul display compare (>>>> CONNESISONEUSB)
Collegare il cavo USB al PC
Connessione con Xtream 64-32-6 Xtream640 (da versione scheda master MA00512)
Collegare il cavo USB al computer
Digitare il codice di comunicazione (CONNESSIONE USB – ENT) – pigiare ENT
Sul display compare (>>> CONNESISONE USB)
Modalità REAL TIME: permette di connettersi in tempo reale con la centrale e di visionare
lo stato del sistema; consumi - stato fusibili, controllo telefonico - stato ingressi – stato
uscite e controllo storico eventi.
Nota: per attivare questa funzione è fondamentale che il codice utente che si utilizza per
questa funzione sia abilitato alla funzione RTC.
NOTA: Sul presente manuale non sono descritti i passi della programmazione della centrale, si possono verificare sul manuale installatore allegato alla centrale.
Per ogni eventuale chiarimento, contattare l’ufficio tecnico al numero telefonico 049 9698
444 o via mail a [email protected]
9
QUICK COMAND (Scorciatoie di programmazione)
Nel menù delle zone è inserita la possibilità di aprire delle maschere riassuntive per tipo di
opzione.
Cliccando col tasto destro del mouse su ogni opzione, si ha la possibilità di programmare
contemporaneamente la funzione desiderata su più zone contemporaneamente.
Es. Abilitare “Segnala Tamper”.
Es. abilitare “Segnala Tamper” contemporaneamente su più zone.
Una volta abilitate le varie zone, premere “OK” per confermare.
COPIA PROGRAMMAZIONE – MODALITA’ GRIGLIA
Tasto COPIA
Modalità GRIGLIA
10
COPIA
Questa opportunità è presente anche in altri menù (zone – o.c. – utente – numeri telefonici) e permette di copiare gli attributi impostati per una “zona, o.c., utente, numero telefonico” su un altra “zona, o.c., utente e numero telefonico”.
Non vengono copiati alcuni elementi ed in particolare per:
Zone: - il legame tra zona “software” ed “ingresso fisico” - la stringa di zona
O.C.: - la stringa O.C.
Utente: - il valore del codice utente - la stringa utente
Numeri telefonici: - il valore del numero di telefono
Selezionare le zone
su cui si vogliono
copiare gli attributi
I
T
A
Conferma le modifiche
Annulla le modifiche
MODALITA’ GRIGLIA
Questa opportunità consente di programmare/visualizzare più attributi di zona contemporaneamente in un’unica schermata.
Elenco proprietà
Annulla le modifiche
Conferma le modifiche
11
ATTIVARE LE PROGRAMMAZIONI
Codice di Comunicazione
dev’essere programmato in centrale per poter effettuare le connessioni USB.
Digitato sulla tastiera della centrale, può attivare la
programmazione interattiva con collegamento USB; in
fabbrica non è programmato, è necessario impostare
un valore da menù “Installatore” per attivarlo.
Sequenza di programmazione in centrale, con tastiera:
Cod.inst. Codici di servizio Codice di comunicazione: impostare lo stesso valore
che è inserito in XWIN
Password di Accesso
E’ una password numerica composta da 6 cifre; in fabbrica è programmata 000000. Questa password, permette al computer di farsi riconoscere dalla centrale per causare una
chiamata di ritorno (CALL BACK) per la riprogrammazione.
Password di Programmazione
E’ una password numerica composta da 6 cifre; in fabbrica è programmata con 000000. E’
la password che il computer confronta con la centrale prima di allineare la programmazione. Per la piena abilitazione dell’allineamento è necessario che la Password di Accesso
e la Password di Programmazione programmati in centrale, siano uguali a quelli programmati nel computer per il cliente selezionato. Inoltre deve coincidere la data della centrale con quella del PC.
Account di Telegestione
L’ACCOUNT CODE DEVE CORRISPONDERE
AL CODICE CLIENTE DI XWIN
anche per le connessioni dirette con cavo USB.
12
CREAZIONE FONIE PERSONALIZZATE
La centrale ha la possibilità di memorizzare delle fonie aggiuntive che possono essere usate per aumentare il vocabolario vocale della centrale.
Caratteristiche della memoria:
- Massimo 40 memorizzazioni
- Tempo massimo di registrazione per singola memoria pari a 30 secondi
- Tempo massimo totale di registrazione pari a 120 secondi.
Vi sono due modi di creare le fonie aggiuntive:
- Registra Fonia
- Crea Fonia
Registra fonia
Questa opportunità attiva un tool presente sul PC che consente la registrazione di una parola/frase direttamente con un microfono collegato al computer.
Questo applicativo Windows® permette la creazione di un file audio.waw; con questo
strumento è possibile creare sia la fonia di presentazione che le singole fonie aggiuntive.
13
I
T
A
Crea fonia
Questa opportunità attiva un secondo tool che permette di trasformare in vocale una frase/parola digitata sul PC.
E’ fondamentale, prima di utilizzare questa opzione, verificare che impostazioni di lingua
siano programmate sul computer.
In sostanza, bisogna verificare che sia caricata una voce italiana, meglio se femminile, per
essere in linea con le fonie impostate in centrale.
Nota. I computer, anche se venduti in Italia, hanno pre-caricata una fonia “americana”.
Di seguito vi elenchiamo alcuni siti dov’è possibile acquistare le voci:
- http://www.nextup.com/ - http://www.nextup.com/scansoft.html
- http://www.cepstral.com/ - http://www.cepstral.com/downloads/
Selezionare “Crea fonia”, impostare la voce italiana ed iniziare la digitazione del testo da
trasformare in file audio.waw.
2
Selezionare la
lingua desiderata
1
A questo punto si può procedere alla digitazione del testo da convertire in file-audio.
Volume: varia il volume di audio del file.
Velocità: varia la velocità di lettura del
testo
Per ascoltare il file audio, è sufficiente cliccare su “Anteprima”;
se la riproduzione audio fosse quella desiderata, si potrà procedere al salvataggio cliccando su “Salva su file”.
14
TRASFERIRE UN FILE AUDIO IN CENTRALE
E’ possibile trasferire un file.waw alla volta cliccando su “Aggiungi Singola”, oppure creare un elenco di file in successione e procede ad un’unica operazione di trasferimento.
E’ possibile aggiungere altri file successivamente con la stessa procedura.
Non è possibile cancellare un singolo file, ma la procedura prevede la cancellazione contemporanea di tutta la memoria audio personalizzabile.
Selezionare “Gestisci archivio”.
Il software chiede la connessione con la centrale, una volta stabilita,
si apre una maschera per la “Gestione archivio fonie personalizzate”.
Il simbolo (+) in verde sta ad indicare che è possibile aggiungere una fonia.
Sulla sinistra rimane l’indicazione del numero della fonia trasferito e del campo “descrizione”.
Il campo descrizione è un campo che automaticamente si completa prendendo il nome del
file.waw; per questo si consiglia di salvare i vari files audio dando loro un nome che ricordi
la registrazione effettuata.
Questo campo viene poi gestito in altre parti del programma, offrendo un valido aiuto nella
gestione delle fonie personalizzate.
Una volta creato l’elenco, si può procedere al trasferimento delle fonie dal PC alla centrale
cliccando su “Salva modifiche”.
Per poter creare un elenco di fonie da trasferire
1
Spazio riservato alla descrizione del file trasferi-
2
Per aggiungere una fonia all’elenco
Per cancellare tutte le fonie
Per trasferire le
fonie
3
15
I
T
A
PERSONALIZZAZIONE VOCALE DELLE ZONE
Le comunicazioni di allarme / ripristino degli ingressi sono normalmente composte in automatico da XTREAM in relazione al tipo di linea impostata in codifica SIA (es. linea furto o
linea gas ecc) ed al numero di zona.
Alla comunicazione standard è possibile aggiungere fino a quattro comunicazioni personalizzate per ogni singola zona.
Se fosse necessario personalizzare le comunicazioni di XTREAM relativamente alle zone,
creando un messaggio aggiuntivo a quello standard, si può attingere alla libreria di parole
pre registrate.
Per personalizzare le fonie
delle zone è sufficiente:
Cliccare due volte sulla parola
Trascinare la parola
PERSONALIZZAZIONE VOCALE DELLE USCITE OPEN COLLECTOR
Se fosse necessario personalizzare le comunicazioni di XTREAM relativamente alle uscite, si può attingere alla libreria di parole pre registrate.
Se fosse necessaria una descrizione vocale
composta da più parole, ad esempio “riscaldamento primo piano”, si dovrà procedere alla registrazione di una fonia aggiuntiva
16
XWEB
La centrale ha la possibilità gestire l’ INTERFACCIA L AN - WEB SERVER (mod. XWEB).
L’interfaccia “XWEB” permette il collegamento in rete LAN delle centrali XTREAM. Il web
server integrato consente attraverso un comune WEB BROWSER installato sul PC, net
PC, I Pad ®, I Phone ® di collegarsi alla centrale in locale tramite rete LAN/WLAN oppure
da remoto tramite linea ADSL e di esegui re le seguenti funzioni:
• Verifica stato impianto in real-time su mappa grafica pre-caricata.
• Attivazione e spegnimento impianto .• Attivazione e disattivazione uscite OC .
• Porta di comunicazione: LAN, TCP- IP ETHERNE T
• Compatibilità Browser: IE 8.0 ®, Firefox 3.5 ®, Safari Mac e Pc 5.0 ® , Chrome 7 ®
Nota: ® i marchi citati sono dei rispettivi proprietari
IMPOSTAZIONI WEB
I
T
A
Questa sezione della programmazione permette di programmare le impostazioni di rete.
-
Configurazione IP
Usa DHCP: Utilizza servizio DHCP per parametri di rete
Indirizzo IP: E’ l’indirizzo IP che permette l’accesso alla scheda XWEB
Gateway: Parametro tecnico di rete
DNS Primario: Parametro tecnico di rete
DNS Secondario: Parametro tecnico di rete
Configurazione server:
Porta web: Porta di accesso tramite Browser;normalmente configurato il valore 80
Porta socket: Porta di accesso attraverso protocollo proprietario AVS
Password installatore: Codice di autenticazione per la pubblicazione delle mappe
grafiche.
Password gestione utenti: Codice master di autenticazione per la registrazione
delle password di accesso degli utenti
Impostazioni DNS Dinamico:
-
Provider
Host
Username
Password
Nota: Parametri forniti dal gestore del servizio.
17
IMPOSTAZIONI MAPPA
Questa sezione è dedicata all’importazione del
file di mappa ed alla personalizzazione del sistema con il posizionamento di icone legate a
zone – uscite – settori - accessori
Caratteristiche file da importare:
- File con estensione JPG
- Risoluzione 1024 X 768
Importazione mappa:
1
selezionare sul tab “ + “
3
2
4
1
Percorso immagine
2
Usare il percorso per selezionare la mappa
Nome Mappa
3
Indicare un nome che verrà riportato nella pagina web pubblicata ad indicare la mappa.
4
Premere “OK“ per confermare.
Una volta caricata la mappa è possibile inserire sulla stessa delle icone che rappresenteranno lo stato delle zone – uscite – settori – periferiche di sistema.
PERSONALIZZAZIONE DELLA MAPPA
Selezionare la mappa e cliccare con il tasto destro del mouse
1
2
18
Confermando di voler aggiungere un’icona, si apre il menù “Nuova Icona”.
Tipo e sottotipo:
- Sistema
o
Centrale
o
Tastiera
o
Satellite
o
Inseritore
Numero
Descrizione
Icona
- OC – Uscite
o
Numero
o
Descrizione
o
Bypass blocco per timeout:
permette di attivare l’uscita senza dover inserire il codice utente di sblocco timeout
o
Icona
- Zona
o
Numero
o
Descrizione
o
Icona
- Settore
o
Numero
o
Descrizione
o
Icona
Gestione mappa
- Nuova mappa grafica : permette di creare
una nuova mappa cancellando l’esistente
- Carica da File: permette di caricare una mappa da file precedentemente salvato
- Salva su file: permette di salvare la mappa
creata.
Nota: si consiglia di salvare il lavoro effettuato, se si
dovesse salvare chiudere XWIN andrebbero perse le
impostazione effettuate
19
I
T
A
Pubblicazione
Associa Logo Installatore:
Permette di caricare un logo installatore che sarà pubblicato a sinistra del logo XWEB. Il logo deve avere dimensione massima (157x57) e dev’essere
un file.PNG.
Pubblica mappa …
Abilitare pulsanti: è possibile selezionare i pulsanti
che si vogliono attivare.
Home: è possibile selezionare quale schermata debba
essere visualizzata dopo il LOGIN
Opzioni di mappa: è possibile attivare la rotazione tra
le varie mappe e l’intervallo temporale di rotazione
Opzioni blocco comandi: è possibile attivare il blocco
dei comandi dopo l’esecuzione di qualche funzione e il
time out di blocco.
Logo Installatore (Click per cambiare): è possibile
cambiare il logo installatore caricato, cliccando dentro
al riquadro.
Pubblica: permette di pubblicare la mappa
Host: inserire l’indirizzo IP di XWEB seguito da “:” e la
porta WEB (es: http://192.168.0.110:80)
Password: va inserita la password installatore creata
nella parte di programmazione dedicata XWEB.
20
AGGIORNAMENTO FIRMWARE XTREAM
Procedura per l’aggiornamento del firmware di centrali XTREAM640
Scaricare dal sito www.avselectronics.com il file di aggiornamento del firmware.
Salvare il file in una cartella del computer; si può usare una cartella preesistente, oppure
la cartella può essere creata nuova a piacimento, come esempio in questo testo si utilizzerà C:\XTREAM640
Dal menu di programmazione della centrale, selezionare "Aggiornamento Firmware" ed
eseguire la procedura come descritto nel manuale installatore
Solo ora collegare il cavo USB tra la centrale e il PC
Avviare il programma XWIN e selezionare dall’anagrafica clienti il codice associato alla
centrale
Dal pannello delle funzioni selezionare “Aggiorna
Firmware”
I
T
A
A questo punto il programma richiede il file per eseguire l’aggiornamento
Selezionare la cartella C:\XTREAM640; all’interno
di essa compare la lista dei file con estensione
“bim” che sono relativi agli aggiornamenti firmware
disponibili; in questo esempio, il file di aggiornamento si chiama xtream_1.0p1_xwin.bim
Eseguire un doppio-click su questo file.
Il programma entrerà in funzione e in una finestra
si vedranno scorrere velocemente dei dati numerici; il processo dura tipicamente circa un minuto.
Al termine, il programma mostrerà l’avviso di scollegare il cavo USB dalla centrale e quindi di premere il tasto RESET nella centrale.
Il programma può ora essere chiuso
La centrale ripartirà con il nuovo firmware; si attenda il completamento dell’inizializzazione della centrale e delle sue periferiche; per ultima
conferma della corretta operazione, si entri in menù installatore, si selezioni la voce “Versione eprom” e si verifichi che i dati riportati corrispondano alla versione del file selezionato al punto 8.
Non si cancelleranno dati di programmazione, si aggiornerà solamente la versione
firmware della centrale.
21
Consigli e problematiche frequenti
Verificare preventivamente la validità del collegamento USB e il corretto funzionamento
dei driver caricati in WINDOWS©® per la centrale Xtream: si utilizzi a tale scopo il programma XWIN per effettuare qualche operazione, ad esempio “Allinea centrale” oppure
“Allinea PC” o “Allineamento SPOT” o infine “Modalità REALTIME”
Il programma di aggiornamento può riportare dei messaggi di errore, oppure il processo di
aggiornamento può rivelarsi estremamente lento: si consiglia di ripetere il procedimento
dall’inizio, con queste avvertenze preliminari:
5 Chiudere il programma di aggiornamento
6 Staccare il cavo USB dal PC
7 Chiudere il programma XWIN
8 Premere il tasto RESET in centrale
In caso non si riesca a portare a termine l’aggiornamento, si consiglia di contattare
l’Assistenza Clienti AVS.
22
AGGIORNAMENTO XWIN A HPWIN
Per fare in modo che XWIN possa gestire le periferiche digitali (Outspider – BM..HP) si
deve fare un aggiornamento con il file enable_ hpwin.zip.
Procedere come indicato:
OPZIONI PROGRAMMA
Selezionare la modalità
Aggiorna tramite file Zip
di
aggiornamento:
AGGIORNA TRAMITE FILE ZIP
Una volta selezionato questa modalità di aggiornamento, si apre “carica aggiornamento da file”.
A questo punto è necessario caricare un file che
dovremmo aver richiesto al distributore.
NON DECOMPRIMERE IL FILE, ma semplicemente copiarlo sul pc dove si intende effettuare
l’up-grade di XWin a HPwin.
Seguire la procedura che viene proposta dal programma.
A questo punto si potrà, quando si crea un cliente,
associare lo stesso “codice” sia alla centrale che all’HPWIN; questo è fondamentale se si
gestisce da remoto il sistema usando la centrale come strumento per la connessione con
le periferiche digitali.
Codice associato a
due dispositivi
Quando si seleziona il cliente, il software richiederà di selezionare il dispositivo che si vuole programmare.
Selezionare il dispositivo
per procedere
23
I
T
A
AGGIORNAMENTO FIRMWARE XWEB
E’ possibile aggiornare tramite collegamento diretto con una chiave USB.
Per effettuare questa procedura è necessario avere a disposizione:
•
Chiave USB
•
File firmware: “avsxweba.bin”
Procedura:
1. Copiare il file del firmware “avsxweba.bin” nella radice della chiave USB. La
chiave USB può avere al suo interno anche altri file o cartelle, ma è importante
che il file Firmware sia sulla radice della chiave
2. La centrale non dev’essere nel menù di installazione ed XWEB dev’essere attivo;
I Led D-F devono lampeggiare velocemente.
3. Inserire la chiave USB sulla scheda XWEB
4. Spostare DIP 1 di SW1 su XWEB in ON
5. Attendere che i LED B-C comincino a lampeggiare in modo alternato.
OFF 1
4
6. Una volta terminato il lampeggio, spostare il Spostare DIP 1 in OFF; il file di aggiornamento del firmware è stato trasferito su XWEB.
7. Rimuovere la chiave USB
6. Pigiare il pulsante di reset sulla centrale;
si spengono i led su XWEB, dopo circa un (1) minuto il sistema si rimette in funzione.
24
AGGIORNAMENTO FIRMWARE PERIFERICHE SERIALI
OutSpider PA-DT
BM60-120-200HP
Procedura per l’aggiornamento del firmware:
E’ possibile aggiornare tramite collegamento diretto con PC il firmware delle periferiche seriali.
Per effettuare questa procedura è necessario avere a disposizione:
9 PC con porte USB
10 Software HPWIN installato sul PC
11 Cavo USB di collegamento
12 File FIRMWARE satellite che è disponibile sul sito www.avselectronics.com
Procedura se collegate a XSATHP:
1. Chiudere il ponte S4 per attivare la connessione USB
2. Collegare il cavo USB al PC
3. Eseguire la procedura guidata di aggiornamento da HPWIN:
- Avviare il programma XWIN e selezionare dall’anagrafica clienti il codice associato al
satellite XSATHP.
1- Dal pannello delle funzioni selezionare “Aggiorna Firmware”
2a- selezionare il tipo di connessione e se si tratta di “XSATHP o Periferica seriale”
Diretta se connessi direttamente alla periferica.
Satellite 1.. se i sensori sono “collegati” ad un satellite, anche
quello virtuale.
2b- Selezionare la periferica da aggiornare
3- Confermare
4- Selezionare la cartella C:\XXXXXXX; all’interno di essa compare la lista dei file con estensione “bim” che sono relativi agli aggiornamenti firmware disponibili; in questo esempio, il file di aggiornamento si chiama “Periferica”_Vx.xpx.bim ed eseguire un doppio-click su
questo file;
25
I
T
A
Il programma entrerà in funzione e in una finestra
si vedranno scorrere velocemente dei dati numerici; il processo dura tipicamente circa un minuto.
4. Al termine della procedura scollegare il cavo
5. Aprire il ponte S4 per disattivare la connessione USB
6. Pigiare e rilasciare il pulsante di RESET sulla scheda satellite
26
AGGIORNAMENTO PERIFERICHE COLLEGATE ALLA XTREAM
Dalla versione 1.1p2 di centrale, è possibile effettuare l’aggiornamento automatico delle
periferiche collegate in RS485. Durante la fase di aggiornamento, che può durare qualche
minuto, sul display della tastiera comparirà l’indicazione “Aggiorn.perifer.”
Questa procedura permette di aggiornare le tastiere e le espansioni collegate su bus.
PROCEDURA
- Scaricare dal sito di AVS Electronics (area CLIENTI) i files:
o Up-grade Xwin,
o Up-grade Xtream
o il pacchetto di aggiornamento periferiche.
- Aggiornare Xwin alla nuova versione.
- Aggiornare il firmware della centrale via USB.
- Trasferire il file up-grade periferiche via USB.
o Cliccare “Aggiorna periferiche”
o Cliccare “Carica File”
o Selezionare il file scaricato
o Cliccare su “Avvia programmazione” (in USB non serve impostare alcun codice)
- Attendere il trasferimento del file.
Una volta completato il trasferimento,
In automatico la centrale aggiornerà tutte le periferiche collegate.
27
I
T
A
Via Valsugana, 63
35010 (Padova) ITALY
Tel. +39 049 9698 411 / Fax. +39 049 9698 407
[email protected]
www.avselectronics.com
[email protected]
28
Curtarolo (Padova) Italy
www.avselectronics.com
Xwin
PROGRAMMING SOFTWARE
CONTROL UNITS SERIES
Xtream
Quality system
certified
ISO9001:2008
Ist0793v5.2
29
E
N
G
Index
DESCRIPTION .................................................................................................................. 31
SYSTEM REQUIREMENTS .............................................................................................. 31
INSTALLATION AS ADMINISTRATOR ............................................................................. 32
INSTALLATION WITH PC SYNCHRONISATION OPTION ............................................... 33
INITIAL SCREEN ............................................................................................................... 34
PROGRAM OPTIONS ....................................................................................................... 34
UPDATE USING ZIP FILE ................................................................................................. 35
UPDATE USING INTERNET ............................................................................................. 35
CONTROL UNIT MASTER FILE ....................................................................................... 35
XWIN FUNCTIONS ........................................................................................................... 36
PROGRAM / CONNECTION TRANSFER ......................................................................... 37
Connection with Xtream 640 (with master before to MA00512) ........................................ 37
Connessione con Xtream 64-32-6 Xtream640 (with master after MA00512) ..................... 37
QUICK COMMANDS (Programming shortcuts) ................................................................. 38
COPY PROGRAMMING - GRID MODE ............................................................................ 38
COPY
................................................................................................................. 39
GRID MODE
........................................................................................................... 39
ACTIVATE PROGRAMS ................................................................................................... 40
Communication Code ........................................................................................................ 40
Remote management account ........................................................................................... 40
CREATION OF CUSTOM VOICE RECORDINGS ............................................................ 41
Record voice ...................................................................................................................... 41
Create voice....................................................................................................................... 42
TRANSFER AND AUDIO FILE TO CONTROL UNIT ........................................................ 43
VOCAL CUSTOMISATION OF THE ZONES .................................................................... 44
VOCAL CUSTOMISATION OF THE OPEN COLLECTOR OUTPUTS .............................. 44
WEB SETTING .................................................................................................................. 45
MAP SETTING .................................................................................................................. 46
MAP CUSTOMIZING ......................................................................................................... 46
XTREAM FIRMWARE UPDATE ........................................................................................ 49
Recommendations and frequent problems ........................................................................ 50
XWIN TO HPWIN UPDATE ............................................................................................... 51
PROGRAM OPTION ......................................................................................................... 51
UPDATE USING ZIP FILE ................................................................................................. 51
XWEB FIRMWARE UPDATE ............................................................................................ 52
SERIAL PERIPHERAL FIRMWARE UPDATE .................................................................. 53
Procedure if connected to XSATHP: .................................................................................. 53
DEVICE FIRMWARE UPLOAD CONNECTED TO XTREAM ............................................ 55
30
DESCRIPTION
XWIN is the advanced software for complete programming of the Xtream control unit, both
with direct connection using USB cable, and remotely using a universal 56K modem or
using the GSM channel. XWIN allows updating control unit firmware with direct connection
on control unit through USB port.
The software also has the possibility of viewing system status in real time and giving an
indication about instantaneous consumption of the control unit and the various pieces of
equipment. Besides this, it is possible to have complete control of input and output status
and it is also possible to intervene, locally or remotely, switching on/off the system. All
operations are subordinate to inserting an enabled User code.
The REAL TIME mode is the new AVS dynamic remote management that allows
monitoring and managing each individual system at 360°.
SYSTEM REQUIREMENTS
• Windows 95B - 98E - 2000SP3 – ME - XP SP1 – VISTA - SEVEN
• Modem compatibility: standard modem V.90
• Control unit compatibility: XTREAM
E
N
G
31
INSTALLATION AS ADMINISTRATOR
Simplified product installation includes a self-installing CD-ROM.
Once the procedure is started, it proposes whether the user wants to proceed as
ADMINISTRATOR or USER.
Select "ADMINISTRATOR".
At this point is it necessary to set a password that will be necessary to protect the
software.
Also set the "Name" field.
If necessary, change the language (default is Italian), it is possible to select between
English and French.
Press “OK” to complete the procedure
32
INSTALLATION WITH PC SYNCHRONISATION OPTION
There are two possible ways to guarantee synchronisation between multiple PCs where
XWin
is
installed.
Both require that only one PC has XWin installed as administrator and all the other ones
are installed as User.
The administrator installation acts as master, while all the other ones are slave.
1^ solution USING USB pen drive
- The master (admin) loads client master files and the list of slave devices on the "Account
Management" panel (the master knows the codes and passwords of all slave devices)
- once this is complete, for each slave one must export the data (using the specific function
on the "Remote User Management" grid) and distribute the zip files that have been created
for each installer (a specific one for each, passing it by way of USB pen drive) that will
proceed with import using the specific function from the Account Management panel of
their XWin (which must be in USER mode).
- when an installer updates the programming, he must enter the "Account management"
panel and export the zip file with the updates. This zip file must be imported by the master
(only he can do it), who must also redistribute updates to all slaves following the same
procedure
from
the
previous
point.
(The scene is this: each installer, when coming by the company, unloads his updates on
the master and, before going out to a client, downloads the most updated version of the
program
from
the
master).
Currently user accounts (slave) cannot create new master files since the master controls
what customers are to be loaded.
2^ solution THROUGH Internet: Synchronise function
This solution is very similar to the previous one, the difference is that the installer does not
need to be physically present at the company in order to "synchronise" his slave with the
master. The negative aspect is that it requires an ftp shared between master and slave.
The prerequisite is therefore that of having an ftp server (internal to the company or
external, see aruba) that functions as a shared archive.
The access data for the ftp area must be configured on both the master and the various
slave machines at initial configuration, or through the "Account Management" panel.
Once the ftp server is configures, it is possible to synchronise master and slave simply by
using the Synchronise panel in Xwin (naturally one must be connected to the internet).
33
E
N
G
INITIAL SCREEN
Control unit Master files: in this menu it is possible to organise the various customers
Program Options: in this menu it is possible to select the Up-Grade procedure of the
Xwin software.
Connection Management: in this menu it is possible to set the mode for connection with
the control unit (RS232 – telephone line – USB)
Account Management: In this menu it is possible to configure connection account if the
software is installed on network servers
Synchronise: in this menu it is possible to start synchronisation between data on the pc
and what is found on the remote server.
Exit: exits the program
PROGRAM OPTIONS
Select the desired update mode:
Update Through internet / Update through Zip file
34
UPDATE USING ZIP FILE
Once this update mode is selected, it opens "load
update form file".
At this point it is necessary to load a file what must
be previously downloaded from the Avs electronics
website in the download area.
DO NOT UNCOMPRESS THE FILE,
but simply copy it on the PC where the Xwin is the
be up-graded
UPDATE USING INTERNET
If the PC is connected to internet, once this update
mode is selected, it is possible to select "START"
and the software will connect to the servers for
automatic download.
CONTROL UNIT MASTER FILE
Once this step is selected, it is possible to open
and existing client or create a new client:
Suspend: select the client and subsequently the
item "suspend", the client will be moved from the
main view to a secondary one.
In order to view the list of suspended clients it is
sufficient to click on “display suspended clients”.
In order to go back to the main screen, select
“show active clients”.
New: select new to create a client
In order to create a new client it is necessary to fill
out at least one field:
Code: insert a number value that will identify the
client
Name: Insert the name assigned to the client
All other fields are optional Next: to complete client
creation and pass to the next mask.
35
E
N
G
XWIN FUNCTIONS
: go back to the main menu
Show/Modify: accesses the control unit programming parameters
Print Programming: allows printing programming of the control unit by selecting the
desired sections.
Archive/Save: it is possible to save the various programming modifications by inserting
notes. The programs are saved automatically after each alignment.
DB Archive: in this menu it is possible to view all automatic saves not carried out for this
client. It is then possible to recover a specific save and "load it" to then transfer it to the
control unit.
Load from File: allows loading a saved client.
Save on file: allows saving a client
Update Firmware: allows updating the firmware version of the control unit. Before
entering this menu it is necessary to previously download the ".bim" file from the download
area of the AVS Electronics website.
This function requires carefully respecting certain operations that must be carried out in
succession; we request that you refer to instructions dedicated to this procedure.
VOICE
RECORDINGS:
allows
transferring
“file.wav” recordings from PC to control unit and
vice versa.
Update Voice recordings: allows changing the
entire voice recording packet to load the language
of another nation.
Add single: allows loading a single voice
recording.
Manage archive: allows creating a list of files and
transferring them to the control unit.
Note: the file transfer occurs through USB / PSTN /
GSM connection.
Create Voice: allows opening an application for creating .Wav vocal recording from text.
The language that the text files are converted into must be previously loaded and selected
in PC settings.
Record Voice: opens the sound recorder and allows recording a .Wav file if the PC is
equipped with microphone.
36
PROGRAM / CONNECTION TRANSFER
Align PC: allows transferring the program located on the control unit to the computer
Align Control unit: allows transferring programming from the computer to the control unit
SPOT Alignment: allows connecting with the control unit and displays the programming.
Changes made on the Xwin change colour to indicate that they have been changes. The
program is transferred when synchronisation is activated.
In order to align the system it is fundamental to already have activated:
Communication code in the control unit in order to
activate the USB connection
On the control unit and the PC, set the remote
management account the same as the Xwin client
code
Connection with Xtream 640 (with master before to MA00512)
Before connecting the USB cable to the computer it is necessary to activate the USB
connection:
Type the communication code (USB CONNECTION - ENT) - press ENT
The following appears on the display (>>>> USB CONNECTION)
Connect the USB cable to the PC
Connessione con Xtream 64-32-6 Xtream640 (with master after MA00512)
Connect the USB cable to the computer
Type the communication code (USB CONNECTION - ENT) - press ENT
The following appears on the display (>>> USB CONNECTION)
REAL TIME mode: allows connecting to the control unit in real time and viewing system
status; consumption - fuse status, telephone control - input status – output status and
events history file control.
Note: in order to activate this function it is fundamental that the user code used for this
function is enabled for RTC function.
NOTE: This manual does not describe control unit programming steps; they can be
verified on the installer manual attached to the control unit.
For additional information, contact the technical office the following phone number 049
9698 444 or by e-mail at [email protected]
37
E
N
G
QUICK COMMANDS (Programming shortcuts)
In the zones menu there is a possibility of opening summary masks by option types.
Right clicking with the mouse on each option, it is possible to simultaneously program the
desired function on multiple zones simultaneously.
E.g.. Enable “Signal Tamper”.
E.g. enable “Signal Tamper” simultaneously on multiple zones.
Once the various zones are enables, press “OK” to confirm.
COPY PROGRAMMING - GRID MODE
COPY key
GRID Mode
38
COPY
This opportunity is also present in other menus (zones – o.c. – user – telephone numbers)
and allows copying set attributes for a “zone, o.c., user, telephone number” on another
“zone, o.c., user and telephone number”.
No elements are copied and in particular for:
Zones: - the link between “software” and "physical input" - the zone string
O.C.: - the o.c. string
User: - the user code value - the user string
Telephone numbers: - the value of the telephone number
Select the zones
where the attributes
are to be copied on
Confirm changes
Cancel changes
E
N
G
GRID MODE
This opportunity allows programming/viewing multiple zone attributes simultaneously in a
single screen.
Property list
Cancel changes
Confirm changes
39
ACTIVATE PROGRAMS
Communication Code
it must be programmed in the control unit in order to complete USB connections.
Entered on the control unit keypad, it can activate interactive programming through USB
connection; it is not programmed in the factory,
it is necessary to set a value from the "Installer" menu to activate it.
Programming sequence in the control unit, with keypad:
Inst. code Service codes Communication codes: set the same value that is
inserted in XWIN
Access Password
It is a numerical password composed of 6 digits; by default 000000. This password
enables the computer to be recognised by the control panel to cause a return call (CALL
BACK) for the re-programming.
Programming Password
It is a numerical password composed of 6 digits; by factory default 000000. It is the
password that the computer compares with the control panel before aligning programming.
For the full enabling of the alignment it is necessary that the Access Password and the
Programming Password programmed in control panel, be the same to those
programmed in the computer for the selected client. The date of the control panel must
coincide with that on the PC.
Remote management account
THE ACCOUNT CODE MUST CORRESPOND
TO THE XWIN CLIENT CODE
even for direct connections using USB cable.
40
CREATION OF CUSTOM VOICE RECORDINGS
Using the control unit it is possible to save additional voice recordings that can be used to
increase the vocal vocabulary of the control unit.
Memory characteristics:
- Maximum of 40 saves
- Maximum time for recording an individual memory is equal to 30 seconds
- Maximum total recording time is equal to 120 seconds.
There are two ways to create additional voice recordings:
- Record Voice
- Create Voice:
Record voice
This opportunity activates a tool on the PC that allows recording a word/phrase directly
using a microphone connected to the computer.
This Windows® application allows creating an audio.waw file; with this tool it is possible to
both create the presentation voice recording and individual additional voice recordings.
E
N
G
41
Create voice
This opportunity activates a second tool that allows transforming a phrase/word typed into
the PC into vocal.
Before using this option, it is fundamental to verify that language settings are programmed
on the computer.
Substantially, it is necessary to verify that an Italian voice is loaded, better if female, to be
in line with vocal recording set in the control unit.
Note. Computers, even if sold in Italy, have an "American" voice recording preloaded.
Here below is a list of a few websites where it is possible to purchase voices:
- http://www.nextup.com/ - http://www.nextup.com/scansoft.html
- http://www.cepstral.com/ - http://www.cepstral.com/downloads/
Select “Create voice recording”, set the Italian voice and start entering text that is to be
transformed into an audio.waw file.
2
Select desired
language
1
At this point it is possible to proceed by entering the text to be converted into audio-file.
Volume: changes the audio volume
Speed: varies text reading speed
In order to listen to the audio file it is sufficient to click on “Preview”;
if the audio reproduction is as desired, it is possible to proceed with saving by clicking on
“Save to file”.
42
TRANSFER AND AUDIO FILE TO CONTROL UNIT
It is possible to transfer .waw files one at a time by clicking on “Add Single”, or creating a
list of files in succession and carrying out a single transfer operation.
It is possible to add files at a later time by following the same procedure.
It is not possible to delete a single file, but the procedure allows simultaneously deleting
the entire custom audio memory.
Select “Manage archive”.
The software requires connection with the control unit, once established,
it opens a mask for “Custom voice recordings archive management”.
The green (+) symbol indicates that it is possible to add a voice recording.
The left side indicates the number of the transferred voice recording and the "description"
field.
The description field is a field that completes automatically, taking the name of the .waw
file; for this reason it is recommended to save the various audio files giving them a name
that reminds of the recording completed.
This field is then managed in other parts of the program, offering a valid help in managing
custom voice recordings.
Once the list has been created, it is possible to proceed with transferring voice recordings
from the PC to the control unit by clicking on “Save modifications”.
To create a list of voice recordings to be transferred
1
Space reserved for a description of the file transferred
2
In order to add a voice
recording to the list
To delete all voice recordings
To transfer voice
recordings
3
43
E
N
G
VOCAL CUSTOMISATION OF THE ZONES
The input alarm / reset communications are normally made automatically by XTREAM in
relation to the type of line set during SIA coding (ex. theft line or gas line, etc.) and the
zone number.
It is possible to add four custom communications to the standard communication for each
individual zone.
Should it be necessary to customise the XTREAM communications relating to the zones,
by creating an additional message to the standard one, it is possible to access the prerecorded work library.
For customising zone voice
recordings it is sufficient to:
Click on the word twice
Drag the word
VOCAL CUSTOMISATION OF THE OPEN COLLECTOR OUTPUTS
If necessary to customise XTREAM communications related to the outputs, it is possible to
access the library of pre-recorded words.
If a vocal description made of multiple words is
required, for example "first floor heating", one
must record and additional voice recording
44
The control panel can manage the WEB SERVER INTERFACE (mod.XWEB)
The “XWEB” interface enables the LAN network connection of the XTREAM stations.
Through a common WEB BROWSER installed on a PC, net PC, I Pad ® or I Phone ®, the
integrated web server allows the connection to the local station through a LAN/WLAN network or remotely from an ADSL line, and to carry out the following functions:
• Check real-time system status on preloaded graphic map
• System activation and shut down • OC outlets activation and deactivation.
• Communication port: LAN, TCP- IP ETHERNET
• Browser Compatibility: IE 8.0®, Firefox 3.5®, Safari Mac and Pc 5.0®, Chrome 7®
• Operating system: Windows CE®
Note: ® the brands mentioned belong to the respective owners
WEB SETTING
This part of the programming allows to manage the IP setting.
-
IP Setting
Use DHCP: Use the DHCP server for IP setting
IP Address: It is the IP address to connect the board Xweb
Gateway: Technical parameter network
Primary DNS: Technical parameter network
Secondary DNS: Technical parameter network
-
Server setting:
Web port: Access port using the browser; usually it is setted on 80
Socket port: Access port using the AVS protocoll.
Installer password: Authentication code for the publication of graphic maps
User management password: Master authentication code for logging user password
-
Dinamic DNS setting:
Provider
Host
Username
Password
Note: contact the network operator for the value
45
E
N
G
MAP SETTING
This part is dedicated to the upload of the MAP
file and to the personalization of the MAP with
icons of zones – outputs – partitions – accessories.
Features of the file:
- File extension: JPG
- Resolution: 1024 X 768
Map upload:
1 Select “ + “
3
2
4
1
Search in
2 Select the directory of the immage
Map name
3 Write the map name that will be indicated on the
web.
4 Push “OK“ to confirm.
When the map is upload, it is possible upload the icons of zones – outputs – partitions – accessories.
MAP CUSTOMIZING
Select the map and click your right mouse button
1
Add icon here
2
Confirming you want to add an icon, it opens the menu "New Icon"
46
Type and subtype:
- System
o
Control panel
o
Keypad
o
Satellite
o
Reader
Number
Description
Icon
- OC – Output
o
Numer
o
Description
o
Bypass timeout lock:
allows you to activate the output without
having to digit your user code to unlock
timeout.
o
Icon
- Zone
o
Numer
o
Description
o
Icon
- Partition
o
Numer
o
Description
o
Icon
Map management
- New map: allows to create a new map, and
delate the old.
- File upload: allows to upload a map using a
saved file.
- Save on file: allows to save the map.
Note: save the work make, if you will have a problem
with PC, you will lost the setting done.
47
E
N
G
Publication
Link the installer logo:
Allows to upload an installer logowhich
will be published on the left of the
XWEB logo. The logo must be sized
(157x57) and must be a file.PNG
Map Upload …
Enable buttons: you can select which buttons you
want to activate.
Home: you can select which i the first page after login
Map options: you can select the rotation between the
maps and the timing switch.
Block command options: you can select the block of
the commands after an execution of some function and
the timing of the block.
Installer logo (Click to change): you con change the
uploaded installer logo.
Upload: allows to upload the map.
Host: enter the XWEB IP address followed by “:” and
the XWEB port (es: http://192.168.0.110:80)
Password: enter the installer password that you have
created programming the XWEB page.
48
XTREAM FIRMWARE UPDATE
Proceed in order to update the firmware for XTREAM640 control units
Download the firmware update file from the www.avselectronics.com website.
Download the file to a folder on the computer, it is possible to use a pre-existent folder,
otherwise a new folder can be created as needed, for example, this text will use the folder
C:\XTREAM640
From the programming menu of the control unit, select "Firmware Update" and
complete the procedure as described in the installer manual
Only now connect the USB cable between the control unit and the PC
Start the XWIN program and select the code assigned to the control unit in the client
master file
From the functions panel select “Update Firmware”
At this point the program requests for the file to
complete the update
Select the C:\XTREAM640 folder; inside there is a
list of files with “bim” extension that are related to
available firmware updates; in this example, the
update file is called xtream_1.0p1_xwin.bim
Double click on this file
The program with start running and in a window it
will quickly display numerical data; the process
typically lasts about a minute.
At the end, the program will warn about
disconnecting the USB cable from the control unit
and then press RESET on the control unit.
The program can now be closed
The control unit will restart with the new firmware; wait for the control unit and its
peripherals to initialise; as an additional confirmation that the procedure was completed
correctly, enter the installer menu, select the “Eprom Version” and verify that the data
shown corresponds to the file version selected in point 8.
Programming data will not be deleted; it will only update the control unit firmware
version.
49
E
N
G
Recommendations and frequent problems
Previously verify the validity of the USB connection and the correct operation of the drivers
loaded into WINDOWS©® for the Xtream control unit: for this purpose, use the XWIN
program to carry out a few operations, for example "Align control unit", "Align PC", "SPOT
Alignment" or finally, "REAL-TIME Mode"
The update program can show error messages, or the update process may be extremely
slow: it is recommended to repeat the procedure from the beginning, with these
preliminary warnings:
- Close the update program
- Disconnect the USB cable from the PC
- Close the XWIN program
- Press the RESET button on the control unit
If unable to complete the update, it is recommended to contact AVS Customer Service.
50
XWIN TO HPWIN UPDATE
In order to have the XWIN manage digital peripherals (Outspider – BM..HP) it is necessary
to update using the enable_ hpwin.zip file.
Proceed as indicated:
PROGRAM OPTION
Select the update mode: Update through Zip file
UPDATE USING ZIP FILE
Once this update mode is selected, it opens "load
update form file".
At this point it is necessary to load a file that must
be requested from the distributor.
DO NOT UNCOMPRESS THE FILE, but simply
copy it on the PC where the Xwin is to be upgraded to HPwin.
Follow the procedure suggested by the program.
At this point, when creating a client, it is possible to
associate the same "code" both to the control unit
and the HPWIN, this is fundamental is handling a system remotely using the control unit as
a tool for connection with digital peripherals.
Code associated
with two devices
When selecting the client, the software will request selection of the device to be
programmed.
Select the device to proceed
51
E
N
G
XWEB FIRMWARE UPDATE
You can upload XWEB using a USB key.
In order to complete this procedure it is necessary to have the following
available:
• USB Key
•
File firmware: “avsxweba.bin”
Procedure:
1. Copy the firmware file “avsxweba.bin” on the root of the USB key.
2. Be sure that XWEB is enabled into the control panel, and working; for this you should
see XWEB LEDs named 'D' and 'E' lighted, and slightly blinking.
3. Plug the USB stick into XWEB USB receptacle; the stick's internal LED should blink for
some seconds, confirming it was recognized by XWEB
4. Set XWEB DIP switch #1 to ON position with a narrow screwdriver
5. Now wait some seconds; at some point, you should see LEDs 'B' and 'C' blinking alternatively, and this will last more or less one minute; after that time, blinking will stop, meaning operations completed well.
OFF 1
4
6. Carefully set DIP #1 to OFF position
7. Unplug the USB stick
8. Press the reset button on the control panel;
the XWEB leds will turn off, after 1 minutes the system will work again.
52
SERIAL PERIPHERAL FIRMWARE UPDATE
OutSpider PA-DT
BM60-120-200HP
Firmware update procedure:
It is possible to update serial peripheral firmware though direct connection with the PC.
In order to complete this procedure it is necessary to have the following available:
- PC with USB ports
- HPWIN Software installed on the PC
- USB connection cable
- Satellite FIRMWARE file that is available on the www.avselectronics.com website
Procedure if connected to XSATHP:
1. Close bridge S4 to activate the USB connection
2. Connect the USB cable to the PC
3. Carry out the guided update procedure from HPWIN:
- Start the XWIN program and select the code assigned to the XSATHP satellite in the
client master file.
1- From the functions panel select “Update Firmware”
2a- select the connection type and if it is “XSATHP or serial
Peripheral”
Direct if directly connected to the peripheral.
Satellite 1. if the sensors are “connected” to a satellite, even the
virtual one.
2b- Select the peripheral to be updated
3- Confirm
4- Select the C:\XXXXXXX folder; inside there is a list of files
with “bim” extension that are related to available firmware updates; in
this example, the update file is called “Peripheral”_Vx.xpx.bim and
double click this file;
53
E
N
G
The program with start running and in a window it
will quickly display numerical data; the process
typically lasts about a minute.
4. Disconnect the cable at the end of the procedure
5. Open bridge S4 to deactivate the USB connection
6. Press and release the RESET button on the satellite board
54
DEVICE FIRMWARE UPLOAD CONNECTED TO XTREAM
From the version 1.1p2 of the control panel you can make the automatic upload of device
connected using RS485. During the upload, the keypad display will show “Aggior, perifer.”
This procedure allows to upload: Keypads and devices connected to RS485
PROCEDURE
- Download these files those are available on the www.avselectronics.com website:
o Xwin up-grade,
o Xtream up-grade
o The device firmware file.
- Upload Xwin to the new version.
- Upload the control panel firmware
- Transfer the device up-grade file in the control panel.
o Click “upload device” (ITA: Aggiorna periferiche)
o Click “upload file” (ITA: Carica File)
o Select the file “device firmware file”
o Click “Start Programming” (ITA:Avvia programmazione” )(in USB mode don’t select codes)
- Wait the processing.
When the processing is ended,
The control panel will upload all the device connected.
55
E
N
G
Via Valsugana, 63
35010 (Padua) ITALY
Tel. +39 049 9698 411 / Fax. +39 049 9698 407
[email protected]
www.avselectronics.com
[email protected]
56
Scarica