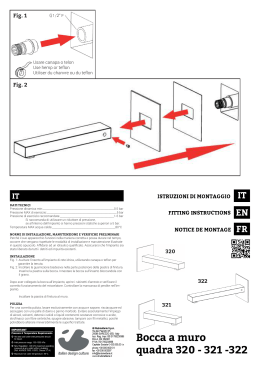
MA 01.03.01.360.15
26.10.2006
14:11 Uhr
Seite 1
Aloys F. Dornbracht GmbH & Co. KG Armaturenfabrik Köbbingser Mühle 6 D-58640 Iserlohn
Telefon +49 (0) 23 71 - 433 0 Fax +49 (0) 23 71 - 433 232 E-Mail [email protected] www.dornbracht.com
D
Zentraler Kundenservice
www.dornbracht.com
Tel. +49 (0) 2371 433 480
Fax +49 (0) 2371 433 175
A
Vertriebsbüro Österreich
Tel. +43 (0) 2622 255 480
AMÉRICA CENTRAL
Dornbracht México S.A. de C.V.
Tel. +52 55 534 323 22
ASIA PACIFIC
Dornbracht Asia Pacific Ltd.
Tel. +852 2505 6254
Gils & Gils B.V.B.A.
Tel. +32 (0) 3 235 2521
Sadorex Handels AG
Tel. +41 (0) 62 787 2030
Maria Kramárová
Tel. +42 (0) 233 372 617
E
Dornbracht España, S.L.
Tel. +34 93 272 3910
F
Dornbracht France SARL
Tel. +33 (0) 1 60 95 93 10
GB
Splash Distribution Ltd.
Tel. +44 (0) 1444 473 355
GR
R.N. Saltiel Commercial Agencies
Tel. +30 (0) 31 532 982
B
L
CH
CZ
SK
I
Marquardt s.a.s.
Tel. +39 02 3351 2028
LI
Naji Kanafani & Fils
Tel. +961 (1) 307 400
NL
Burgmans Agenturen B.V.
Tel. +31 (0) 10 450 8451
P
gdesign
Tel. +351 219 498 210
PL
Honorata Broniowska
Tel. +48 (0) 95 728 2617
Irena Jesenšek
Tel. +386 1 283 3636
OSA Trading
Tel. +49 (0) 2371 23311
SLO
RUS
HR
TR
KENT YAPI SANAYI
Tel. +90 216 363 2241
UA
Alexej Khelemendik
Tel. +38 (0 ) 44 490 8189
USA
Dornbracht USA, Inc.
Tel. +1 800 774 11813
YU
Nenad Djukic
Tel. +381 63 849 5603
ZA
Neumann Sanitary Ware (Pty) Ltd.
Tel. +27 (0) 11 462 2189
01.03.01.360.15/04.2005 // headline:Werbeagentur . Iserlohn
Service
Pflege- und Wartungstips entnehmen Sie bitte der beiliegenden Broschüre. // Verzorgings- en onderhoudstips
vindt u in de bijgevoegde brochure. // Vous trouverez des conseils d’entretien et de maintenance dans la brochure
ci-jointe. // Tips on care and maintenance for your new product can be found in the Finished Excellence brouchure. //
Per consigli sulla cura e manutenzione si rimanda all’allegato opuscolo. // Sugerencias para la conservación y el
mantenimiento puede tomarlas del folleto adjunto.
Montageanleitung
MontáÏní návod
Instrucciones de montaje
Instructions de montage
Installation instructions
Istruzioni di montaggio
Montageaanwijzing
Instrukcja monta˝u
сук
о оу
Monteringsanvisning
Assembly Instructions
Montageanleitung
25.943.360. // 35.943.970.90
Garantie nur bei Montage durch einen Fachinstallateur //
// Záruka pouze při montáÏi odborn˘m instalatérem // La garantía es
efectiva sólo quando el montaje haya sido realizado por un profesional del ramo // La
garantie n'est accordée qu'en cas de montage par un installateur spécialisé //
Installation by unqualified person will void the warranty // Garanzia valida soltanto se
il montaggio è stato eseguito da un idraulico specializzato // Garantie slechts bij
montage door een erkend installateur // Gwarancja wyst´puje tylko w przypadku
monta˝u przez wykwalifikowanego instalatora // Г
олко о
слсо // Garantin gäller endast vid montering av fackinstallatör // Installation
by unqualified person will void the warranty
26.10.2006
14:11 Uhr
Seite 3
1.0 LIEFERUMFANG
Wannenfüll – und Brausebatterie 1/2"
mit Standrohr
35.943.970.90
- Bausatz Vormontage
25.943.360.FF
- Bausatz Endmontage
890
730
120
MA 01.03.01.360.15
90
245
75 60
250
150
100
Abstandhalter
D
ACHTUNG Bei höherem Fußbodenaufbau
müssen die Gewindestangen bauseits
verlängert werden.
Bausatz Vormontage 35.943.970.90
Grundplatte komplett, einschließlich
2 x Anschlusswinkel 1/2"
Isolierhauben für Anschlusswinkel
Gewindestangen M 8
Schutzhülsen ø 8 mm
Abstandhalter
Befestigungssatz
2 x Hahnverlängerung 1/2", 25 mm
2 x Hahnverlängerung 1/2", 50 mm
150
3.0 VORMONTAGE
max. Fußbodenaufbau 120 mm (OKFFB)
Stichmaß und Verstellbarkeit entnehmen
Sie bitte den Maßzeichnungen.
Abb. 1
Bausatz Endmontage 25.943.360.FF
Batterie komplett, einschließlich Standrohre mit
Steckanschluss 1/2"
2 x Anschlusswinkel
2 x Keramik Innenoberteil 1/2"
Brauseschlauch 1/2", 1250 mm
Handbrause 1/2"
Brausehalter
1/2"
Grundplatte entsprechend der Lage der
Zuleitungen auf den Betonboden legen.
Mögliche Unebenheiten im Rohfußboden (Beton)
vorher beseitigen.
Befestigungspunkte markieren.
Bohrungen für Dübel S 10.
Gummischeiben unter die Grundplatte legen und
die
Platte mit den beiliegenden Schrauben befestigen.
Grundplatte genau auswiegen.
Zuleitungen anschließen.
Kalt – rechts; Warm - links
Isolierhauben über die Anschlusswinkel stecken.
Anschlusswinkel mit den Baustopfen verschließen. und auf Dichtheit prüfen.
Estrich einbringen.
Abb. 1
Bausatz Vormontage nicht im Lieferumfang
enthalten.
ACHTUNG Um eine ausreichende Auflage
der oberen Halteplatte zu erreichen, muss der
Estrich vollflächig bis an den Baustopfen
geführt werden.
Baustopfen 1/2"
Abstandhalter
Isolierhaube
130
Gewindestange
M8 mit Kunststoffhülsen
8
Anschlusswinkel
1/2"
2.0 BETRIEBSBEDINGUNGEN
Empfohlene Vorlauftemperatur
Maximale Vorlauftemperatur
Mindestfließdruck
Maximaler Fließdruck
Empfohlener Betriebsdruck
Prüfdruck
65 °C
80 °C
1 bar
10 bar
1 - 5 bar
16 bar
Gummischeiben
Bei Ruhedruck über 5 bar empfehlen wir den
Einbau eines Druckminderers, entsprechend
DIN 1988 in die Versorgungsleitung.
Die Armaturen sind nicht geeignet für die
Verwendung von drucklosen
Heißwasserspeichern.
1/2"
Bei neuinstallierten Leitungsnetzen ist nach
DIN 1988 vorzugehen.
Abb. 2
Hinweis für Fliesenleger unbedingt beachten:
Bohren Sie den Fliesenausschnitt Mitte der
Baustopfen mit einem ø = 53 - 55 mm.
Die Ausschnitte für die Gewindestangen
müssen dann separat ausgeführt werden.
Das Maß ist genau einzuhalten, damit für den
Bodenflansch der Standrohre noch genügend
Auflagefläche vorhanden ist.
Abstandhalter nach Verfliesung wieder auf die
Gewindestangen schrauben.
Abb. 3
MA 01.03.01.360.15
26.10.2006
14:11 Uhr
Seite 5
4.0 ENDMONTAGE
Überwurfmuttern und Bodenrosetten auf die
Standrohre schieben.
Anschlusswinkel aufschrauben.
ACHTUNG
Linksgewinde
Abstandhalter von den Gewindestangen entfernen, Kunststoffhülsen auf den Gewindestangen
bis auf OK Fliesen kürzen.
Gewindestangen bei Bedarf kürzen.
Länge über OKFFB = 15 mm.
Wasser absperren und Baustopfen entfernen.
Anschlüsse mit Hahnverlängerungen hochführen.
Steckanschlüsse montieren.
D
Endbauhöhe:
Hahnverlängerungen plus eingeschraubten
Steckanschluß = 40 - max. 44 mm über OKFFB.
Abb. 4
Bodenflansch auf die Gewindestangen
stecken und festschrauben.
Umlaufend siliconieren.
Abb. 7
Standrohre auf die Steckanschlüsse schieben
und mit den Überwürfen festschrauben.
ACHTUNG O-Ringe müssen vorher etwas
gefettet werden.
Armatur an die Anschlusswinkel montieren,
Wasser aufdrehen und Montage auf Dichtheit prüfen.
Bodenrosette über die Verschraubungen schieben.
Auflegegabel, Brauseschlauch und Handbrause
montieren.
Abb. 5
40 - max. 44 mm
Abb. 6
Abb. 8
26.10.2006
14:11 Uhr
Seite 7
1.0 OMVANG VAN DE LEVERING
Badvul - en douchemengkraan 1/2" met
standpijp
35.943.970.90
- inbouwset
25.943.360.FF
- eindmontageset
890
730
120
MA 01.03.01.360.15
Inbouwset 35.943.970.90
bodemplaat compleet, inclusief
2 x verbindingshoek 1/2"
isolatiekappen voor verbindingshoeken
schroefdraadstangen M8
beschermingshulzen ø 8 mm
afstandhouders
bevestigingsset
2 x kraanverlenging 1/2", 25 mm
2 x kraanverlenging 1/2", 50 mm
Zie afb. 1
90
245
75 60
150
250
150
100
Afstandhouders
1/2"
Eindmontageset 25.943.360.FF
mengkraan compleet, inclusief standpijpen met
schuifaansluting 1/2"
2 x verbindingshoek
2 x keramisch binnenwerk 1/2"
doucheslang 1/2", 1250 mm
handdouche 1/2"
douchehouder
Inbouwset behort niet tot de omvang van de
levering.
130
Schroefdraadstangen M8
8
Verbindingshoek
1/2"
Rubberen schijven
2.0 BEDRIJFSVOORWAARDEN
Aanbevolen voorlooptemperatuur
Maximale voorlooptemperatuur
Minimale stromingsdruk
Maximale stromingsdruk
Aanbevolen werkdruk
Controledruk
65°C
80 °C
1 bar
10 bar
1 - 5 bar
16 bar
Bij een rustdruk hoger dan 5 bar adviseren we de
inbouw van een drukreducerdeel volgens DIN
1988 in de distributieleiding.
De kranen zijn niet geschikt voor het gebruik van
drukloze boilers.
1/2"
LET OP Bij een hogere opbouw op de vloer
moeten de schroefdraadstangen tijdens de
montage worden verlengd.
Bodemplaat afhankelijk van de positie van de
toevoerleidingen op de betonvloer leggen.
Mogelijke oneffenheden in de ruwe vloer (beton)
vooraf verwijderen.
Bevestigingspunten markeren.
Gaten voor pluggen S 10.
Rubberschijven onder de bodemplaat leggen
en de plaat met bijgevoegde schroeven bevestigen.
NL
afb. 1
Bodemplaat nauwkeurig afwegen.
Toevoerleidingen aansluiten.
koud - rechts; warm - links
Isolatiekappen over de hoekaansluitingen schuiven
Hoekaansluitingen met hulzen afsluiten en op
dichtheid controleren.
Estrik aanbrengen.
LET OP Om ervoor te zorgen dat de
sluitplaat voldoende aansluit, moet de estrik
volledig tot aan de huls worden gevoerd.
Montagestop,1/2"
Afstandhouders
Isolatiekappe
3.0 VOORMONTAGE
Maximale vloeropbouw 120 mm (OKFFB).
Zie voor de schaal en de verstelbaarheid de
tekeningen op schaal.
Voor nieuw geïnstalleerde leidingsnetten geldt
DIN 1988!
afb. 2
Let goed op de aanwijzingen
voor tegelleggers:
Boort u de tegeluitsparing in het midden van
de hulzen ø = 53 - 55 mm.
De uitsparingen voor de draadstangen
moeten dan afzonderlijk worden uitgevoerd.
Aan de maten moet nauwkeurig de hand
worden gehouden, zodat voor bodemflens van
de standpijpen nog voldoende plaats is.
Schroef de afstandshouders na het leggen van
de tegels weer op de draadstangen.
afb. 3
MA 01.03.01.360.15
26.10.2006
14:11 Uhr
Seite 9
4.0 EINDMONTAGE
Zie voor de precieze afmetingen van de mengkraan de tekeningen op schaal.
Schuif de wartels en vloerrozetten op de
standpijpen.
Schroef de hoekaansluitingen vast.
LET OP linkse schroefdraad
Afstandhouders van de draadstangen verwijderen,
kunststofhulzen op de draadstangen tot op
bovenzijde tegels afkorten.
Draadstangen naar behoefte inkorten.
Lengte boven OKFFB = 15 mm.
Water afsluiten en hulzen verwijderen.
Aansluitingen met kraanverlengingen
naar boven geleiden.
Monteer de steekaansluitingen.
Inbouwhoogte:
Kraanverlengingen plus ingeschroefde
schuifaansluiting = 40 - max. 44 mm
boven OKFFB.
afb. 4
Schuif de vloerflens op de draadstangen en
schroef deze vast.
Rondom kitten.
NL
afb. 7
Standpijpen op de schuifaansluitingen schuiven
en met de wartels vastschroeven.
LET OP O-ringen moeten vooraf iets
worden ingevet.
Monteer de armatuur aan de hoekverbinding en
completeer deze met oplegvork, doucheslang en
handdouche.
Draai het water open en controleer de montage
op dichtheid.
Schuif de vloerrozet over de schroefverbindingen.
afb. 5
40 - max. 44 mm
afb. 6
afb. 8
26.10.2006
14:11 Uhr
890
730
120
MA 01.03.01.360.15
90
245
75 60
150
250
150
100
Ecarteurs
Seite 11
1.0 PIÈCES LIVRÉES
Mélangeur bain avec tubes verticaux
35.943.970.90
- jeu de prémontage
25.943.360.FF
- jeu de finition
3.0 PRÉMONTAGE
Revêtement de sol maximal 120 mm (OKFFB).
Le calibre et l’ajustabilité sont indiqués dans les
dessins cotés
Jeu de prémontage 35.943.970.90
plaque de base avec
2 raccords angulaires 1/2"
calottes isolantes pour raccords angulaires
tiges filetées M 8
douilles de protection
écarteurs
lot de fixation
2 x rallonge pour robinet 1/2", 25 mm
2 x rallonge pour robinet 1/2", 50 mm
Voir ill. 1
ATTENTION En cas de revêtement de sol
plus élevé, les tiges filetées doivent être
rallongées.
Jeu de finition 25.943.360.FF
mélangeur complet avec
tubes verticaux avec raccord à emboîter 1/2"
2 raccords angulaires
2 têtes internes en céramique 1/2"
flexible de douche 1/2", 1250 mm
douchette à main 1/2"
support de douchette
1/2"
Le jeu de prémontage ne fait pas partie des
pièces livrées.
Bouchon d´obturation pour la durée
des travaux, 1/2"
Calottes isolantes
130
Ecarteurs
Tiges filetées M 8
8
Raccords
angulaires 1/2"
2.0 CONDITIONS DE FONCTIONNEMENT
Température aller recomandée
65 °C
Température aller maximale
80 °C
Pression minimale d´écoulement
1 bar
Pression maximale d´écoulement
10 bar
Pression de service recomandée
1 - 5 bar
Pression d´essai
16 bar
Disques de
caoutchouc
En cas de pression de repos supérieure à 5 bars,
l'installation d'un monodétendeur conforme
à DIN 1988 dans le conduit d'alimentation est
recommandée.
Les robinetteries ne conviennent pas pour
l'installation de chauffe-eau à accumulation
sans pression.
Mettre la plaque de base au sol de béton en
fonction des conduits d´alimentation après avoir
égalisé le béton (le cas échéant).
Marquer les points de fixation.
Forures pour chevilles S 10.
Mettre les disques en caoutchouc sous la plaque
de base et fixer la plaque avec les vis livrés.
ill. 1
Ajuster la plaque de fond avec précision.
F
Raccorder les conduits d'alimentation.
Froid - à droite, chaud - à gauche.
Mettre les douilles de protection sur les raccords
angulaires.
Fermer les raccords angulaires à l'aide des
bouchons d´obturation et vérifier l'étanchéité.
Mettre l'aire de repous en place.
ATTENTION Pour permettre un support
suffisant à la plaque supérieure, l'aire de
repous doit être étalé sur toute la surface
allant jusqu'aux bouchons d'obturation.
ill. 2
Avis important au carreleur :
Découper les carreaux céramiques au milieu
des bouchons d'obturation avec un diamètre
de 53 - 55 mm.
Faire séparément les découpures pour les
tiges filetées.
Il faut respecter ces mesures pour assurer un
support suffisant à la bride de fixation des
tubes verticaux.
Après le carrelage, remettre les écarteurs sur
les tiges filetées.
1/2"
Pour les réseaux de conduits nouvellement
installés, il faut procéder conformément à DIN
1988!
ill. 3
MA 01.03.01.360.15
26.10.2006
14:11 Uhr
Seite 13
4.0 MONTAGE DE FINITION
Pour les dimensions précises du mélangeur voir
dessins cotés.
Mettre les écrous d'accouplement et les
rosettes de base sur les tubes verticaux.
Visser les raccords angulaires.
ATTENTION
filet à gauche
Enveler les écarteurs des tiges filetées, raccourcir
les douilles en plastique sur les tiges filetées
jusqu'au bord supérieur des carreaux.
Si necéssaire, raccourcir les tiges filetées.
Longueur en dessus OKFFB = 15 mm.
Fermer l'alimentation en eau et enlever les
bouchons d´obturation.
Installer verticalement les raccords par les
prolongations du mélangeur.
Monter les raccords à emboîter.
Hauteur de montage :
Prolongation du mélangeur plus raccord
vissé = 40 - max. 44 mm en dessus OKFFB.
ill. 4
Mettre la bride de base sur les tiges de
fixation et la visser.
Isoler au silicone.
ill. 7
F
Emboîter les tubes verticaux aux raccords et visser par les écrous d'accouplement.
ATTENTION Les anneaux en O doivent être
légèrement graissés avant.
Monter le mélangeur aux raccords angulaires et
compléter par le support de douche, le flexible et
la douchette à main.
Ouvrir l'alimentation en eau et vérifier l'étanchéité.
Enfiler la rosette de base sur la fixation.
ill. 5
40 - max. 44 mm
ill. 6
ill. 8
26.10.2006
14:11 Uhr
890
730
120
MA 01.03.01.360.15
90
245
75 60
150
250
150
100
Distance piece
Seite 15
1.0 PARTS SUPPLIED
Bath and shower mixer, 1/2"
with floor risers
35.943.970.90
- concealed rough parts
25.943.360.FF
- exposed trim parts
3.0 PRE-INSTALLATION
Please refer to the drawing for the base
plate dimensions.
Concealed rough parts 35.943.970.90
Base plate assembly, including
2 angle connectors, 1/2" with mudguards
2 rubber insulation boots
6 threaded rods with protective sleeves, 8 mm
2 templates for tile cut out
Mounting kit for above plate
2 x tap extension 1/2", 25 mm
2 x tap extension 1/2", 50 mm
See Fig. 1
ATTENTION If longer length thread rods are
required, the customer must arrange for rod
extensions.
Exposed Trim parts 25.943.360.FF
Complete mixer, including
floor risers with 1/2" o-ring mounts
2 ceramic cartridges, 1/2"
1 aerator, M 24 x 1
Shower hose, 1/2", 49" long
Personal shower, 1/2"
Adjustable personal shower bracket
1/2"
Concealed rough parts must be ordered
separately from the trim parts.
Insulation cap
130
1/2" Installation
plugs
Distance piece
Threaded rods,
M8
15
145
72
232
Rubber Discs
It is essential that the sub-floor be perfectly level
before fastening the base plate.
Place the base plate on the subfloor with the
adjustable angle connectors lined up
to the supply lines.
Carefully attach the base plate to the subfloor
with the mounting kit.
Connect the angle connectors to the
water supply lines.
Cold - right; Hot - left.
Affix the rubber insulation boots
to the angle connectors.
Screw the mudguards into the angle
connectors and check for leaks.
Further installation requires finishing the floor.
Templates supplied must be used.
Fig. 1
US
ATTENTION In order to achieve sufficient
support for the mounting flange, the finished
floor has to cover the surrounding area of the
base plate.
psi
psi
psi
psi
8
connecting
angles 1/2"
2.0 OPERATING CONDITIONS
Minimum operating pressure
Maximum operating pressure
Recommended operating pressure
Maximum test pressure
To convert mm to inches multiply x 0,0394.
At operating pressure exceeding 72 psi,
Dornbracht recommends that a pressure reducer
be installed in the supply lines.
Using the tile templates centered on the angle
connectors cut the tile to a diameter
of 53-55 mm.
Additional cut-outs are necessary for the
threaded rods.
It is imperative that you leave sufficient
flooring for the floor flange.
Fig. 2
These fittings are not intended for use with
pressureless hot water heaters.
1/2"
Fig. 3
MA 01.03.01.360.15
26.10.2006
14:11 Uhr
Seite 17
4.0 FINAL ASSEMBLY
The following accessories may be ordered
separately for mounting on the mixer:
Soap dish
Towel bar
82.410.890.FF.
82.211.890.FF.
Accessories must be placed onto the mixer before the floor risers can be attached.
Remove the trim ring from the bottom of the
mixer and replace with the soap dish or towel bar.
The hand shower bracket may be changed from
the left riser to the right riser in the same manner.
Slide the union nuts and the decorative flanges
over the floor risers.
Assure that flange o-rings and risers are free of
any dirt.
O-rings must be properly lubricated to avoid
scratching the risers.
Screw the floor risers to the shower mixer body.
Cut the protective sleeves on the threaded rods to
the top of the finished floor.
Cut the threaded rods if necessary to a maximum
length above the finished floor of 15 mm.
Shut off the water supplies and remove the
mudguards.
Extend the angle connectors with the
supplied tap extensions.
Fig. 7
Fig. 4
Final installation height:
1/2" tap extensions plus o-ring mounts
must equal 40-44 mm maximum above the
finished floor.
If necessary, the o-ring mounts (18 mm) thread
may be shortened.
Place the floor risersí flange on to the threaded
rods and secure with provided nuts and washers.
Apply silicon to the sub flange edge to seal.
US
Lightly apply grease (lightly) to the o-rings on the
o-ring mount.
Slide the mixer with the attached floor risers onto
to the plug connector link and secure with the
union nuts.
Fig. 5
Turn on the water and check for leaks.
Slide the decorative flanges over the union nuts.
Attach the shower hose to the mixer and to the
hand shower.
40 - max. 44 mm
Fig. 6
Fig. 8
26.10.2006
14:11 Uhr
Seite 19
1.0 PARTS SUPPLIED
Bath and shower mixer, 1/2"
with standing waste
35.943.970.90
- concealed rough parts
25.943.360.FF
- trim exposed parts
890
730
120
MA 01.03.01.360.15
Concealed rough parts 35.943.970.90
Base plate assembly, including
2 x connecting angles, 1/2"
Insulation caps for connecting angles
Threaded rods, M8
Protective sleeves, 8 mm diameter
Distance piece
Fastening set
2 x tap extension 1/2", 25 mm
2 x tap extension 1/2", 50 mm
See Fig. 1
90
245
75 60
150
250
150
100
Distance piece
1/2"
Trim exposed parts 25.943.360.FF
Mixer assembly, including
standing waste with plug link, 1/2"
2 x connecting angles
2 x ceramic head parts, 1/2"
Shower hose, 1/2", 1250 mm
Hand shower, 1/2"
Wall bracket
Concealed rough parts are not included in the
parts supplied.
3.0 PREPARATION
Maximum length from the floor 120 mm (OKFFB).
Please see the scale drawings for gauge and
adjustability.
ATTENTION The threaded rods have to be
extended by the customer should longer
lengths from the floor be required.
Place the base plate on the concrete floor in line
with the location of the mains.
Remove any uneven areas in the raw floor
(concrete) beforehand.
Mark out the fastening points.
Drill holes for S 10 plugs.
Place rubber washers under the base plate and
secure the plate with the supplied screws.
Level the base plate precisely.
Connect to the mains. Cold - right; hot - left.
Place the insulation caps over the connecting
angles.
Close the connecting angles with the installation
plug and check for leaks.
Finish the floor.
Fig. 1
ATTENTION In order to achieve sufficient
support for the top holding plate, the flooring
has to extend over the whole area up to the
installation plug.
1/2" Installation
plugs
Distance piece
Insulation cap
130
Threaded rods,
M8
8
connecting
angles 1/2"
Rubber Discs
2.0 OPERATING CONDITIONS
Recommended feed temperature
Maximum feed temperature
Minimum flow pressure
Maximum flow pressure
Recommended flow pressure
Test pressure
65°C
80°C
1 bar
10 bar
1 – 5 bar
16 bar
At static temperatures exceeding 5 bars, we
recommend that a pressure reducer be installed in
the mains in compliance with DIN 1988.
The fittings are not suitable for use with
pressureless hot water boilers.
1/2"
Fig. 2
Absolutely essential information for the tiler:
Drill the tile cut-out from the middle of the
installation plug with a diameter of 53 - 55 mm.
The cut-outs for the threaded rods then have
to be done separately.
The size must be adhered to precisely to leave
sufficient support space for the stand waste's
floor flange.
Screw the distance piece back on to the
threaded rods after tiling.
DIN 1988 must be followed where pipes have
been newly installed!
Fig. 3
GB
MA 01.03.01.360.15
26.10.2006
14:11 Uhr
Seite 21
4.0 FINAL ASSEMBLY
Please refer to the scale drawings for the precise
mixer sizes.
Slide the union nuts and floor rosettes on to the
standing waste. Screw on the connecting angles.
ATTENTION Left thread
Remove the distance piece from the threaded
rods, shorten the plastic sleeves on the threaded
rods to the top edge of the tiles.
Shorten the threaded rods if necessary.
Length above OKFFB = 15 mm.
Shut off the mains and remove the installation
plug. Extend the connections with the tap extensions.
Attach plug connectors.
Final installation height:
Tap extensions plus screwed-in plug
link = 40 - max. 44 mm above OKFFB.
Fig. 4
Place the floor flange on to the threaded
rods and secure.
Apply silicon all round.
Fig. 7
Slide the standing waste on to the plug links and
secure with the unions.
ATTENTION O-rings must be greased
(lightly) beforehand.
Attach the fitting to the connecting angles and
assemble the shower cradle, shower hose and
hand shower.
Turn on the water and check that the fitting does
not leak. Slide the floor rosettes over the screw
connections.
GB
Fig. 5
40 - max. 44 mm
Fig. 6
Fig. 8
MA 01.03.01.360.15
26.10.2006
14:11 Uhr
Seite 23
890
730
120
1.0 ENTITÀ DI FORNITURA
Gruppo vasca con tubi verticali 1/2"
35.943.970.90
- kit componenti interni
25.943.360.FF
- kit componenti esterni
Kit componenti interni 35.943.970.90
piastra di fondo completa,
inclusi 2 raccordi a gomito 1/2"
calotte isolanti per raccordi a gomito
aste filettate M8
boccole di protezione ø 8 mm
distanziatore
kit di fissaggio
2 x prolunga rubinetto 1/2", 25 mm
2 x prolunga rubinetto 1/2", 50 mm
Vedi Fig. 1
90
245
75 60
150
250
150
100
Distanziatore
Kit componenti esterni 25.943.360.FF
batteria completa, inclusi tubi verticali con attacco
rapido 1/2"
2 raccordi a gomito
2 vitone a dischi ceramici 1/2"
tubo flessibile per doccetta 1/2" 1250 mm
doccetta 1/2"
supporto doccetta
1/2"
Kit componenti interni non comprese
nell´entità di fornitura.
Bussole,1/2"
Distanziatore
Calotte isolanti
130
Aste filettate M8
8
Raccordi a
gomitol 1/2"
2.0 CCONDIZIONI D´ESERCIZIO
Temperatura di mandata consigliata
Temperatura di mandata massima
Pressione minima di flusso
Pressione massima di flusso
Pressione d´esercizio consigliata
Pressione massima di prova
65 °C
80 °C
1 bar
10 bar
1 - 5 bar
16 bar
Dischi di gomma
In presenza di una pressione statica superiore
ai 5 bar, è consigliabile l'installazione di un riduttore di pressione nella tubazione d'alimentazione,
secondo la norma DIN 1988.
La rubinetteria non è adatta per il collegamento a
scaldabagni non in pressione.
1/2"
In caso di installazione di nuove reti idrauliche,
procedete secondo il disposto della
norma DIN 1988.
3.0 PREMONTAGGIO
Elevazione massima del pavimento:
120 mm (OKFFB).
Per il calibro e la possibilità di regolazione vedi i
disegni quotati.
ATTENZIONE In caso di maggiore
elevazione del pavimento si devono allungare
a livello costruttivo le aste filettate.
Collocare la piastra di fondo sul fondo di
calcestruzzo in modo corrispondente alla posizione delle linee di alimentazione.
Prima di ciò, eliminare gli eventuali dislivelli sul
fondo grezzo del pavimento (calcestruzzo).
Marcare i punti di fissaggio.
Fori per caviglie S 10.
Collocare i dischi di gomma sotto la piastra di
fondo e fissare la piastra con le viti in dotazione.
Bilanciare con precisione la piastra di fondo.
Raccordare i tubi di alimentazione.
Acqua fredda – a destra; acqua calda – a sinistra.
Infilare le calotte isolanti sui raccordi a gomito.
Chiudere i raccordi a gomito con le bussole e
controllarne la tenuta.
Eseguire la cappa di pavimentazione.
ATTENZIONE Per permettere un appoggio
sufficiente della piastra d’arresto superiore, la
cappa di pavimentazione va eseguita
sull’intera superficie fino alle bussole.
Fig. 1
Fig. 2
Si devono assolutamente osservare le
istruzioni per i piastrellisti:
I
Forare nella piastrella nel centro delle bussole
un taglio del diametro di 53 - 55 mm.
I tagli per le aste filettate devono poi essere
effettuati separatamente.
Si deve rispettare accuratamente la misura in
modo che sia disponibile una sufficiente
superficie di appoggio per la flangia di fondo
dei tubi verticali.
Dopo la piastrellatura, riavvitare il
distanziatore sulle aste filettate.
Fig. 3
MA 01.03.01.360.15
26.10.2006
14:11 Uhr
Seite 25
4.0 MONTAGGIO FINALE
Le dimensioni esatte della batteria sono
riportate nei disegni quotati.
Infilare sui tubi verticali i dadi di premistoppa e le
rosette di fondo.
Avvitare i raccordi a gomito.
ATTENZIONE
Filettatura sinistra
Togliere il distanziatore dalle aste filettate, accorciare le boccole di plastica sulle aste filettate fino
ad OK piastrella.
Se necessario, accorciare le aste filettate.
Lunghezza sopra OKFFB = 15 mm.
Chiudere l’alimentazione d’acqua e rimuovere
le bussole.
Portare in alto i raccordi con le prolunghe
di rubinetto.
Montare gli attacchi rapidi.
Altezza di montaggio:
Prolunghe di rubinetto più raccordo rapido
avvitato = 40 - max. 44 mm sopra OKFFB.
Fig. 4
Infilare sulle aste filettate la flangia di fondo
e avvitarla.
Isolare all’intorno con silicone.
Fig. 7
Infilare sugli attacchi rapidi i tubi verticali e
serrarli con i dadi di premistoppa.
ATTENZIONE Prima di ciò, si devono un
poco ingrassare gli anelli a O.
Montare la rubinetteria sul raccordo a gomito
completando il montaggio con la forcella,
tubo flessibile e doccetta.
Aprire l’alimentazione d’acqua e controllare
la tenuta.
Spingere la rosetta di fondo sui raccordi a vite.
Fig. 5
40 - max. 44 mm
I
Fig. 6
Fig. 8
26.10.2006
14:11 Uhr
890
730
120
MA 01.03.01.360.15
90
245
75 60
150
250
150
100
Espaciadores
1/2"
Seite 27
1.0 ALCANCE DEL SUMINISTRO
Batería de bañera con tubos verticales 1/2"
35.943.970.90
- juego de premontaje
25.943.360.FF
- juego de montaje definitivo
3.0 PREMONTAJE
Elevación máxima del suelo: 120 mm (OKFFB).
Véase el plano de medidas para la
calibración y el ajuste.
Juego de premontaje 35.943.970.90
placa de base completa,
con 2 codos de conexión 1/2" incluidos
cubiertas aislantes para codos de conexión
barras roscadas M8
manguitos protectores ø 8 mm
espaciadores
juego de fijación
2 x prolongación de grifo 1/2", 25 mm
2 x prolongación de grifo 1/2", 50 mm
Véase Fig. 1
ATENCION Si la elevación del suelo es mas
grande, las barras roscadas deben ser
alargadas a nivel de construcción.
Juego de montaje definitivo 25.943.360.FF
batería completa, con tubos verticales con racor
insertable 1/2" incluidos
2 codos de conexión
2 elementos superiores interno de cerámica 1/2"
manguera de ducha 1/2" 1250 mm
ducha a mano 1/2"
soporte de ducha
Juego de premontaje no incluido en el
suministro.
130
8
Cubiertas aislantes 1/2"
Arandelas de goma
2.0 CONDICIONES DE SERVICIO
Temperatura de avance recomendada
Temperatura de avance máxima
Presión minima de flujo
Presión máxima de flujo
Presión de servicio recomendada
Presión de comprobación
Fig. 1
ATENCION Para obtener un apoyo
suficiente de la placa de soporte superior, se
debe formar el solado sobre toda la superficie
hasta los manguitos.
Manguitos, 1/2"
Espaciadores
Barras
roscadas M8
Cubiertas
aislantes
Colocar la placa de base sobre el fondo en
hormigón según la posición de las líneas de
alimentación.
Eliminar previamente las eventuales desigualdades del suelo bruto (hormigón).
Marcar los puntos de fijación.
Orificios para tacos S 10.
Colocar los discos de goma bajo la placa de base
y fijar la placa por medio de los tornillos incluidos.
Equilibrar con precisión la placa de base.
Conectar los tubos de alimentación. Agua
fría – derecha; agua caliente – izquierda.
Meter las cubiertas aislantes sobre los codos de
conexión.
Cerrar los codos de conexión con los manguitos
y controlar la estanqueidad.
Formar el solado.
65 °C
80 °C
1 bar
10 bar
1 - 5 bar
16 bar
Para presión en reposo superior a 5 bares se
recomienda la instalación de un reductor de presión en la linea de alimantación según DIN 1988.
Las griferías no son apropiadas para el uso de
acumuladores de agua caliente exentos de presión.
1/2"
Fig. 2
Es imprescindible observar las instrucciones
para los soladores:
Barrenar en la losa en el centro de los
manguitos una sección de ø 53 - 55 mm.
Después, las secciones para las barras
roscadas deben ser ejecutadas por separado.
Se deben observar las medidas exactamente
de modo que sea disponible una superficie de
apoyo suficiente para la brida de base de los
tubos verticales.
Después de enlosar, atornillar el espaciador de
nuevo sobre las barras roscadas.
E
En el caso de líneas de nueva instalación debe
procederse como determina DIN 1988.
Fig. 3
MA 01.03.01.360.15
26.10.2006
14:11 Uhr
Seite 29
4.0 MONTAJE DEFINITIVO
Para las medidas exactas de la batería véase los
planos de medidas.
Empujar las tuercas tapón y las rosetas de base
sobre los tubos verticales.
Atornillar los codos de conexión.
ATENCION
Filete con paso a la izquierda.
Quitar el espaciador de las barras
roscadas, acortar las cubiertas de
plástico sobre las barras roscadas
hasta el OK de losa.
Si es necesario, acortar las barras roscadas.
Largura sobre OKFFB = 15 mm.
Cerrar la alimentación de agua y quitar los
manguitos.
Llevar hacia arriba los racores con las
prolongaciones de grifo.
Montar los racores insertables.
Altura de montaje:
Prolongaciones de grifo más racor insertable
atornillado = 40 - max. 44 mm sobre OKFFB.
Fig. 7
Fig. 4
Meter la brida de base sobre las barras
roscadas y atornillar.
Aislar a la redonda con silicona.
Empujar los tubos verticales sobre los racores
insertables y apretar con las tuercas tapón.
ATENCION Previamente, los anillos
en O deben ser algo lubrificados.
Fig. 5
Montar la grifería en el codo de conexión y
completar el montaje con la horquilla para ducha,
manguera y ducha de mano.
Abrir la alimentación de agua y controlar la
estanqueidad.
Empujar la roseta de base sobre las atornilladuras.
40 - max. 44 mm
E
Fig. 6
Fig. 8
MA 01.03.01.360.15
26.10.2006
14:11 Uhr
Seite 31
Scarica