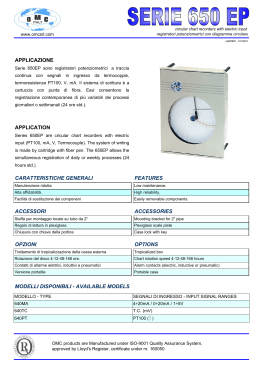
NOTIZIE TECNICHE
Service Operations Division
Modello
bizhub PRESS
C6000/C7000
Data emissione
N° documento
N° pagine
31/10/12
013-12
5 di 5
Categoria Prodotto
BN
Colore
Oggetto:
Guida all’utilizzo dei profili bilanciamento colore
X
Controller
Printer/AIO
A complemento della guida per la creazione ed il caricamento dei Profili di Bilanciamento
Colore (Color Density Profiles), riportata di seguito a questa Notizia Tecnica, è opportuno
tenere presente le modalità con cui la macchina utilizza i profili caricati.
1. In ciascun profilo, in fase di registrazione in macchina, vengono “inglobati” i parametri
con cui sono stati stampati i tasselli delle pagine di misurazione, ovvero RETINO, TIPO
DI CARTA e GRAMMATURA.
2. Se vengono caricati in macchina 2 profili creati con gli stessi 3 parametri indicati nel
punto 1, la macchina consente di abilitarne uno solo alla volta, disabilitando
contemporaneamente l’altro.
3. Nel caso in cui in macchina siano registrati svariati profili attivi (quindi con i parametri
non tutti coincidenti), verrà utilizzato, per il lavoro in corso, il profilo con il maggior
numero di parametri (RETINO, TIPO DI CARTA e GRAMMATURA), secondo il
seguente schema (in ordine di priorità decrescente) :
stesso retino > stesso tipo di carta > stessa grammatura > profilo registrato prima
4. Il retino di stampa è il parametro che maggiormente influenza la resa ed il
bilanciamento colore; l’impatto delle caratteristiche della carta è minore anche se
carte speciali (carta molto spessa, goffrata, colorata) renderanno meno efficace il
profilo di bilanciamento.
5.
Per esempio :
• Priorità 1
Viene utilizzato il profilo che include lo stesso retino, tipo di carta e grammatura
del lavoro di stampa.
• Priorità 2
Viene utilizzato il profilo che include almeno lo stesso retino e tipo di carta, se
nessun profilo include la grammatura del lavoro in stampa,.
• Priorità 3
Viene utilizzato il profilo che include lo stesso retino e grammatura, se nessun
profilo include lo stesso tipo di carta del lavoro in stampa,.
• Priorità 4
Se esistono combinazioni coincidenti, viene utilizzato il profilo registrato prima.
• Priorità 5
Se nessun profilo attivo include il retino del lavoro di stampa, non viene
utilizzato nessun profilo.
(allegata procedura Density Balance Adjustment)
Konica Minolta BSI
Service Operations
Pagina 1 di 1BT_PRESS C6000-C7000_013_profili bilanciamento col_ott 12
Quick Guide of Density Balance Adjustment(C8000/C7000)
BT-CSO
2010-0827
< Preparation >
1) Measurement instrument ( i1Pro/ES-1000 or i1iSisXL )
2) ProfileMaker5/MeasureTool
◇Profilemaker5(English version)◇
http://www.xrite.com/product_overview.aspx?ID=793&Action=support&SoftwareID=931
3) Script data ( required only for i1iSisXL )
Denbal11x17V01.txt
Denbal12x18V01.txt
Denbal13x19V01.txt
DenbalA3V01.txt
DenbalSRA3V01.txt
4) USB memory
Make folder previously
For C8000 > \C8000\ADJUST_DATA
For C7000/C7000P/C7000PV/C6000 > \C7000\ADJUST_DATA
< Procedure >
Printing "Density Balance chart" from printing engine
1) On the Machine Screen > Adjustment(at bottom left3)
2) 04 Density Balance Adjustment > 01 Density Balance Chart Output
3) Select Measurement instrument and chart type
>i1iSis and Type1 Chart(8-step on 1 sheet)
>i1iSis and Type2 Chart(16-step on 2 sheets)
>i1Pro and Type1 Chart(1-step on 1 sheet)
>i1Pro and Type2 Chart(3-step on 1 sheet)
4) push "Print Mode"
5) On the PRINT MODE Screen > Quality Adj(upper Left2)
6) Select the screen type > Screen > select > OK > Close
7) Select the paper size for the chart > Tray*
8) push "Start" on Hard Key
-- Chart would be printed out -9) > Exit PrintMode > Return > Close > Exit
Measuring chart(s) and save to USB memory
Caution: Connect measuring instrument(i1iSisXL or i1Pro/ES-1000) before starting MeasureTool/ProfileMaker
1) Boot MeasureTool(ProfileMaker5)
Note: When booting MeasureTool, following message will appear.
"This application will run in a limited demonstration mode. A hardware dongle is required to activate all functions."
Therefore MeasureTool works correctly without hardware dongle.
2) Configuration > Instrument > Select i1iSis or i1Pro > Reflection
3) Measuring > Testchart > open
4) Select script data as follows
For i1iSis and Type1/Type2
> Denbal11x17V01 / Denbal12x18V01 / Denbal13x19V01 / DenbalA3V01 / DenbalSRA3V01 refering to paper size
For i1Pro and Type1 Chart > Custom > set Columns:6 and Rows:5
For i1Pro and Type2 Chart > Custom > set Columns:6 and Rows:13
5) Start measuring
For i1iSis, feed chart automatically
For i1Pro, put chart on 10sheets of paper and click for each patches one by one(Not trace as usual)
( measuring order was described in "i1Pro / Measuring order of each patches")
6) Close > Export Lab
7) Name as following rule [A] and [B] at \C8000(or C7000)\ADJUST_DATA in USB memory
Rule[A]: (14 characters of identifying information printed on the chart)_(up to 21 characters of user-customized information)
>example: 0051015011A573_i1iSisT1_2010_0628.txt
Rule[B]: Characters of user-customized information must be same for both charts when i1iSis and Type2 chart is used
>example: 0051015011A573_i1iSisT2_2010_0628.txt
10510150219D8E_i1iSisT2_2010_0628.txt
Registering colorimetric data to printing engine
Caution: Don't connect USB memory before indicated
1) On the Machine Screen > Adjustment(at bottom left3)
2) 04 Density Balance Adjustment > 02 Density Balance Data Reg/Del
3) Select the desired number of row from the 10 on the list
4) Press "Measured data load"
5) Connect USB memory
6) Push "OK"
7) Select the file name of the data to be registered
8) Push "OK"
9) When replasing data > press"Overwrite"
When synthesize selected data > press"Combination"
When stopping overwrite or synthesize > press"Cancel"
10) > Return > Close > Exit
i1Pro / Measuring order of each patches
Following figure shows Measuring Order. They should be measured one by one.
i1Pro / Type1
5
9
13
17
21
25
1
2
3
4
5
6
7
8
9
10
11
12
13
14
15
16
17
18
19
20
21
22
23
24
25
26
27
28
29
30
i1Pro / Type2
5
9
13
17
21
25
1
2
3
4
5
6
7
8
9
10
11
12
13
14
15
16
17
18
19
20
21
22
23
24
25
26
27
28
29
30
31
32
33
34
35
36
37
38
39
40
41
42
43
44
45
46
47
48
49
50
51
52
53
54
55
56
57
58
59
60
61
62
63
64
65
66
67
68
69
70
71
72
73
74
75
76
77
78
Scarica