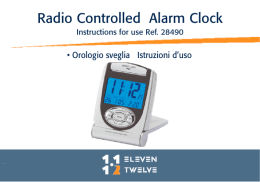
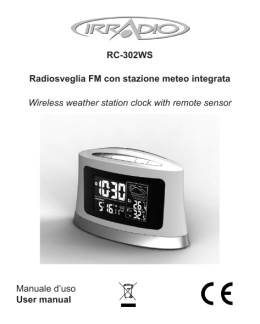
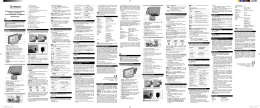
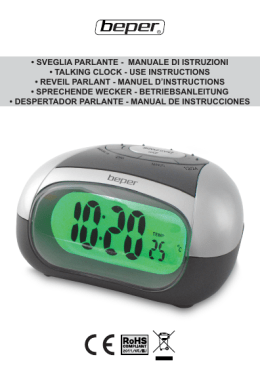
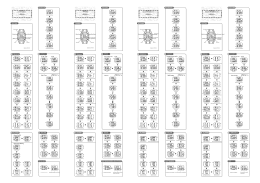
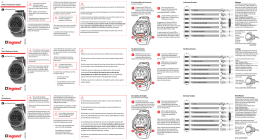
I ART. 86326 ORA / DATA Nella schermata principale tenere premuto il pulsante MODE per 2 secondi per passare all’impostazione del formato ora (12/24), premere il pulsante UP / DOWN per selezionare il formato e premere MODE per confermare. Successivamente compariranno le seguenti impostazioni: secondi / ore / minuti / anno / mese / giorno e premere MODE per confermare. Per modificare premere UP e DOWN. Per confermare ogni modifica premere MODE. SVEGLIA Nella schermata principale premere MODE per passare alla modalità sveglia e successivamente tenerlo premuto per 2 secondi per regolarla. Regolare l’ora premendo UP o DOWN. Premere MODE per passare ai minuti e premere UP o DOWN per regolarli. Una volta impostata la sveglia premere MODE per confermare. Nella schermata della sveglia o nella schermata principale premere il pulsante ALM per: attivare la sveglia / sveglia con modalità snooze / disattivare sveglia e modalità snooze. Quando la sveglia si attiva premere il pulsante SNOOZE per fermarla e ricomincerà a suonare dopo 5 minuti • Nella schermata principale premere UP per passare da Centigradi a Fahrenheit. • Premere ZONE per cambiare fuso orario. Il segnale radio sistemerà l’orario automaticamente. • Accendere la vettura con lo spinotto di alimentazione inserito nella presa accendisigari e la luce di sfondo si attiva. Colori di sfondi disponibili: arancione e blu selezionabili con l’apposito pulsante laterale. • Nella schermata principale tenere premuto il pulsante down per 2 secondi per aggiornare l’ora tramite segnale radio. INSTALLARE LE BATTERIE - rimuovere il coperchio delle batterie - sostituire le vecchie batterie con quelle nuove. Prestare attenzione alla corretta polarità. - sostituire le batterie quando il display perde contrasto SISTEMA RCC: RICEZIONE SEGNALE RADIO L’orologio ha un sistema che mantiene sempre aggiornata l’ora, evitando errori. Durante l’utilizzo, può essere condizionato dalle condizioni ambientali. Per ottenere una migliore ricezione del segnale fare attenzione ai seguenti punti: -durante la ricezione del segnale non rimuovere il prodotto -il prodotto deve essere tenuto ad una distanza massima di 1200km dai trasmettitori radio. - non posizionare il prodotto vicino ad oggetti che creano interferenze elettromagnetiche come ad esempio Tv, monitor. Tenere ad una distanza di 3 metri. -in grandi palazzi il segnale può diventare debole. Posizionare il prodotto vicino alla finestra o in spazi vuoti per una migliore ricezione. Cambiare posizione nel caso non si ricevesse segnale. IMPORTANTE 1:entro il segnale radio, l’ora viene aggiornata automaticamente. 2:durante il cambio delle batterie si aggiorna automaticamente 3: premere il pulsante DOWN per 2 secondi per fare l’aggiornamento manuale 4: ogni giorno tra le 2:00am alle 4:00am il sistema riceve l’aggiornamento dell’ora. 5:Tempi di ricezione: - se il segnale è debole, l’aggiornamento dell’ora richiede massimo 16 minuti - se non c’è segnale, l’aggiornamento si interrompe dopo 8 minuti - se il segnale è forte, l’aggiornamento richiede 2-3 minuti. TIME SETTING In the normal display mode, keep pressed the MODE button for 2 seconds to enter into the time settings. Settings are in the following sequence: 12/24 hour format / hour / minute / year / month / date. To skip from one setting to the following one press MODE button. Press UP / DOWN to adjust the corresponding item To confirm each setting press MODE ALARM SETTING 1 Press MODE key to enter the Alarm mode 2 In Alarm mode press the ALM button to choose one of the following alarm function: Alarm on – alarm and snooze on – alarm and snooze off. 3 Keep pressed MODE for 2 seconds to enter the alarm settings. 4 Press UP / DOWN to adjust the corresponding item 5 Press MODE to skip from hour to minute setting and to confirm. NOTE: during alarm ringing press SNOOZE, the alarm will stop ringing and it will start again after 5 minutes. NOTE In normal display mode, press UP button to shift between Centigrade and Fahrenhait Press Zone button to choose the time zone. If Germany is ZONE 0, and the clock was adjusted to ZONE 1 or ZONE -1, after receiving the German RCC the time will be adjusted to +1 -1 hour. Plug in the cigarette lighter plug and the backlight will turn on. BLUE or ORANGE backlight selectable by using the button on the side. In normal display mode press DOWN for 2 seconds to activate the manual time update RCC SYSTEM: RADIO SIGNAL RECEPTION The clock is equipped with a radio receiver which enables to show always the right time. To activate manually the reception, keep pressed the DOWN button for 2 seconds. It may happen that the radio reception is not completely clear because of environmental conditions. It is recommended to: 1 Never unplug the unit or press any button during the signal reception 2 The unit must be not more than 1200km distant from the nearest radio transmitter 3 Keep the unit faraway from any electromagnetic source or big building. The signal might be less clear then normal. 4 The clock receives the signal every day at 02:00, 03:00 and 04:00 am. 5 The reception takes: 2/3 minutes if the signal is clear, if the signal is weak it takes maximum 16 minutes and without signal the transmission stops after 8 minutes. BATTERIES REPLACEMENT Pull out the cover and replace the old batteries with new ones having the same type (AG13)and power. Batteries need to be changed when the display looks out of focus. FUSE REPLACEMENT Unscrew the plastic cover on the top of the plug and pull out the capsule containing the fuse. Replace the old fuse with a new one having the same power. SOSTITUZIONE DELLE BATTERIE Rimuovere il coperchio ed installare le batterie dello stesso modello rispettando le polarità. Le batterie vanno sostituite quando il display inizia essere sfuocato e confuso. SOSTITUZIONE DEL FUSIBILE Per sostituire il fusibile interno, svitare la punta dello spinotto e sfilare la capsula con il fusibile. Sostituire il fusibile saltato con uno nuovo dello stesso amperaggio. Una carica elettrostatica da +/- 8Kv e forti campi elettromagnetici possono causare malfunzionamenti. E’ dunque necessario resettare il sistema togliendo le batterie. Strong magnetic fields or electro magnetic charges may affect the performances of the product. In these cases it is recommended to pull out the batteries from the unit and put it back inside after few seconds.
Scarica
