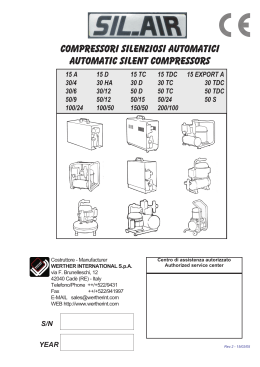
COMPRESSORI SILENZIOSI AUTOMATICI
AUTOMATIC SILENT COMPRESSORS
P 15TC
P 50/10 AL
P 100/24 AL
Black Panther
P 30TC
P 50/15 AL
P 100/50 AL
Black Panther2
Costruttore - Manufacturer
WERTHER INTERNATIONAL S.p.A.
via F. Brunelleschi, 12
42040 Cadè (RE) - Italy
Telefono/Phone ++/+522/9431
Fax
++/+522/941997
E-MAIL
[email protected]
P 50TC AL
P 50/24 AL
P 150/50 AL
Portadent
Centro di assistenza autorizzato
Authorized service center
S/N
YEAR
Rev.1 - 15/03/01
Indice
1 Informazioni generali
1.1
1.2
1.3
1.4
1.5
1.6
1.7
1.8
Contents
3
Importanza ed utilizzo del manuale ...3
Contenuto .......................................3
Stoccaggio ......................................3
Pesi e dimensioni.............................3
Smaltimento imballo.........................4
Sollevamento...................................4
Sicurezza ........................................4
Componenti principali .......................5
2 Specifiche tecniche
6
1 General information
1.1
1.2
1.3
1.4
1.5
1.6
1.7
1.8
3
Importance and use of the manual....3
Content ...........................................3
Storage ...........................................3
Weights and dimensions ..................3
Packing disposal..............................4
Lifting ..............................................4
Safety .............................................4
Main components ............................5
2 Technical specifications
6
2.1 Dati tecnici.......................................6
2.2 Curve volume aria aspirata/pressione6
2.3 Schemi elettrici.................................7
2.1 Technical data .................................6
2.2 Air intake / pressure curves...............6
2.3 Wiring diagrams...............................7
3 Funzionamento
3 Operation
8
8
3.1 Messa in servizio..............................8
3.2 Istruzioni per l’uso ............................9
3.3 Limiti per l’ uso a
funzionamento continuo....................12
3.4 Tempi di riempimento.......................13
3.5 Controllo del tempo di riempimento ...13
3.1 Machine set up ................................8
3.2 Operating instructions.......................9
3.3 Limits for continuous operatio............12
4 Manutenzione
4 Maintenance
14
3.4 Filling up..........................................13
3.5 Check of filling time ..........................13
14
4.1 Manutenzione periodica....................14
4.2 Cambio olio .....................................15
4.1 Periodic maintenance.......................14
4.2 Oil replacement................................15
5 Inconvenienti e rimedi
6 Informazioni particolari
5 Troubleshooting
6 Special informations
16
19
6.1 Demolizione del compressore...........19
6.2 Parti di ricambio ...............................19
6.3 Garanzia .........................................19
2
16
19
6.1 Compressor demolition.....................19
6.2 Spares ............................................19
6.3 Warranty .........................................19
1 Informazioni generali
1 General information
1.1 Importanza ed utilizzo del manuale
1.1 Importance and use of the manual
Questo manuale è parte integrante del compressore e deve sempre accompagnarlo,
anche in caso di vendita. Il proprietario e/o
l’utilizzatore del compressore devono conoscere le presenti istruzioni d’uso e le raccomandazioni prima dell’utilizzo del compressore. Se l’operatore non capisce bene la lingua del presente manuale, è obbligo del rivenditore presentargli traduzione corretta e
dettagliata nella lingua madre.
This manual is an integral part of the compressor and must always accompany it,
even in the event of sale. The compressor
owner and/or user must know the operating
instructions and recommendations before
using the compressor. If the operator does
not fully understand the language of this
manual, the retailer must supply a correct
and detailed translation into his or her native
language.
IL COSTRUTTORE NON RISPONDE DI ALCUN DANNO A PERSONE O A COSE PER
USO IMPROPRIO O NON CONSENTITO
DEL COMPRESSORE.
THE MANUFACTURER SHALL NOT BE
HELD LIABLE FOR ANY DAMAGE TO
PERSONS OR OBJECTS DUE TO AN IMPROPER OR NOT-PERMITTED USE OF
THE COMPRESSOR.
1.2 Contenuto
L’imballo contiene:
- il compressore
- flacone di olio tipo:
ROLOIL - SINCOM/32E
- Manuale istruzioni
- Certificato serbatoio
Modello
Model
P 15TC
P 30TC
P 50TC AL
P 50/10 AL
P 50/15 AL
P 50/24 AL
P 100/24 AL
P 100/50 AL
P 150/50 AL
Black Panther
Black Panther2
Portadent
Olio - Oil
l.
1
1/2
1
1
1
1
2
2
2 1/2
1
2
1
1.2
Content
Packing contains the following:
- the compressor
- oil bottle type
ROLOIL - SINCOM/32E
- instruction manual
- tank certificate
1.3 Stoccaggio
I compressori imballati
Peso
devono essere custoditi
Modello
Weight
in luoghi asciutti, coperti
Model
Kg.
e protetti dalle intempe16
P 15TC
rie a temperature com17
prese tra -10°C e +40°C. P 30TC
21
P 50TC AL
23
P 50/10 AL
26
1.4 Pesi e dimensioni P 50/15 AL
30
P 50/24 AL
Pesi lordi e dimensioni P 100/24 AL
46
imballi dei vari modelli: P 100/50 AL
57
73
P 150/50 AL
37
Black Panther
50
Black Panther2
25
Portadent
Dimens.
Size
cm.
42x35x37
42x35x37
42x35x37
35x35x50
49x46x57
49x46x57
80x39x65
91x45x67
91x45x67
50x38x77
50x38x77
47x32x50
1.3..Storage
The packed compressors
have to be kept in a dry,
covered and sheltered place
at a temperature between
-10°C and +40°C.
1.4
Weights
dimensions
and
Gross weights and packing dimensions of each
type of compressor:
3
1.5 Smaltimento imballo
1.5 Packing disposal
Dopo aver tolto il compressore dall’imballo,
accertarsi che non vi siano particolari danneggiati durante il trasporto.
After having removed the compressor from
the packing, check that no parts have been
damaged during transport.
Il materiale dell’imballo deve essere smaltito
secondo le norme vigenti nel paese in cui il
compressore viene montato, oppure riciclato
o riutilizzato.
The packing material has to be disposed of
in compliance with the regulation in force in
the country where the compressor is being
erected or recycled or reused.
1.6 Sollevamento
I compressori devono essere movimentati e
posizionati con cura servendosi eventualmente di muletti o transpallet.
1.7 Sicurezza
1.6 Lifting
The compressors have to be handled and
positioned with care using, if necessary,
fork-lift trucks or transpallets.
1.7 Safety
Non usare il compressore per scopi diversi
da quelli per cui è stato progettato.
Tenere in ambiente coperto e proteggerlo
dalla pioggia e dalla umidità.
Durante l’ uso, tenere il compressore lontano dalla portata dei bambini, non lasciarlo
mai incustodito e non dirigere il getto d’ aria
verso persone.
Do not use the compressor for purposes
other than those for which it has been designed.
To be kept in a covered place and protected
from rain and humidity.
When using the compressor, keep it out of
reach of children, never leave it unattended
and not direct air stream towards persons.
Se, col compressore, si utilizzano liquidi infiammabili, ci può essere il pericolo di incendi o di esplosioni, sopratutto in ambienti
chiusi: aerare adeguatamente.
Non effettuare riparazioni sul compressore
quando è collegato alla rete elettrica o con il
serbatoio in pressione.
When a flammable liquid is sprayed, there
may be danger of fire or explosion, especially in closes rooms: ventilate adequately.
I ATTENZIONE!
I WARNING!
La valvola di sicurezza è tarata e sigillata
dal costruttore.
NON TENTARE DI MANOMETTERLA O DI
VARIARNE LA TARATURA.
Durante il funzionamento il gruppo motore
/ tubo di mandata raggiunge temperature
elevate.
Se si lavora in prossimità di questi particolari evitare il contatto poichè può provocare bruciature.
The safety valve is calibrated and sealed
by the manufacturer.
DO NOT ATTEMPT TO TAMPER WITH IT
AND CHANGE THE SETTING.
While working the motor / air hose unit
reaches high temperature.
If working near this unit do not touch
(burn risk).
La mancanza del rispetto di queste raccomandazioni può causare danni anche gravi
al compressore e/o alle persone.
Failure to observe these recommendations
may cause serious damage to the compressor and/or to the persons.
4
Do not repair the compressor while it is connected to the electric circuit or to the tank
under pressure.
1.8 Componenti principali
1.8 Main components
1- Gruppo motore
2 - Serbatoio aria
3 - Pressostato
4 - Manometro pressione serbatoio
5 - Riduttore/filtro
6 - Manometro pressione utilizzo
7 - Valvola di sicurezza
1 - Motor
2 - Air tank
3 - Pressure switch
4 - Tank pressure gauge
5 - Filter reducer
6 - Outlet pressure gauge
7 - Safety valve
3
1
7
5
2
6
4
5
2 Specifiche tecniche
2 Technical specifications
2.1 Dati tecnici
2.1 Technical data
Modello
Model
Volt/Hz
KW - AMP
1ph ±10%
230/50
0,13 - 0,85
P 15 TC
115/60
0,15 - 1,85
230/50
0,18 - 1,15
P 30 TC
115/60
0,20 - 2,60
230/50
0,34 - 2,40
P 50 TC AL
115/60
0,34 - 4,80
230/50
0,34 - 2,40
P 50/10 AL
115/60
0,40 - 4,80
230/50
0,34 - 2,40
P 50/15 AL
115/60
0,40 - 4,80
230/50
0,34 - 2,40
P 50/24 AL
115/60
0,40 - 4,80
230/50
0,68- 4,80
P 100/24 AL
115/60
0,80 - 9,60
230/50
0,68 - 4,80
P 100/50 AL
115/60
0,80 - 9,60
230/50
1,02 - 7,20
P 150/50 AL
115/60
120 - 14,40
230/50
0,34 - 2,40
Black Panther
115/60
0,40 - 4,80
230/50
0,68 - 4,80
Black Panther2
115/60
0,80 - 9,60
230/50
0,34 - 2,40
Portadent
115/60
0,34 - 4,80
2.2 Curve volume aria aspirata/pressione
MOTORE TIPO 15
MOTOR TYPE 15
6
Lt/min.
C.F./min
17
0,71
25
1,05
50
2,10
50
2,10
50
2,10
50
2,10
100
4,20
100
4,20
150
6,30
50
2,10
100
4,20
50
2,10
Bar
Psi
8
120
8
120
8
120
8
120
8
120
8
120
8
120
8
120
8
120
8
120
8
120
8
120
Lt.
Gal.
3,5
0,93
3,5
0,93
3,5
0,93
10
2,6
15
3,96
24
6,34
24
6,34
50
13
50
13
14
3,6
14
3,6
9
2,3
dB(A)1m
dB(A)40"
32
32
35
35
45
45
45
45
45
45
45
45
47
47
47
47
49
49
40
40
47
47
40
40
2.2 Air intake / pressure curves
MOTORE TIPO 30
MOTOR TYPE 30
MOTORI TIPO 50
MOTORS TYPE 50
2.3 Schemi elettrici
2.3 Wiring diagrams
MOTORI TIPO 15 e 30
MOTORI TIPO 50
1
2
3
4
5
Relè avviamento
Relè termico
Morsettiera
Pressostato
Condensatore
L
N
E
A
B
D
F
G
Marrone
Blu
Giallo/Verde
Nero
Bianco
Marrone
Azzurro
Giallo/Verde
MOTORS TYPE 15 and 30
MOTORS TYPE 50
1
2
3
4
5
Starting relay
Overload protector
Terminal box
Pressure switch
Capacitor
L
N
E
A
B
D
F
G
Brown
Blue
Yellow/Green
Black
White
Brown
Sky blue
Yellow/Green
7
3 Funzionamento
3 Operation
3.1 Messa in servizio
3.1 Machine set up
Installare il compressore su un piano orizzontale in un locale di misure adeguate, ben
aerato e non umido, con una temperatura
non superiore a 35°C. Se la circolazione
dell’aria è insufficiente, installare un aspiratore o un ventilatore correttamente dimensionato.
Install the compressor on a flat surface, in a
suitably sized room, well ventilated and not
wet, where the temperature is not likely to
rise above 35°C. If there is not enought air
ventilation, install a suitably sized exhauster
or fan.
I ATTENZIONE!
I WARNING!
IL COMPRESSORE É SENZ’ OLIO.
Questo per evitare che durante i trasporti, a
causa di accidentali capovolgimenti, l’olio
penetri nella camera di compressione con
conseguenze dannose per un corretto funzionamento.
COMPRESSOR OUT OF OIL.
This is to prevent oil from going into the
compression chamber during transport, owing to accidental overturning and thus damaging its functioning.
Togliere il tappo di gomma posto sul tubo di
aspirazione, estrarre dal sacchetto di nylon il
filtro aspirazione e il beccuccio, avvitare
quest’ ultimo sul flacone dell’ olio in dotazione.
Remove the rubber plug on the intake pipe,
remove the air intake filter and the spout
from the plastic bag and screw the spout on
the supplied oil bottle.
Procedere quindi all’ introduzione dell’ olio
attraverso il tubo laterale (per i motori tipo 15
e 30) o il foro di carico olio sul coperchio
(per i motori tipo 50 ) (Fig. 1) fino al raggiungimento del livello ottimale, come indicato
sull’ apposita targhetta e visibile attraverso
la spia livello olio.
Now add the oil through the side pipe (for
motors type 15 and 30) or the oil charging
hole on the cover (for motors type 50 ) (Fig.
1) until reaching optimum level, as indicated
on the data label, and visible through the oil
level glass.
NON SUPERARE MAI IL LIVELLO MAX.
OIL MUST NEVER BE OVER THE MAX.
OIL LEVEL.
OLIO
OIL
Filtro aria
Air intake
OLIO
OIL
Filtro aria
Air intake
Motori Tipo 15 e 30 - Motors Type 15 and 30
Fig. 1
8
Motori Tipo 50 - Motors Type
NON USARE MAI OLIO DIVERSO DA
QUELLO PREVISTO DAL COSTRUTTORE
PENA LA DECADENZA DI OGNI GARANZIA.
Conservare l’ olio rimasto nel flacone per i
futuri rabbocchi.
Inserire quindi sul tubo o nel foro il filtro di
aspirazione.
Dopo l’ introduzione dell’ olio é indispensabile non capovolgere né inclinare troppo il
compressore, per evitare fuoriuscite di olio.
La tensione di alimentazione deve essere
quella indicata in targhetta: 230V/50Hz
(115V/60Hz) e la presa del tipo 2 poli + Terra.
NEVER USE AN OIL DIFFERENT FROM
THE ONE RECOMMENDED BY THE
MANUFACTURER; THIS WOULD VOID
ALL GUARANTEES.
Keep any oil remaining in the bottle for future topping up.
Now insert the intake filter on the pipe or in
the hole.
After having added the oil, never overturn or
excessively tilt the compressor as this would
cause the oil run out.
The power supply voltage must be the same
indicated on the data label: 230V/50Hz
(115V/60Hz) and the socket must be 2
pole+ground type.
3.2 Operating instructions
3.2 Istruzioni per l’uso
Operare sempre con il compressore su una
superficie piana.
L’ interruttore di marcia é situato sul coperchio del pressostato.
Always use your compressor on a flat surface.
The start switch is situated on the cover of
the pressure switch.
Turn the switch to position “0” (Fig.2).
Ruotare l’interruttore in posizione “0” (Fig.2).
Inserire la spina nella presa di
corrente e avviare il compressore portando l’ interruttore in posizione “1”.
Insert the plug into the socket and
start the compressor turning the
switch to position “1”.
Il ciclo di funzionamento del
compressore è automatico.
The compressor working process
is automatic.
Fig.2
9
Il pressostato ferma il compressore quando
la pressione nel serbatoio raggiunge il valore
massimo (8 bar¹120psi standard), e
lo fa ripartire quando scende al valore minimo (6 bar¹90psi standard)
Regolare la pressione dell’aria in
uscita agendo sul riduttore-filtro
(Fig. 3).
La pressione è indicata sul manometro posto a lato del regolatore.
The pressure switch stops the compressor
when the pressure in the tank reaches the
maximum value allowed (8
bar¹120psi standard) and starts it
again when the pressure drop to the
minimum value
(6 bar¹90psi standard).
Adjust the outlet air pressure operating on the reducer-filter (Fig.3)
Pressure is shown on the gauge
placed on one side of the regulator.
Fig. 3
Regolazione delle pressioni ( fig 4 ) :
1. Regolazione della pressione massima
( stop )
La pressione massima può essere regolata
per mezzo delle 2 viti “A” e “B”
Girare le 2 viti “A” e “B” in senso orario per
aumentare la pressione.
2. Regolazione della pressione differenziale
(partenza ).
La pressione differenziale
può essere soggetta a regolazione mediante la vite “C”.
Girare la vite “C” in senso orario per ridurre la pressione
differenziale.
Pressure adjustment (fig. 4):
1. adjustment of max. pressure (cut out)
Max pressure can be adjusted through the
two screws “A” and “B”.
Rotate the screws “A” and “B” clockwise in
order to increase pressure.
2. adjustment of differential
pressure (cut in).
Differential pressure can be
adjusted through the screw “C”.
Rotate the screw “C” clockwise
to reduce differential pressure.
Fig.4
I Attenzione
L’operazione di regolazione della pressione deve essere eseguita solo da personale
specializzato
10
I Attention
Pressure regolation must be carried out
by skilled personnel only.
In caso di mancato funzionamento del pressostato (sovrapressione) interviene automaticamente la valvola di sicurezza, che si
apre quando la pressione supera quella di
massima taratura.
If the pressure switch does not work
(overpressure), the safety valve will automatically operate and open when the pressure exceeds the max. setted value.
I ATTENZIONE!
I compressori debbono essere collegati ad
una presa di corrente protetta da un interruttore magneto-termico adeguato.
I WARNING!
Nelle tabelle sono riportati i valori di assorbimento dei vari modelli:
The tabs show the absorption data for each
type of compressor:
Compressors must be connected to an
outlet protected by a suitable magnetothermic switch.
Motore tipo
15
Motore tipo
30
Motore tipo
50
Motor type
Motor type
Motor type 30
50
15
230 V
50 Hz
0,85A
230 V
50 Hz
1,15A
230 V
50 Hz
2,4 A
230 V
50 Hz
0,85A
115 V
60 Hz
1,85A
115 V
60 Hz
2,60 A
115 V
60 Hz
4,8 A
Le linee di alimentazione dei compressori o
eventuali prolunghe devono avere la sezione
dei fili proporzionata alla lunghezza.
Nelle tabelle sono riportati i valori della sezione dei cavi per i vari modelli in funzione
della lunghezza:
230 V
50 Hz
Motore
1 mm
tipo 15
Motore
1 mm
tipo 30
Motori
1 mm
tipo 50
Motori
1,5 mm
tipo 100
Motori
1,5 mm
tipo 150
2
2
2
2
2
230 V
50 Hz
115 V
60 Hz
1 mm
1,5 mm
1,5 mm
1 mm
1,5 mm
1,5 mm
1,5 mm
1,5 mm
2,5 mm
2,5 mm
1,5 mm
2,5 mm
2,5 mm
2,5 mm
2,5 mm
2
2
2
2
2
2
2
2
2
115 V
60 Hz
2,60 A
2
2
2
2
2
230 V
50 Hz
2,4 A
115 V
60 Hz
4,8 A
From 3
to 20 mt.
To 3 mt.
115 V
60 Hz
2
230 V
50 Hz
1,15A
The compressor feeding lines or eventual
extensions must have the wire section proportioned to the lenght.
The tables show the wires section data for
each type of compressor in relation to the
lenght:
da 3
a 20 mt.
Fino a 3 mt.
115 V
60 Hz
1,85A
Motor
typ 15
Motor
typ 30
Motor
typ 50
Motor
typ 100
Motor
typ 150
230 V
50 Hz
115 V
60 Hz
230 V
50 Hz
1 mm
1 mm
1,5 mm
1,5 mm
1 mm
1 mm
1,5 mm
1,5 mm
1 mm
1,5 mm
1,5 mm
2,5 mm
1,5 mm
2,5 mm
1,5 mm
2,5 mm
1,5 mm
2,5 mm
2,5 mm
2,5 mm
2
2
2
2
2
2
2
2
2
2
115 V
60 Hz
2
2
2
2
2
2
2
2
2
2
11
3.3 Limiti per l’ uso a funzionamento
continuo
3.3 Limits for continuous operation
· La curva 1 (fig.5) indica i tempi di funzionamento continuo, alle varie pressioni, prima
che il relé termico del motore arresti il compressore (Temperatura del motore 115° C.
circa). Questi tempi sono calcolati partendo da una temperatura di 20° C al momento dell’ avviamento. Esempio:
6 bar = 116 minuti.
· Curve n°1 (fig.5) indicates the length of
continuous running at varying pressures,
until the overload protector switces off the
motor (at approx. 115°C oil temperaturemeasured from 20°C start point). Example:
6 bar = 116 minutes.
· La curva 2 indica la proporzione tra i tempi di utilizzo e i tempi di fermata.
Esempio: a 4 bar il tempo di funzionamento é
del 76%, corrispondente
a 46 minuti di utilizzo e
14 minuti di pausa in un’
ora.
· Curve n°2 indicates the
proportion of operation
and standstill.
Example: at 4 bar operation is 76% of the time,
corresponding to 46 minutes operation/14 minutes
standstill per hour.
Le curve rappresentano
valori medi a 230V/50Hz e
con temperatura ambiente
di 20° C.
The curves represent average values at
230V/50Hz operation, with
an outside temperature =
20°C.
Fig.5
12
3.4 Tempi di riempimento
3.4 Filling up
Tempi di riempimento del serbatoio da 0 a pressione max.(in secondi)
Filling up time of the tank from 0 to max. pressure (in seconds)
P 15TC
P 30TC
Volt/Hz
88
82
230/50
73
68
115/60
Volt/Hz P 100/24 AL P 100/50 AL
160
330
230/50
135
274
115/60
Temperatura Test 20°C
P 50TC AL
40
P 50/10 AL
115
P 50/15 AL
175
P 50/24 AL
280
33
95
145
232
P 150/50 AL
210
Black Panther
-
Black Panther2
-
Portadent
-
174
-
-
-
Test temperature 20°C
3.5 Controllo del tempo di riempimento
3.5 Check of filling time
Controllare il compressore come segue:
1. Vuotare il serbatoio dall’aria compressa.
2. Chiudere l’uscita del compressore sul serbatoio e controllare che il rubinetto di drenaggio sia chiuso.
3. Far partire il compressore e controllare il
tempo che trascorre tra l’accensione e lo
spegnimento automatico.
4. Verificare che non ci siano perdite sulle
connessioni.
5. Verificare la p.max=8 bar/120 Psi
Check the compressor as follows:
1.Empty the compressor air tank
2.Close the compressor outlet on the tank
and check that the drain cap is closed
3.Start the compressor and check the time
elapsing between starting and automatic
switching off
4. Check that there are no leaks on connections.
5. check max. pressure= 8 bar/120 Psi
13
4 Manutenzione
4 Maintenance
4.1 Manutenzione periodica
4.1 Periodic maintenance
I ATTENZIONE!
Tutte le operazioni che seguono debbono
essere eseguite esclusivamente da personale specializzato.
I WARNING!
All following operations, must be done
by a specialised personnel.
una
una
una
volta alla volta al volta
settimana mese all’anno
Fig. 6
Fig. 7
Fig. 8
Check the oil level shown by the
glass. When the motor is off, the
oil level must correspond to the
one shown by the label
Drain the water collected in the air
outlet filter proceeding as Fig. 6:
(the operations are to be done
with the tank under pressure)
Remove the condensate that has
collected in the air tank. To empty
the tank, put it under pressure,
take the compressor to a place
where the water will not damage
the floor, tip the compressor
slightly forward and open the tap
(Fig. 7).
Once a month check the
Controllare l’efficienza del compressore:
eventuale allentamento di raccordi, usura dei compressor efficiency: possible
tubi di pressione, serraggio delle viti, efficenza connectors slackening, pressure
hose wear, screws tightening,
della parte elettrica, etc.
electric circuit efficency, etc
Controllare il filtro di aspirazione aria.
Every three months check the air
Nel caso fosse intasato sostituirlo.
intake filter. Replace it if is
necessary.
Controllare, il livello dell’ olio.
A motore fermo il corretto livello, visibile
attraverso l’apposita spia, deve corrispondere
a quello indicato sulla targhetta
Scaricare l’acqua accumulata nel
riduttore/filtro uscita aria procedendo come in
fig.6 : (operazione da eseguire con il
serbatoio in pressione)
Scaricare l’ acqua di condensa che si forma
nel serbatoio dell’ aria. Per fare questo
occorre mettere in pressione il serbatoio,
portare il compressore in un luogo dove l’
uscita dell’ acqua non danneggi il pavimento,
e aprire l’ apposito rubinetto (Fig. 7).
Pulire il compressore con un panno morbido.
La polvere e la sporcizia impediscono il
raffreddamento
Controllare il riduttore/filtro ed i suoi elementi
per l’ottimizzazione dell’efficienza
Controllare la valvola di sicurezza (fig.8)
tirando dolcemente l’anello con pressione nel
serbatoio.
Sostituzione totale dell’olio
14
Clean the compressor with a soft
cloth. Dust and dirty prevent the
compressor from cooling
Check the filter reducer and its
parts to optimize efficiency
Check the safety valve (fig.8)
pulling the ring gently when there
is pressure in the tank
Total replacement of oil
once a
week
once a once a
month
year
*
*
*
*
Ogni 3
mesi
Every 3
month
s
*
*
*
*
4.2 Cambio olio
4.2 Oil replacement
Procedere come segue fig.10:
1. Smontare il gruppo motore dal serbatoio
se necessario.
2. Togliere il coperchio alettato allentando le
4 viti.
3. Inclinare il gruppo motore (non capovolgerlo) mantenere il blocco interno al suo posto con una mano.
4. Vuotare tutto l’olio.
Act as follows fig.10:
1. remove the motor unit from the tank, if
necessary.
2. remove the finned cover by loosing the 4
screws.
3. tilt the motor unit towards outlet side (do
not turn it upside down )and at the same
time keep the inner unit in its seat with your
hand.
4. Empty all oil
Nota ! L’olio usato deve essere riciclato in accordo alle
norme ambientali in vigore
Note! Waste oil must be recycled in conformity with the
regulations in force
Fig.10
5. Controllare l’O-ring del coperchio alettato.
6. Riposizionare il coperchio alettato e controllare durante le operazioni che l’O-ring sia
posizionato correttamente per assicurare
una chiusura a tenuta al 100% tra la cassa
ed il coperchio .
7. Avvitare le 4 viti del coperchio alettato.
8. Montare il gruppo motore sul serbatoio.
5. Check the O’ring of the finned cover
6. Place the finned cover in its seat again
and check that during the operations the
O’ring is properly placed in order to ensure a
perfect seal between housing and cover.
7. Tighten the 4 screws of the finned cover
8. Assemble the motor unit on the tank
I IMPORTANTE !
Usare sempre l’olio “ROLOIL - SINCOM/32E “ in quanto ogni altro tipo di olio
può causare seri danni meccanici al compressore.
Di conseguenza la garanzia si applica solo
se si utilizza l’ olio sopra indicato.
I IMPORTANT!
Always use oil “ROLOIL – SINCOM/32E”
since any other type of oil can cause severe mechanical damages to the compressor.
Consequently warranty is valid only if the
above mentioned oil is used.
15
5 Inconvenienti e rimedi
5 Troubleshooting
I ATTENZIONE
I WARNING
· Prima di qualsiasi intervento sul compressore, disinserire la spina dalla presa di corrente.
· Prima di smontare qualsiasi parte del compressore che sia in pressione, svuotare
completamente il serbatoio dell’ aria.
· Le seguenti operazioni devono essere eseguite esclusivamente da personale specializzato.
· Before any operation on the compressor,
disconnect the plug from the socket.
5.1 Il compressore non parte
5.1 The compressor does not start
· a) Manca tensione. Controllare presa e fusibili.
· b) Rottura o lesioni delle connessioni elettriche. Controllare la continuità con un tester come da schema elettrico (vedere
pag.7).
· c) Il serbatoio é già in pressione. Il compressore non parte fino a quando la pressione non scende al disotto del valore minimo di taratura del pressostato.
· d) La valvola di non ritorno per1
de. Smontare il tubo flessibile
per verificare se fuoriesce aria
dalla valvola. Se ciò avviene,
svitare il tappo della valvola
(Fig.10 pos. 1), pulire accurata2
mente il tappino in gomma
(pos. 2) e la sua sede con un
panno asciutto e rimontare il
tutto con estrema cura . Nel
caso la perdita permanga, sostituire l’ intera valvola.
Fig.10
· e) Il relè di avviamento è
difettoso . Contattare il distributore
· f) Condensatore difettoso.
Sostituirlo
· g) Il relé termico ha fatto spegnere il
compressore per sovratemperatura .
Quando raffreddato, il compressore
ripartirà automaticamente ad una
temperatura idonea .
· a) No power from mains. Check fuses and
socket.
· b) Breakage or loose joints in electrical
connections. Check with tester for continuity as per wiring diagram(See page 7).
16
· Empty air tank of air before dismantling
any part of compressor unit’s pressure
system.
· Following operations must be done by a
specialist.
· c) Pressure in air tank too high for activation of pressure switch. The pressure
switch makes circuit only when pressure
has dropped to preset start pressure.
· d) Leaky non-return valve. Take
off the flexible pressure pipe to
see if air leaks out from the
valve. If so, unscrew the valve
cap (Fig.10 item 1), clean the
rubber disk (item 2) and his
place with a dry cloth and assembly the whole with care . If
the leakage persists, the whole
valve must be replaced.
· e) The starting relay is defective.
Call the manufacturer.
· f) Condenser defective. Replace it.
· g) The therrmal relay has switched off the
compressor due to overheating. When
cooled, the compressor will automatically
turn on at the suitable temperature.
5.2 Il compressore funziona ma non
raggiunge la pressione massima
· a) Verificare che non esistano perdite d’aria (Vedere punto 5.6).
· b) Verificare l’efficienza del pressostato e
se necessario registrarlo (Vedere pag.10
Regolazione della pressione )
· c) La valvola di non ritorno é otturata e
crea una restrizione di flusso.
Pulire o sostituire.
5.2 The compressor does not reach the
maximum pressure
· a) Check any air leak (See point 5.6).
· b) Check the pressure switch efficency and
if necessary adjust it (See page 10
Pressure adjustment).
· c)The non-return-valve is clogged so creating a flow restriction.
Clean or replace the valve.
5.3 Il compressore funziona, ma la
pressione nel serbatoio non aumenta
(oppure aumenta troppo lentamente)
· a) Il tappo per il trasporto non é stato tolto
dal tubo o dal foro di aspirazione aria.
· b) Il filtro dell’ aria é ostruito. Pulirlo o sostituirlo.
· c) Verificare che non esistano perdite d’
aria (Vedere punto 5.6).
5.3 The compressor works, but pressure
does not increase in tank
(or increase too slowly)
· a) The transportation cap has not been removed from the air intake pipe (or hole).
· b) Air filter clogged. Clean or replace.
· c) Check any air leak (See point 6).
5.4 Il compressore funziona ma non carica
· Il difetto può essere causato dalla rottura
delle valvole o delle guarnizioni (Fig.11).
Procedere immediatamente alla sostituzione del particolare danneggiato.
5.4 The compressor works but does not load
· The defect can be due to a valve or a gasket break (Fig.11). Replace the damaged
part immediately.
Motori tipo 15
Motors type 15
Motori tipo 30
Motors type 30
Motori tipo 50
Motors type 50
Fig. 11
5.5 Durante il funzionamento il
compressore si ferma
· Il motore è dotato di un relè termico a riarmo automatico, che arresta il compressore
quando la temperatura raggiunge valori
troppo elevati. Il compressore ripartirà automaticamente dopo 15/20 min.
5.6 Perdite d’aria
· Possono essere causate dalla cattiva tenuta di qualche connessione. Controllare tutti
i raccordi bagnandoli con acqua saponata.
5.5 The compressor stops while working
· The motor has an automatic resetting thermal protection, that stops the compressor
when the temperature is too high. The
compressor will start again automatically
after 15/20 minutes.
5.6 Air leaks
· Can be due to bad seal of any connection,
check all connections wetting with suds.
17
5.7 Perdita dalla valvola posta sotto al
pressostato
· a) Valvola danneggiata, da sostituire.
· b) Il difetto può essere causato da una imperfetta tenuta della valvola di non ritorno
(Vedere punto 5.1d).
5.7 Leak from the valve placed under the
pressure switch
· Damaged valve, replace it.
· The defect can be due to an unperfect
valve seal (See point 5.1d).
5.8 Il compressore parte nonostante non
venga utilizzata aria
· Perdite d’ aria (Vedere punto 5.6).
5.8 The compressor starts when no air is
being tapped
· Air leak (See point 5.6).
5.9 Il compressore parte e si arresta con
una frequenza maggiore del solito
· a) Grossa quantità di condensa nel serbatoio. Scaricare condensa.
· b) Perdite d’ aria (Vedere punto 5.6).
5.9 The compressor starts and stops more
frequently than usual
· a) Large amount of condensate in air tank.
Remove condensate.
· b) Air leak (See point 5.6).
5.10 Il compressore non parte quando la
pressione scende sotto il valore minimo
e/o non si arresta quando raggiunge la
pressione massima
· Il pressostato é difettoso. Sostituire.
5.10 The compressor does not switch on
when pressure is under the minimum
level and/or does not switch off at max.
pressure
· Defective pressure switch. Replace.
5.11 Il compressore si surriscalda e consuma
molto olio
· a) Controllare il livello dell’ olio.
· b) Nel compressore é stato messo olio
sbagliato. Usare solamente l’ olio consigliato dal costruttore.
· c) Perdite d’ aria (Vedere punto 5.6).
· d) Filtro dell’ aria ostruito. Pulirlo o sostituirlo.
· e) Temperatura dell’ aria ambiente troppo
alta. Non installare mai il compressore all’
interno di un mobile, se non adeguatamente ventilato.
· f) Il compressore é sovraccaricato.
Assicuratevi che sia un modello adeguato
alle vostre necessità.
5.11 The compressor gets very hot and/or
uses a lot of oil
· a) Check oil level.
· b) Wrong oil has been filled in the compressor. Use oil recommended by the
manufacturer only.
· c) Air leak (See point 5.6).
· d) Clogged intake filter. Clean or replace.
18
· e) Too high outsidet temperature. Do not
close the unit in a cupboard unless adequately ventilated.
· f) Over-running.
Ensure the compressor is the correct
model for your work load.
6 Informazioni particolari
6.1 Demolizione del compressore
6 Special informations
6.1 Compressor demolition
Durante la demolizione del compressore
devono essere osservate tutte le norme di
sicurezza possibili al fine di evitare danni
alle cose o alle persone.
Le parti metalliche potranno essere rottamate come materiale ferroso; le parti in gomma, plastica o altro dovranno essere smaltite
secondo le norme vigenti nel paese in cui
viene demolito il compressore.
During the compressor demolition all
possible safety regulations must be observed in order to avoid any damage to
people or things.
All the metal parts can be recycled; rubber
and plastic parts have to be disposed of in
the compliance with the laws in force in the
country where the compressor is installed.
6.2 Parti di ricambio
6.2 Spares
La sostituzione di parti difettose deve essere eseguita esclusivamente da personale
specializzato, rispettando tutte le norme di
sicurezza possibili al fine di evitare danni
alle cose o alle persone.
Defective parts must be replaced only by
authorized personnel; all possible safety
regulations must be observed in order to
avoid any damage to people or things.
6.21Procedura per l’ordinazione delle
parti di ricambio
6.21How to order spare parts
Per ordinare parti di ricambio occorre:
· indicare il numero di matricola del compressore e l’anno di costruzione.
· indicare il codice del pezzo richiesto riferendosi agli esplosi dei vari tipi di compressore.
· indicare la quantità richiesta.
To order the spare parts it is necessary to:
· indicate the compressor serial number and
the year of manufacturing.
· indicate the part code requested referring
to exploded drawings of the various types
of compressor.
· indicate the quantity requested.
I ATTENZIONE
I WARNING
L’inosservanza delle norme di sicurezza
può arrecare gravi danni alle persone e
alle cose.
Il costruttore non risponde di nessun
danno a cose e persone derivato da un
uso improprio o non consentito del
compressore.
6.3 Garanzia
· Il compressore è garantito per una durata
di 12 mesi.
· Copre unicamente la sostituzione gratuita
dei pezzi riconosciuti difettosi dal costruttore escluse le parti elettriche e di usura.
· La manomissione ed il cattivo uso del compressore fanno decadere automaticamente
ogni forma di garanzia.
· Le spese di trasporto e mano d’opera sono
escluse dalla garanzia.
Failure to observe the safety regulations
may cause serious damage to people or
things.
The manufacturer shall not be held liable
for damage to people or things caused by
improper or not permitted use of the
compressor.
6.3 Warranty
· The compressor is guaranteed for 12
months from the date of purchase.
· It regards only the free replacement of
parts recognised as defective by the manufacturer apart from the electric parts and
worn parts.
· The guarantee automatically ceases in
case of tampering and bad usage.
· The warranty does not include transport
and labour costs.
19
Part Code
Sugg.
Descrizione
Description
Beschreibung
Description
Denominacion
A0184
VITE TE M6X16 ZINCATA
SCREW TE M6X16 UNI 5739
SCHRAUBE M6X16 UNI 5739
VIS TH M6X16 GALVANISÉE
TORNILLO TE M6X16
ZINCADO
A0218
DADO ALTO M4 UNI 5587 ZB
NUT M4
MUTTER M4
ECROU HAUT M4 UNI 5587 ZB
TUERCA M4 UNI 5587 ZB
B0420
DADO MEDIO M6 UNI 5588
NUT M6 UNI 5588
MITTLERE MUTTER M6 UNI
5588
ÉCROU M6 UNI 5588
TUERCA MEDIANA M6 UNI
5588
C0001
GUARNIZIONE TESTATA E59
HEAD GASKET
DICHTUNG
JOINT
JUNTA
C0002
PLACCA VALVOLA E 59
COMPLETA DI VALVOLE
VALVE PLATE E 59 WITH
VALVE
PLATTEN
PLAQUE
PLACA
C0003
GUARNIZIONE CILINDRO E 59
CYLINDER GASKET
ZYKLINDERDICHTUNG
JOINT CYLINDRE
JUNTA CILINDRO
C0004
MOLLA COPERCHIO
MORSETTIERA
FASTENING SPRING
FEDER
RESSORT
C0021
RUBINETTO SPURGO M 1/8"
DRAINCOCK M 1/8"
ABLAßHAHN M 1/8"
ROBINET DE VIDANGE M 1/8"
LLAVE DE PURGA M 1/8"
C0024
TAPPO OLIO Ø 8
RUBBER OIL PLUG Ø8
STÖPSEL Ø8
BOUCHON Ø8
TAPÓN ACEITE Ø8
C0026
MANOMETRO R 1/8 Ø40 10 BAR
R. GAUGE D.40 1/8" 0-10 BAR
MANOMETER R 1/8 Ø40 10
BAR
MANOMÈTRE R 1/8 Y40 10
BARS
MANÓMETRO R 1/8 Ø40 10
BAR
C0028
NIPPLO M1/4
NIPPLE M1/4
RACCORD FILETÉ M1/4
NIPPEL M1/4
NIPLE M1/4
C0031
INTERRUTTORE BIPOLARE
22X29 VER 10A
SWITCH 22X29 VER 10A
POLEN SCHALTER 22X29
VER 10A
INTERRUPTEUR
INTERRUPTOR 22X29 VER
10A
C0034
FERMACORDONE
COMPRESSORI
CABLE RELIEF
KABELKLEMME
ARRET CÂBLE
SUJETADOR DE CABLE
C0037
VITE TCEI M6X20 UNI 5931 ZB
SCREW TCEI 6X20
SCHRAUBE M6X20
VIS TCEI M6X20
TORNILLO TCEI M6X20
C0038
NIPPLO 1/4"X 35
NIPPLE 1/4" X 35
NIPPEL 1/4"X 35
RACCORD FILETÉ 1/4"X 35
NIPLE 1/4"X 35
C0040
RIDUZIONE M-F 1/4"X1/8"
REDUCTION M-F 1/4 X 1/9
REDUKTION G1/4" - G 1/8"
RÉDUCTEUR M/F G 1/4" - G
1/8"
REDUCCIÓN M/F G 1/4" - G
1/8"
C0042
RACCORDO RAP.DIR.M 1/8X6
QUICK MALE CONNECTION
1/8" X PIPE 6
SCHNELLANSCHLUß 1/8 X
SCHLAUCH 6
RACCORD RAPIDE 1/8" X
TUYAU 6
CONEXION RAPIDA M
1/8X6
C0043
VITE TE M6X10 UNI 5739
SCREW TE M6X10 UNI 5739
SECHSKANTSCHRAUBE
M6X10 UNI 5739
VIS TH M6X10 UNI 5739
TORNILLO TE M6X10
ZINCADO
C0045
CAVO EL MM 600 (CODICE C45)
ELECTRICAL CABLE 600MM
KABEL
CÂBLE ÉLECTRIQUE
CABLE
C0047
RACCORDO RAPIDO DIRITTO
M5XØ6
QUICK COUPLING M5XØ6
GERADER ANSCHLUSS
M5XØ6
RACCORD
CONEXION
C0049
TAPPO M1/4
PLUG M1/4
STÖPSEL M1/4"
BOUCHON M 1/4
TAPÓN G 1/4"
C0051
TUBO RILSAN Ø4/6
RYLSAN HOSEØ4/6
SCHLAUCH 6X4
TUYAU RILSAN D.6X4
TUBO RILSAN Ø6X4
C0052
GUARNIZIONE TESTATA E88
HEAD GASKET
DICHTUNG
JOINT
JUNTA
C0053
PLACCA VALVOLA E88 CON
VALVOLE
VALVE PLATE E88 WITH
VALVE
PLATTEN
PLAQUE
PLACA
C0054
GUARNIZIONE CILINDRO E88
CYLINDER GASKET
ZYKLINDERDICHTUNG
JOINT CYLINDRE
JUNTA CILINDRO
C0059
PROLUNGA M 1/4"÷ F 1/4"
EXTENSION M 1/4"÷ F 1/4"
VERLÄNGERUNG M 1/4"÷ F
1/4"
RALLONGE M 1/4" - F 1/4"
DISTANCIADOR M 1/4"÷ F
1/4"
C0061
VITE TE M8X10 UNI 5739
SCREW TE M8X10 UNI 5739
SCHRAUBE TE M8X10 UNI
5739
VIS TH M8X10 UNI 5739
TORNILLO
C0065
RACCORDO “90°” GIREVOLE M
1/4"XØ6,3
CONNECTION “90°”
ROTATING M1/4"XØ6,3
ANSCHLUSS “90° M 1/4"XØ6,3
RACCORD
C0068
CAVO EL H05VVF 3X0,75 L2000
SPINA EU
ELECTRIC CABLE H05VVF
3X0,75 L2000 EU PLUG
KABEL
CÂBLE ÉLECTRIQUE
CABLE
C0077
RACCORDO GIREVOLE M1/4"
SWIVEL CONNECTOR M1/4"
DREHBARER ANSCHLUSS
M1/4"
RACCORD PIVOTANT M 1/4"
CONEXION M1/4"
C0078
CAVO EL H05VVF 3X1,5 L2000
SP EU
CABLE H05VVF 3X1,5 L2000
SP EU
ELEKTR. KABEL H05VVF 3X1,5
L2000 SP EU
CÂBLE ÉLECTRIQUE H05VVF
3X1,5 L2000
CABLE H05VVF 3X1,5
L2000 SP EU
C0091
CAVO EL MM 500
ELECTRIC CABLE MM 500
ELEKTR. KABEL MM 500
CÂBLE ÉLECTRIQUEE
CABLE
C0100
RONDELLA Ø8,4X17 UNI 6592
WASHER Ø8,4X17 UNI 6592
SCHEIBE Ø8,4X17 UNI 6592
RONDELLE Ø8,4X17 UNI 6592
ARANDELA Ø8 ZINCADA
C0106
DISTANZIALE T21
SPACER T21
DISTANZSTUECK
ENTRETOISE
DISTANCIADOR
C0109
STAFFA CONDENSATORE T21
CAPACYTOR BRACKET
BÜGEL
PATTE
GRAPA
C0111
RELÈ TERMICO T2134A (230V)
OVERLOAD PROTECTOR
T2134A (230V)
RELAIS
RELAIS
RELÉ
C0112
RELÈ AVVIAMENTO T21 ( 230V
)
START RELAY T21 ( 230V )
RELAIS
RELAIS
RELÉ
C0113
VITE STAFFA CONDENSATORE
SCREW
SCHRAUBE
VIS
TORNILLO
DADO BASSO M8 UNI 5589 ZB
NUT M8 UNI 5589
FLACHE MUTTER M8 UNI 5589
ECROU BAS M8 UNI 5589
TUERCA BAJA M8
ZINCADA
C0115
GUARNIZIONE CILINDRO T21
CYLINDER GASKET
ZYKLINDERDICHTUNG
JOINT CYLINDRE
JUNTA
C0116
PLACCA VALVOLA T21 CON
VALVOLE
VALVE PLATE T21 WITH
VALVE
PLATTEN
PLAQUE
PLACA
C0117
GUARNIZIONE TESTATA T21
HEAD GASKET
DICHTUNG
JOINT
JUNTA
C0118
TAPPO OLIO 3/8+O’RING
OIL PLUG 3/8+O’RING
STÖPSEL 3/8+O’RING
BOUCHON 3/8+O’RING
TAPÓN ACEITE
C0126
AMMORTIZZATORE T21
RUBBER GROMMET T21
STOSSDAEMPFER
AMORTISSEUR
AMORTIGUADOR
C0134
CAVO ELETTRICO MM 500
ELECTRIC CABLE MM 500
ELEKTR. KABEL MM 500
CÂBLE ÉLECTRIQUE
C0147
PIEDINO ALETTATO Ø12
SUPPORT Ø12
STÜTZFUSS Ø12
PIED Ø12
PIE
C0148
PIEDINO ALETTATO Ø20
SUPPORT Ø20
STÜTZFUSS Ø20
PIED Ø20
PIE
C0149XX
TELAIO S.A. TC
S.A. FRAME TC
GESTELL TC
CHASSIS TC
BASTIDOR
C0153
VALVOLA DI LINEA M-M 3/8"C
NON-RETURN VALVE M-M
3/8"C
RÜCKSCHLAGVENTIL M-M
3/8"C
SOUPAPE DE LIGNE M-M
3/8"C
VALVULA DE LINEA M-M
3/8"C
C0158
RUOTA GOMMATA D 125 FORO
15
RUBBER WHEEL D 125 HOLE
15
GUMMI RAD D 125, BOHRUNG
15
ROUE CAOUTCHOUC D125
TROU 15
RUEDA DE GOMA D 125
AGUJERO 15
C0159
ANELLO SEEGER E15 UNI 7435
SEEGER E15 UNI 7435
SEEGER-RING E15 UNI 7435
CIRCLIP EXTÉRIEUR Ø15
ARO ELÁSTICO ØE 15
C0160
RUOTA GOMMATA D200 FORO
20
WHEEL D200
RAD
ROUE
C0114
C0164
RIDUTTORE FILTRO 1/4"
FILTER REGULATOR FR BIT
1/4"
REGLER FILTER 1/4"
RÉDUCTEUR FILTRE 1/4"
REDUCTOR FILTRO 1/4"
C0180
CAVO EL 3X1,6 AWG SPINA
USA
ELECTRIC CABLE 3X1.6 AWG
USA PLUG
ELEKTR. KABEL 3X1,6 USA
CÂBLE ÉLECTRIQUE AWG
3X1,6 USA
CABLE
C0181
CAVO EL MM 500 (CODICE
C181)
ELECTRIC CABLE MM 500
ELEKTR. KABEL MM 500
CÂBLE ÉLECTRIQUE MM 500
CABLE
C0188
ANELLO BLOK PER ALBERO 20
SENZA GOLA
BLOCK RING Ø20
RING
C0193
KIT PIEDE N. 1
FOOT KIT N° 1
C0202
VALVOLA SCARICO A 90°
EXHAUST VALVE 90°
ABLASSVENTIL 90°
SOUPAPE ÉVACUATION
VÁLVULA DESCARGA 90°
C0209
CAVO EL 3X1,5 MM 700
ELECTRIC CABLE 3X1.5
MM700
ELEKTR. KABEL 3X1,5 MM 700
CÂBLE ÉLECTRIQUE
CABLE
C0210
CAVO EL 3X1,5 MM 500
ELECTRIC CABLE
ELEKTR. KABEL 3X1,5 MM 500
CÂBLE ÉLECTRIQUE 3X1.5
MM 500
CABLE
C0221
TUBO SCARICO CONDENSA
Ø4X7
EXHAUST PIPE 4X7
KONDENSWASSERABLASSCH TUYAU ÉVACUATION
LAUCH
CONDENSATION
TUBO DE DESCARGA
CONDENSACIÓN
C0222XX
GRUPPO T2134A+AL (230V)
MOTOR T2134A+AL (230V)
ELEKTRO-MOTOR
MOTEUR
MOTOR ELECTRICO
C0237
CAVO EL 3X1,5
ELECTRICAL CABLE 3X1,5
ELEKTR. KABEL 3X1,5
CÂBLE ÉLECTRIQUE 3X1,5
CABLE
C0239
PORTAGOMMA M5XØ4,5
PIPE HOLDER M5XØ4,5
GUMMIHALTER M5XØ4,5
PORTE-TUYAUX M5XØ4,5
PORTAGOMA M5XØ4,5
C0242
RIDUZIONE M-F 1/2X1/4
CONNECTOR MF 1/2"X1/4"
REDUKTION MF 1/2"X1/4"
RÉDUCTEUR MF 1/2"X1/4"
REDUCCIÓN MF 1/2"X1/4"
C0268
FILTRO SCARICO
AUTOMATICO
AUTOMATIC DRAIN FILTER
AUTOMATISCHEN
ABLASSFILTER
FILTRE DE DÉCHARGE
AUTOMATIQUE
FILTRO DE DESCARGA
AUTOMÁTICO
C0278
RACCORDO ”L" GIREVOLE M
M5X6
“L” CONNECTION M5X Ø6
“L”-ANSCHLUSS
RACCORD
CONEXION “L”
C0288
VITE KTC TCTC 3.9X16 UNI
6954
KTC SCREW 3.9X16
KTC SENKSCHRAUBE 3.9X16
VIS KTC TCTC 3.9X16 UNI
6954
TORNILLO KTC TCTC
3.9X16 UNI 6954
C0292
TUBO ARIA MM 260 1/8FX1/8F
GIREVOLE
AIR PIPE MM 260 1/8FX1/8F
ROTABLE
LUFTSCHLAUCH
TUYAU AIR
TUBO
C0293
TUBO ARIA MM 300 1/8FX1/8F
GIREVOLE
AIR PIPE MM 300 1/8FX1/8F
ROTABLE
LUFTSCHLAUCH MM 300
1/8FX1/8F
TUYAU AIR
TUBO
C0294
TUBO ARIA MM 340 1/8FX1/8F
GIREVOLE
AIR PIPE MM 340 1/8FX1/8F
ROTABLE
LUFTSCHLAUCH
TUYAU AIR
TUBO
C0295
TUBO ARIA MM 470 1/8FX1/8F
GIREVOLE
AIR HOSE MM470 1/8FX1/8F
LUFTSCHLAUCH
TUYAU AIR
TUBO
C0317
RELÈ TERMICO T21 ( 115V )
OVERLOAD PROTECTOR T21
( 115V )
RELAIS
RELAIS
RELÉ
C0323
VALVOLA ASPIRAZIONE T21
INTAKE VALVE
VENTIL
SOUPAPE
VÁLVULA
C0324
VALVOLA COMPRESSIONE T21
EXHAUST VALVE
VENTIL
SOUPAPE
VÁLVULA
C0325
RELÈ AVVIAMENTO T21 ( 115V
)
START RELAY T21 ( 115V )
RELAIS
RELAIS
RELÉ
C0327
RIPARTITORE 3 VIE M-F 1/4-F
1/8
ELBOW MF 1/4"-F 1/8"
DIS.327/00
3-WE3-WEG-VENTIL
DISTRIBUTEUR
DISTRIBUIDOR DE 3 VIAS
C0329
RIPARTITORE 4 VIE M-M-F-F 1/4
CROSS CONNECTOR MMFF
1/4"
C0333
KIT MORSETTIERA T21 ( 115V )
KIT TERMINAL BOX T21 (
115V )
C0334
RIPARTITORE “L” M-F 1/8 CH13
C0335
4-WEG-VENTIL
DISTRIBUTEUR
DISTRIBUIDOR DE 4 VIAS
DISTRIBUTION FRAME “L” M-F
1/8 CH13
VENTIL
DISTRIBUTEUR
DISTRIBUIDOR
TUBO ARIA MM 140 1/8FX1/8F
GIREVOLE
AIR PIPE MM 140 1/8FX1/8F
ROTABLE
LUFTSCHLAUCH MM 140
1/8FX1/8F
TUYAU AIR
TUBO
C0338
CONDENSATORE 145÷174 µF
T21 ( 115V )
CAPACITOR 145÷174 µF T21 (
115V )
KONDENSATOR 145÷174 µF
T21 ( 115V )
CONDENSATEUR 145÷174 µF
T21 ( 115V )
CONDENSADOR 145÷174
µF T21 ( 115V )
C0339
TUBO RYLSAN Ø6/8
RYLSAN HOSE Ø6/8
SCHLAUCH D.8X6
TUYAU RILSAN D.8X6
TUBO RILSAN NEGRO
Ø8X6
C0340
PRESSOSTATO BIPOLARE 4
VIE OMOL. CSA-UL
FOUR WAYS PRESSURE
SWITCH CSA - UL
4-WEGE-DRUCKWÄCHTER
CSA - UL
PRESSOSTAT BIPOLAIRE 4
VOIES CSA -UL
PRESÓSTATO 4 VIE
C0341
RIPARTITORE QUADRO 5 VIE
CH22 NI
CROSS CONNECTOR
C0346
RIDUZIONE F-M 1/4X1/8
REDUCTION M-F-M 1/4X1/8
REDUKTION F-M 1/4X1/8
RÉDUCTION F-M 1/4X1/8
REDUCCIÓN
C0351
VALVOLA DI LINEA M-M 1/4X1/8
LINE VALVE M-M 1/4X1/8
VENTIL M-M 1/4X1/8
SOUPAPE M-M 1/4X1/8
VÁLVULA M-M 1/4X1/8
C0352
RIPARTITORE “L” 2 VIE M-F 1/8
M5
ELBOW MF1/8" - M5
2-WEG-VENTIL
DISTRIBUTEUR
DISTRIBUIDOR DE 2 VIAS
C0353
RUBINETTO A SFERA M-F 1/4"
STRAIGHT OUTLET COCK M-F
1/4"
KUGELHAHN M-F 1/4"
ROBINET À SPHÈRE M-F 1/4"
LLAVE M-F 1/4"
C0354
RUBINETTO SPURGO M 1/4 90
DRAINCOCK M 1/4 90
ABLASSHAHN M 1/4" 90
ROBINET M 1/4 90
LLAVE DE PURGA M 1/4 90
C0356
TUBO ELASTOLLAN 6X4 (L170)
ELASTOLAN HOSE 6X4 L=170
SCHLAUCH 6X4 L=170
TUYAU D.6/4 L=170
TUBO
C0359
DISTANZIALE E 59-E 88
SPACER E 59-E 88
DISTANZSTUECK
ENTRETOISE
DISTANCIADOR
C0360
AMMORTIZZATORE E59-E 88
RUBBER GROMMET E 59 -E
88
STOSSDAEMPFER E59-E 88
AMORTISSEUR E59-E 88
AMORTIGUADOR E59-E 88
C0379
PIEDE SERBATOIO
TANK FOOT
C0380XX
SERBATOIO LT 9CE D 320
NERO
TANK
C0381XX
SERBATOIO L.15
15 LT. TANK
C0382XX
SERBATOIO LT 24 D 400 CE
SPEC.
TANK
C0384XX
SERBATOIO CARELL LT 50CE
TROLLEY TANK 50LT CE
C0385XX
MANICO 8/10
C0386XX
PIED
BEÄHELTER
RÉSERVOIR
DEPOSITO
BEÄHELTER
RÉSERVOIR
DEPÓSITO
HANDLE 8/10
DREHKNOPF
BRANCHE
MANGO
MANICO 8/15-24
HANDLE
DREHKNOPF
BRANCHE
MANGO
C0387
TAPPO MASCHIO 1/4" TCEI
PLUG M1/4" TCEI
DECKEL
BOUCHON
TAPÓN
C0388
ASSALE RUOTE SERBATOIO
LT 50CE
WHEEL AXLE
C0389
NIPPLO M-M 1/4X1/4
CILINDRICO*
NIPPLE M-M 1/4X1/4
NIPPEL
NIPPLE
NIPLE
C0392
TAPPO M 1/8 TCEI
PLUG M 1/8
DECKEL
BOUCHON
TAPÓN
C0416
CAVO EL MM 600 (CODICE
C416)
ELECTRIC CABLE MM 600
ELEKTR. KABEL MM 600
CÂBLE ÉLECTRIQUE
CABLE
C0451
CAVO EL MM 600 (CODICE
C451)
ELECTRIC CABLE MM 600
KABEL
CÂBLE ÉLECTRIQUE
CABLE
C0453
RIDUZIONE M-M 1/4X1/8
REDUCTION M-M 1/4X1/8
REDUKTION M-M 1/4X1/8
RÉDUCTION M-M 1/4X1/8
REDUCCIÓN M-M 1/4X1/8
C0458XX
GPUPPO T2134A+AL (115V)
MOTOR T2134A+AL (115V)
ELEKTRO-MOTOR
MOTEUR
MOTOR ELECTRICO
C0481XX
COPERCHIO ALETTATO
RIBBER HEAD
DECKEL
COUVERCLE
TAPA
C0497XX
MANICO SMONTABILE
SERBATOIO LT 50CE
DETACHABLE HANDLE
DREHKNOPF
C0509
RIPARTITORE “L” 2 VIE M-F 1/4
2 LINE DISTRIBUTION “L
2-WEG-VENTIL
DISTRIBUTEUR
DISTRIBUIDOR DE 2 VIAS
C0513
DADO CON ROSETTA M6 ZB
NUT WITH WASHER
MUTTER
ÉCROU
TUERCA
C0516
RIDUZIONE M-F 3/8"-1/4"
REDUCTION M-F 3/8"-1/4"
REDUKTION M-F 3/8"-1/4"
RÉDUCTION M-F 3/8"-1/4"
REDUCCIÓN M-F 3/8"-1/4"
C0517
TAPPO M1"
PLUG M1"
STÖPSEL M1"
BOUCHON M1"
TAPÓN
C0522
RONDELLA ALLUMINIO 1"
ALUMINIUM WASHER 1"
ALU-SCHEIBE 1"
RONDELLE EN ALUMINIUM 1"
GUARNICIÓN DE ALUMINIO
1"
C0523
KIT TAPPO 1"+ GUARNIZIONE
KIT PLUG 1" + GASKET
SET STÖPSEL 1" + DICHTUNG
KIT BOUCHON 1" + JOINT
KIT TAPÓN 1" + JUNTA
C0553
BUSSOLA DI RINFORZO D 10/8
REINFORCEMENT BUSH
D10/8
BUCHSE D 10/8
BAGUE D 10/8
CASQUILLO DE
REFUERZO D 10/8
C0573
MANOPOLA SENZA BORDO
25-27
HAND GRIP
DREHKNOPF
POIGNÈE
REDONDA
C0617
RONDELLA Ø6,4X12,5 UNI 6592
WASHER Ø6,4X12,5 UNI 6592
SCHEIBE Ø6,4X12,5 UNI 6592
RONDELLE Ø6,4X12,5 UNI
6592
ARANDELA Ø6,4X12,5
UNI6592
C0652
GALLETTO CON VITE 8X16 UNI
5449
WING SCREW M8X16 UNI
5449
RIPPENSCHRAUBE M8X16 UNI VIS À OREILLES M8X16 UNI
5449
5449
TORNILLO DEL ALA M8X16
UNI 5449
C0662
RACCORDO ”L" M 3/8"X Ø10
“L” CONNECTION M3/8 X10
L-FÖRMIGES FITTING M 3/8"X
Ø10
COUDE “L” M 3/8" X Y10
CONEXION “L” M 3/8"X Ø10
C0664
GRIGLIA PER VENTOLA
120X120
FAN PROTECTION 120X120
LAUFRAD MIT GITTER
120X120
VENTILATEUR AVEC GRILLE
120X120
REJILLA VENTILADOR
120X120
C0668
TUBO ARIA L =240MM. 3/8"F 3/8"F GIREVOLE
AIR HOSE
LUFTSCHLAUCH
TUYAU AIR
TUBO AIRE
C0884
RIDUZIONE M-F 1/4"X3/8" NI
REDUCTION M-F 1/4X 3/8 NI
REDUKTION M-F 1/4X 3/8 NI
RÉDUCTEUR
REDUCCIÓN
C0933
VENTOLA A SCATOLA 120X120
115/60 HZ
BOX FAN 120X120 115/60 HZ
LAUFRAD 120X120 115/60 HZ
VENTILATEUR 115/60 HZ
VENTILADOR 120X120
115/60 HZ
C0944
FILTRO EAFD2000
FILTER
FILTER
FILTRE
FILTRO
C1076
FILTRO M 3/8
FILTER
FILTER
FILTRE
FILTRO
C1099
LIVELLO OLIO 1/2"CUPOLA
OIL LEVEL GLASS 1/2"INCH
C1109XX
SERBATOIO LT 3,5 D 130 3
FORI 1/4
TANK
BEÄHELTER
RÉSERVOIR
DEPÓSITO
C1110XX
SERBATOIO LT 14 BLACK
PANTHER
BLACK PANTHER TANK
BEÄHELTER
RÉSERVOIR
DEPÓSITO
C1121
CAVO EL 3X1,8 AWG MM 3800
SP. AMERICA
ELECTR. CABLE 3X1,8 AWG
MM 3800 SP. AMERICA
ELEKTR. KABEL
CÂBLE ÉLECTRIQUE
CABLE
C1122
CAVO EL SJT AWG 3X18 L900
CSA (CODICE C1122)
ELECTR. CABLE SJT AWG
3X18 L900 CSA
KABEL
CÂBLE ÉLECTRIQUE
CABLE
C1128XX
SQUADRETTA PORTA
RADIATORE BLACK PANTHER
SUPPORT RADIATOR BLACK
PANTHER
C1129XX
CARRELLO BLACK PANTHER
BLACK PANTHER TRACK
C1131XX
PORTA BOTTIGLIA SCARICO
BLACK BOTTLE SUPPORT
C1132XX
PIASTRA PORTA ETICHETTA
PLATE FOR LABEL
C1133
CAVO EL. 3X0,5 L850 (CODICE
1133)
ELECTRIC CABLE 3X0,5 L850
KABEL
CÂBLE ÉLECTRIQUE
CABLE
C1134
CAVO EL. 3X0,5 L450 (CODICE
1134)
ELECTRIC CABLE 3X0,5 L450
KABEL
CÂBLE ÉLECTRIQUE
CABLE
C1135
PIEDINO ALETTATO Ø22
SUPPORT Ø22
STÜTZFUSS Ø22
PIED Ø22
PIE CON ALETA Ø22
C1205
O’RING 4700
O’RING
O’RING
JOINT TORIQUE
EMPAQUE
C1234
RIDUZIONE M-F 1/8X3/8 NI
REDUCTION M-F+C16 1/8 X
3/8
REDUKTION M-F+C16 1/8 X 3/8
RÉDUCTION
REDUCCIÓN
C1235
KIT PLACCA
VALVOLE+GUARNIZIONI
T2134A
KIT VALVE PLATE+GASKET
T2134A
KIT PLATTEN
KIT PLAQUE
KIT PLACA
C1236
KIT PLACCA
VALVOLE+GUARNIZIONI E88
KIT VALVE PLATE+GASKET
E88
C1237
KIT PLACCA
VALVOLE+GUARNIZIONI E59
KIT VALVE PLATE+GASKET
E59
C1422
TUBO ELASTOLLAN 6X4 BLU
ELASTOLAN HOSE
C1606XXR
L55 230/50HZ R
MOTOR L55 (230V)
C1607XXR
L55 115/60HZ R
MOTOR L55 (115V)
MOTOR L55 (115V)
MOTEUR L55 (115V)
MOTOR L55 (115V)
C1608XXR
L88 230/50 R
MOTOR L88 (230V)
MOTOR L88 (230V)
MOTEUR L88 (230V)
MOTOR L88 (230V)
C1609XXR
L88 115/60 R
MOTOR L88 (115V)
MOTOR L88 (115V)
MOTEUR L88 (115V)
MOTOR L88 (115V)
C1640
KIT MORSETTIERA T21 ( 230V )
PANTHER
KIT TERMINAL BOX T21 (
230V ) PANTHER
C1723XX
SERBATOIO CARELL. 100/24CE
TANK 100/24 CE
BEÄHELTER
RÉSERVOIR 100/24CE
C1769
KIT COLLARE GRUPPO L55-L88
KIT HOLDING BAND L55-L88
C1770
KIT MORSETTIERA L55 ( 115V )
KIT TERMINAL BOX L55 ( 115V
)
C1771
KIT MORSETTIERA L55 ( 230V )
KIT TERMINAL BOX L55 ( 230V
)
C1772
RELÈ TERMICO L55 ( 230V )
OVERLOAD PROTECTOR L55
( 230V )
RELAIS
RELAIS
CHARIOT
PLAQUE
TUBO
MOTOR L55 (230V)
MOTEUR L55 (230V)
MOTOR L55 (230V)
RELÉ
C1773
RELÈ TERMICO L55 ( 115V )
OVERLOAD PROTECTOR L55
( 115V )
RELAIS
RELAIS
RELÉ
C1774
RELÈ AVVIAMENTO L55 ( 115V )
START RELAY L55 ( 115V )
RELAIS
RELAIS
RELÉ
C1775
RELÈ AVVIAMENTO L55 ( 230V )
START RELAY L55 ( 230V )
RELAIS
RELAIS
RELÉ
C1777
KIT MORSETTIERA L88 ( 115V )
KIT TERMINAL BOX L88 ( 115V
)
C1778
KIT MORSETTIERA L88 ( 230V )
KIT TERMINAL BOX L88 ( 230V
)
C1779
RELÈ TERMICO L88 ( 230V )
OVERLOAD PROTECTOR L88
( 230V )
RELAIS
RELAIS
RELÉ
C1780
RELÈ TERMICO L88 ( 115V )
OVERLOAD PROTECTOR L88
( 115V )
RELAIS
RELAIS
RELÉ
C1781
RELÈ AVVIAMENTO L88 ( 115V )
START RELAY L88 ( 115V )
RELAIS
RELAIS
RELÉ
C1782
RELÈ AVVIAMENTO L88 ( 230V )
START RELAY L88 ( 230V )
RELAIS
RELAIS
RELÉ
C1794
KIT FILTRO ASPIRAZIONE
CORTO
KIT INTAKE FILTER
FILTERSET
KIT FILTRE
KIT FILTRO
C1862
PIEDINO GOMMA
RUBBER SUPPORT
STÜTZFUSS
PIED CAOUTCHOUC
PIE DE GOMA
C1902
O’RING 4625
O’RING
O’RING
JOINT TORIQUE
EMPAQUE
C1906
ANELLO PROTEZIONE
GRUPPO
MOTOR PROTECTION RING
JOINT PROTECTION MOTEUR
ANILLO PROTECTOR
MOTOR
C1925
VITE TS90ØCR M4X60 UNI 7688
ZB
SCREW TS 90°CR M4X60
UNI7688 ZB
SCRAUBE M4X60 UNI 7688 ZB
VIS TSCE 90° M4X60 UUNI
7688 ZB
TORNILLO M4X60 UNI 7688
ZB
VALVOLA SIC.1/4
10BAR+AN.CAT2
VALVE
VENTIL
SOUPAPE
VALVULA
C1970
RIDUTTORE
FILT.TAZ.TRASP.SC.M.
FILTER REGULATOR
REGLER FILTER
RÉDUCTEUR FILTRE
REDUCTOR FILTRO
C2083
CONDENS.71 ÆF T2134A
230/50
CAPACITOR
KONDENSATOR
CONDENSATEUR
CONDENSADOR
Z_RICAMBI
* = RICAMBI CONSIGLIATI
* = RECOMMENDED SPARE
PARTS
* = EMPFOHLENE E-TEILE
* = PIECES DE RECHANGE
CONSEILLEES
* = REPUESTOS
ACONSEJAIOS
C1965
*
Dichiarazione di conformità - Declaration of Conformity
Konformitätserklärung - Déclaration de conformité
Declaración de conformidad - Overensstemmelseserklæring
Samsverserklæring - Överensstämmande intyg
WERTHER INTERNATIONAL S.p.A.
Via F.Brunelleschi,12 42040 CADE’ (Reggio Emilia) Italy
con la presente dichiariamo che il compressore modello - déclare par la presente que le compresseur modèle
hereby we declare that the compressor model - hiermit erklären wir, daß Kompressoren Modell
por la presente declara, que el compresore modelo - Vi erklærer hermed, at Kompressor model
Vi erklærer herved, at Kompressor model - Vi förklarer härmed att kompressor model
P 15TC
P 50/10 AL
P 100/24 AL
Black Panther
P 30TC
P 50/15 AL
P 100/50 AL
Black Panther2
P 50TC AL
P 50/24 AL
P 150/50 AL
Portadent
Cadè, 15/03/2001
Vice president Iori Werter
Scarica